
The last few days I have been struggling to get the Android Emulator to connect to certain domains through a proxy we have at my job. Because of this, I started messing with my OS X DNS configuration and got myself in a DNS mess. I finally figured my way out, so I wanted to share with you how DNS works with the Android Emulator, and hopefully avoid the troubles I ran into.
http://developer.android.com/tools/help/emulator.html#dns
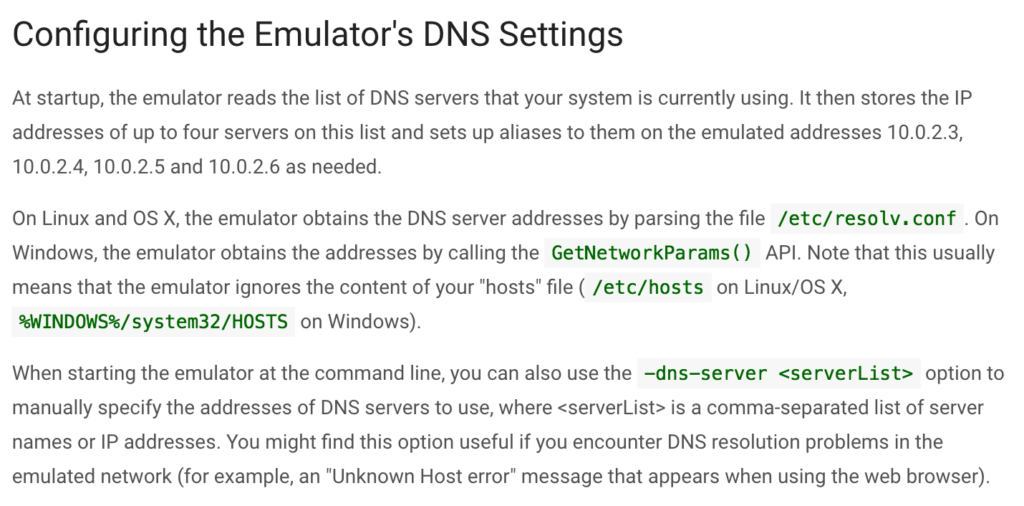
The Android Emulator uses the DNS settings of your OS X machine from/etc/resolv.conf as mentioned above. The file looks something like:
#
# Mac OS X Notice
#
# This file is not used by the host name and address resolution
# or the DNS query routing mechanisms used by most processes on
# this Mac OS X system.
#
# This file is automatically generated.
#
search fios-router.home
nameserver 192.168.1.1
This file is re-generated by OS X as you connect to different networks (different WiFi hotspots or ethernet connections) to properly resolve DNS entries while connected to that network.
The thing I didn’t know is that /etc/resolv.conf is by default a symbolic link to /var/run/resolv.conf. So, if you ever mess with /etc/resolv.conf and want to put back the original, you’ll have to re-create the symbolic link on your system, so that your global overrides are no longer in place. Create the symbolic link using the following command:
sudo ln -s /var/run/resolv.conf /etc/resolv.conf
Anyways, you can override your DNS entries for the Android Emulator via the command line using the “-dns-server” option, or you can edit /etc/resolv.conf and override it globally. Just realize that you need to create a symbolic link to /var/run/resolv.conf in order to “revert” changes if you mess with /etc/resolv.conf.
Happy DNS’ing with the Android Emulator and I hope for your case you don’t ever have to deal with it!