Kotlin Sealed Interfaces with KotlinX Serialization JSON

I heavily use sealed interfaces to model result objects in Kotlin as they allow me to create a type of classes that can be handled using exhaustive when statements, similar to an enum, but also each type can contain its own properties.

I wanted to serialize these sealed interface Kotlin models to/from JSON over HTTP. There are a bunch of options for serializing JSON in Java like Moshi, Gson and Jackson. While all of those libraries are great, I had a requirement of creating a multi-platform library, and went with KotlinX Serialization.

In this post I’ll walk you through an example of how I configured KotlinX Serialization to work for my use case.

Example: Marketing Campaigns API Result

This endpoint returns a strongly typed campaign, and I wanted to represent this in JSON.

public sealed interface CampaignContent {
    public data class PopupModal(
        public val imageUrl: String,
        public val text: String,
        public val subtext: String,
    ) : CampaignContent

    public data class Link(
        public val linkText: String,
        public val url: String,
        public val linkIcon: String? = null,
    ) : CampaignContent
}
{
  "type": "popup_modal",
  "image_url": "https://...",
  "text": "Text",
  "subtext": "Subtext"
}
{
  "type": "link",
  "link_icon": "https://...",
  "url": "https://..."
}

We need to deserialize a JSON response into a strongly typed object that implements the CampaignContent sealed interface.

fun getCampaignContentFromServer() : CampaignContent

KotlinX Serialization has Polymorphism support allows us to do this. You need to register polymorphic definitions in a SerializersModule that you provide to your Json object that is used to encode and decode objects to/from JSON.

val jsonSerializer = Json {
  serializersModule = SerializersModule {
    polymorphic(
      CampaignContent::class,
      CampaignContent.PopupModal::class,
      CampaignContent.PopupModal.serializer(),
    )
    polymorphic(
      CampaignContent::class,
      CampaignContent.Link::class,
      CampaignContent.Link.serializer(),
    )
  }
}
val campaignContent : CampaignContent = jsonSerializer.decodeFromString(
  CampaignContent.serializer(), 
  jsonString,
)

In order to support polymorphism, a type property is used in the JSON string representation {"type": "..."}. By default this "type" field is a fully qualified classname. This allows KotlinX Serialization know what type to deserialize. You have control over what the name of this classDiscriminator field is, as well as other configuration options when configuring your Json {} serializer.

If you don’t want to use the fully qualified class name as the class type, then you can put a @SerializedName("...") annotation to the class and it will use that name instead of the fully qualified class name. This is helpful for me as the backend did not use fully qualified names, and I had set them explicitly. In the example below I added the @SerializedName("popup_modal") data class.

Final Models after adding @Serializable and @SerializedName

public sealed interface CampaignContent {

  @Serializable
  @SerializedName("popup_model")
  public data class PopupModal(
    @SerializedName("image_url")
    public val imageUrl: String,
    @SerializedName("text")
    public val text: String,
    @SerializedName("subtext")
    public val subtext: String,
  ) : CampaignContent

  @Serializable
  @SerializedName("link")
  public data class Link(
      @SerializedName("link_text")
      public val linkText: String,
      @SerializedName("url")
      public val url: String,
      @SerializedName("link_icon")
      public val linkIcon: String? = null,
  ) : CampaignContent
}

Considerations

At first I made my models match the JSON values as I didn’t have to specify @SerializedName since KotlinX Serialization will just match the field name. After a bit of usage, link.link_text just didn’t feel as correct as link.linkText, so I chose to specify a @SerializedName annotation instead. The resulting Java bytecode is the same as the KotlinX Serialization plugin does code generation that writes out the serializer anyways. This does make your data class look not as pretty, but from the general building and usage perspective of these models, the user will not know.

Conclusion

That was a whirlwind intro, but I had to really dig through deep into the documentation to figure it out and am hoping this helps someone do this faster than I did it originally.

[Experiment] Espresso Closed-Box Testing

I wanted to write some Android Espresso tests for a large application, but iterate on the tests as fast as possible.

Typically someone would run :app:connectedDebugAndroidTest to run their instrumentation tests, but under the hood that is just compiling and installing both the app and androidTest apks, and using the instrumentation runner over adb.

When executing Android Instrumentation Tests, you just need an app.apk and an androidTest.apk, and then to invoke the test instrumentation runner via adb.

Because of the configuration, the androidTest APK gets everything that is on the app‘s classpath so it can reference resources, classes and activities in the app.

The Experiment

I wanted to see if I could build an androidTest.apk without having any ties to the original :app. I tried a few methods, but found that creating a new blank application with the exact same package name, and then writing tests under the androidTest folder allowed me to compile quickly.

Problems:

  1. No access to the classpath & resource identifiers
  2. Classpaths can’t clash (must use same versions of dependencies as the original app).

Workarounds:

  1. You could import just a few modules that have resource identifiers or code that you want to reference in your tests. (easier and typesafe, but a little slower)
  2. OR you could just access everything by fully qualified package names, and look up resource identifiers by ID. (no compile time safety, but faster)

I tried workaround #2, because I wanted to have this be the fastest iteration time possible, and I finally got it to work! Here’s my receipt for how I made it happen.

How I Got it Working

1) Install my app (com.example.app) as usual :app:installDebug.

This will be the app I want to test.

2) Create the :cloneapp project

In this :cloneapp project, keep an empty main source folder, but add an androidTest directory.

3) In :cloneapp set the package name to the the exact same package name com.example.app.

android {
    defaultConfig {
        applicationId "com.example.app"
    }
}

4) In :cloneapp update the src/androidTest/AndroidManfest.xml

<manifest xmlns:android="http://schemas.android.com/apk/res/android"
      xmlns:tools="http://schemas.android.com/tools">
    <instrumentation
        android:name="androidx.test.runner.AndroidJUnitRunner"
        android:targetPackage="com.example.app"
        android:targetProcesses="com.example.app" />
</manifest>

5) Add in a test!

package com.example.app.tests

import android.app.Activity
import android.content.Context
import android.os.SystemClock
import android.util.Log
import androidx.test.core.app.ApplicationProvider
import androidx.test.espresso.Espresso
import androidx.test.espresso.ViewInteraction
import androidx.test.espresso.action.ViewActions
import androidx.test.espresso.assertion.ViewAssertions
import androidx.test.espresso.matcher.ViewMatchers
import androidx.compose.ui.test.junit4.createComposeRule
import org.junit.Before
import org.junit.Rule
import org.junit.Test

fun findResourceIntByIdStr(id: String): Int {
    ApplicationProvider.getApplicationContext().resources.getIdentifier(id, "id", applicationContext.packageName)
    Espresso.onView(ViewMatchers.withId(findResourceIntByIdStr(idStr)))
}

fun findViewByIdStr(idStr: String): ViewInteraction {
    Log.d(TAG, "Find View By ID Str $idStr")
    return 
}

class ExampleTest {

    /** Use this to interact with Compose surfaces */
    @get:Rule
    val composeTestRule = createComposeRule()

    @Test
    fun testLoginFlow() {
        
    }
}

6) Install the test clone APK

Run :cloneapp:installDebugAndroidTest to install the test apk.

7) Run the tests using adb!

adb shell am instrument -w -r com.example.app.test/androidx.test.runner.AndroidJUnitRunner

Note: You can be more explicit with command line instrumentation arguments about what test or test class you want to execute.

8) Test Development Iteration Loop

I ended up clearing the app data between runs with adb shell pm clear com.example.app as well so I had consistent behavior and didn’t have to install the package.

Conclusion

As mentioned, this was an experiment. It made the iteration time blazing fast, but lacked compile time safety. Anyways, it’s possible, and hopefully you learned something. If you end up using this technique, I’m curious to hear more. Feel free to message me on Kotlin Lang Slack or Mastodon.

Using the `kotlin-dsl` Gradle Plugin forces Kotlin 1.4 Compatibility 😱

I previously wrote an article “Sharing Gradle Configuration in Multi-Module Android Projects” about re-using Gradle configuration using the “apply” feature to reduce boilerplate and provide consistency. It’s super helpful and handy, but there is now a better way to do the same kind of thing using Gradle Convention Plugins.

Gradle Convention Plugins

There is a great post by Tony Robalik that goes into the benefits of Gradle Convention Plugins. I say it is “better” because it can be pre-compiled, written in Kotlin and tested in Kotlin. These convention plugins are most easily added in buildSrc, so I figured I’d start there when adding it to my existing project.

My journey writing a Gradle Convention Plugin and how I ran into Kotlin 1.4

So, in a large Android project I added the “kotlin-dsl” plugin to the buildSrc module and things blew up. I’m using the latest version of Gradle 7.4.2, yet it is telling me:

Language version 1.4 is deprecated and its support will be removed in a future version of Kotlin

I had specified Kotlin 1.6.10 everywhere! What was I doing wrong?

Nothing. It’s intentional. Gradle even calls out why on their site:

Gradle plugins written in Kotlin target Kotlin 1.4 for compatibility with Gradle and Kotlin DSL build scripts, even though the embedded Kotlin runtime is Kotlin 1.5.

https://docs.gradle.org/current/userguide/compatibility.html#kotlin

Even though it is intentional, it wasn’t immediately clear to me, and to others, but I understand the thinking behind it now, and in this post show you how you can get around it if you need to.

Martin Bonnin has a great post talking about how you could get around this by doing some crazy things like creating shadow jars, but his answer of “Should I use this in production?” was “it depends”, and where possible, I try to not use complex workarounds (even though this post is a less complex workaround 😂).

Gradle 7.4.2 still targets Kotlin 1.4 with the kotlin-dsl plugin, even though 1.5.31 is embedded now in Gradle 7.4.2. Gradle plugin compatibility is very important when distributing plugins publicly, but if you are just going to use them in your team or organization, you may not want to support old version of Kotlin going back to 1.4.

In order to use the version of Kotlin available in the version of Gradle you have, you need to specify the version yourself to override the default.

import org.jetbrains.kotlin.gradle.tasks.KotlinCompile

plugins {
    `kotlin-dsl`
}

afterEvaluate {
    tasks.withType<KotlinCompile>().configureEach {
        kotlinOptions {
            apiVersion = "1.5"
            languageVersion = "1.5"
        }
    }
}

This will allow you to use Kotlin 1.5 syntax now when using the “kotlin-dsl” plugin!

One thing that is weird about this is the need for afterEvaulate. I’m not 100% sure why it was needed, but it’s how they specify it in Gradle source code, and it doesn’t work without adding afterEvaluate.

But… what about Kotlin 1.6?

If you really want to use Kotlin 1.6 though, fear not! Kotlin 1.6.10 is going to be available with Gradle 7.5 when it comes out. When it does, you should be able to use this configuration to use 1.6 compatibility:

import org.jetbrains.kotlin.gradle.tasks.KotlinCompile

plugins {
    `kotlin-dsl`
}

afterEvaluate {
    tasks.withType<KotlinCompile>().configureEach {
        kotlinOptions {
            apiVersion = "1.6"
            languageVersion = "1.6"
        }
    }
}

Kotlin/Gradle Version Table when using kotlin-dsl

Gradle VersionEmbedded Kotlin VersionDefault Api Version
7.5 (Unreleased as of April 14, 2022)1.6.101.4
7.3+1.5.311.4
7.0+1.4.301.4

What do you recommend?

If you are only going to use this plugin internally, and everyone is using the same version of Kotlin everywhere, this seems pretty safe. If you are looking to open source something for public use, you may need to call out a minimum Gradle version required use your Plugin.

Should I put my Gradle Convention Plugin in buildSrc?

This is the first place you should try it out. You will have the same issue with any code you put in buildSrc though, where if any code changes, all code and tests in buildSrc have to be re-run which increases build times.

If you plan to use this a lot going forward, use an includeBuild to add in your Convention Plugins going forward so that you only re-compile when that code changes, and so you could publish a binary to avoid any compilation at all.

Reviewers

Thanks Martin Bonnin and Tony Robalik for reviewing the article. Also special thanks to Martin for helping me dig into the Gradle source to figure this out!

Kotlin Multiplatform: Building a “Fat” iOS Framework for iosArm64 and iosX64

If you are building a Kotlin Multiplatform library which will be consumed by an existing iOS application, using a framework is a great way to do this. Frameworks are typically compiled for a specific target architecture which can then be run on an iPhone, iPad or iOS Simulator on your Intel Macbook.

If you are going use your Kotlin Multiplatform library as a framework in an existing app, you will want to provide a “Fat” framework which will contain both Arm64 and X64 architectures. This article contains the configuration I used to build the “Fat” framework. This is not a full build.gradle.kts file, but just the additional parts needed for a Kotlin Multiplatform project to build a “Fat” framework.

⚠️Use an XCFramework instead ⚠️

This “Fat” framework method no longer works with XCode 12+. Use an XCFramework instead.


I ended up with this Error Message in XCode 12.4: “Building for iOS Simulator, but the linked and embedded framework ‘my_library.framework’ was built for iOS + iOS Simulator.”

This Stack Overflow post shows you how to create an XCFramework from your two frameworks, and I’ll follow up with a blog post on how to do it with an XCFramework a bit later. This solutions ends up combining the two frameworks into a single XCFramework.

xcrun xcodebuild -create-xcframework \
    -framework /path/to/ios.framework \
    -framework /path/to/sim.framework \
    -output combined.xcframework

Custom Gradle Task to Build “Fat” framework

import org.jetbrains.kotlin.gradle.tasks.FatFrameworkTask

kotlin {
    // Set a name for your framework in a single place and reuse the variable
    val libName = "my_library"

    // Configure your Kotlin Multiplatform lib to generate iOS binaries
    // NOTE: This will only work on Macs
    ios {
        binaries.framework(libName)
    }

    // You can choose your output directory
    val frameworkDestinationDir = buildDir.resolve("cocoapods/framework")

    tasks {

        // Custom task to build the DEBUG framework
        // ./gradlew universalFrameworkDebug
        register("universalFrameworkDebug", FatFrameworkTask::class) {
            baseName = libName
            from(
                iosArm64().binaries.getFramework(libName, "Debug"),
                iosX64().binaries.getFramework(libName, "Debug")
            )
            destinationDir = frameworkDestinationDir
            group = libName
            description = "Create the debug framework for iOS"
            dependsOn("linkDebugFrameworkIosArm64")
            dependsOn("linkDebugFrameworkIosX64")
        }

        // Custom task to build the RELEASE framework
        // ./gradlew universalFrameworkRelease
        register("universalFrameworkRelease", FatFrameworkTask::class) {
            baseName = libName
            from(
                iosArm64().binaries.getFramework(libName, "Release"),
                iosX64().binaries.getFramework(libName, "Release")
            )
            destinationDir = frameworkDestinationDir
            group = libName
            description = "Create the release framework for iOS"
            dependsOn("linkReleaseFrameworkIosArm64")
            dependsOn("linkReleaseFrameworkIosX64")
        }
    }
}

Here are two custom gradle tasks that build a “Fat” framework for debug or release. In this I have it outputting to the build/cocoapods/framework directory, but you can configure that as you like.

Gradle Task for “Fat” iOS framework

  • Build a “Fat” debug version of the framework
    • ./gradlew universalFrameworkDebug
  • Build a “Fat” release version of the framework
    • ./gradlew universalFrameworkRelease

Importing the iOS Framework into XCode

I previously wrote a blog post about how to do this which has a companion video along with it. 👇

Thanks and Related Resources

I didn’t figure this all out myself. I just got it to work for me and extracted out the bare minimum you need to make this work. Thanks to Swapnil Patil for letting me know that “Fat” frameworks are possible. Thanks so much to Marco Gomiero for his post Introducing Kotlin Multiplatform in an existing project.

Run Custom Gradle Task After “build”

After running ./gradlew build on my Kotlin Multiplatform project, I wanted to copy the JavaScript build artifacts (.js & .html) to publish a demo where someone could test my library via a web browser. A custom Gradle task is is a great way to write your own behavior to accomplish this using the Gradle build system.

My Custom Gradle Task

I found the Gradle documentation for how to copy files, and was able to write this custom task "myTaskName" to do it. You can then just run ./gradlew myTaskName and it’ll run the task independently. The problem was that I didn’t know how to get it to always run after ./gradlew build ran.

/** Copies files from "build/distributions" to "demo" directory */
tasks.register<Copy>("myTaskName") {
    println("Copying Build Artifacts!!!")
    from(layout.buildDirectory.dir("distributions"))
    include("**/*.*")
    into(layout.buildDirectory.dir("../demo"))
}

TL;DR – Use finalizedBy()

  • finalizedBy – Runs my task AFTER “build”. ✅
    • tasks.named("build") { finalizedBy("myTaskName") }
  • dependsOn – Runs “build” BEFORE my task, if my task is executed explicitly.
    • tasks.named("myTaskName") { dependsOn("build") }

To give you more details and to go into my process of how I figured it out, here are a few options I tried while figuring out how to run this custom task after every execution of the “build” Gradle task.

1. finalizedBy ✅

You can use finalizedBy() to say what task you should run after a named task. I think this reads nicely because it calls out the task dependency separately from it’s declaration. This will appropriately run after the build task executes as I needed.

tasks.named("build") { finalizedBy("myTaskName") }

2. shouldRunAfter 🤔

Another possible way to do this is with shouldRunAfter() which can just be added inside the block where you register your custom task. This will run after the build task executes. HOWEVER: I had to call .get() after registering my task to get it to work in order to have this actually run, which just feels wrong… Someone feel free to explain why, but I’m guessing this is some sort of lazy initialization happening if I don’t call “.get()”. Because of this, I don’t like this solution personally.

tasks.register<Copy>("myTaskName") {
    shouldRunAfter("build") // Tells Gradle to execute after "build" task
    // My Custom Task Code
}.get()

3. dependsOn() 🙃

You would think dependsOn() may work, but it’s the opposite behavior than what I wanted. It’s saying that “myTaskName” needs “build” to have run before it executes. It’s the opposite task dependency relationship from finalizedBy(). This wasn’t the behavior I wanted for this use case because I wanted it to copy the artifacts after every time a ./gradlew build was run, but could be useful depending on your use case.

tasks.named("myTaskName") { dependsOn("build") }

Wrap Up

None of this is rocket science, but if you try to Google for how to do it, it may take you a while to figure out how to do it. Using Option 1, finalizedBy() was the solution that worked for my use case! I hope this saved you an hour or more!

Intro to Kotlin Multiplatform JavaScript

One of the compilation targets of Kotlin Multiplatform is JavaScript. It’s pretty awesome that I can take the same Kotlin code and tools I write Android with, and write code that runs in a browser (or in Node.js).

Here is the video I’ve created to walk you through the creation of a Kotlin Multiplatform Project using the templates in Intellij IDEA, and what you can do to get your Kotlin running as JavaScript in the Browser!

Here are the code snippets mentioned in the video:

./gradlew build
 js(LEGACY) {
     browser {
         webpackTask {
             output.libraryTarget = "this" // Will add to window
         }
         binaries.executable()
     }
 }
 fun printHi() {
     println("Hello World Sam!")
 }
 fun main(args: Array) {
     printHi()
 }
 helloworldsam.printHi()

The Best Way to Collect a Flow in Kotlin – launchIn

At some point you’ll need to collect (receive items) from a Flow (reactive stream) within a Kotlin Coroutine.  More than likely you will use a launch on a CoroutineScope, and then collect like this:

scope.launch {
  flow
    .onEach { println(it) }
    .collect()
}

This works great, but there is a better way for most use cases. It’s using a function called launchIn. What’s launchIn? It’s just shorthand to do what you did above. This is the equivalent logic as above, but using launchIn.

flow
  .onEach { println(it) }
  .launchIn(scope)

This is less code to write, but more importantly it’ll get you out of some hard to debug situations when collecting from Flows. The non obvious thing to understand is that collect() will block the coroutine until the flow has finished emitting. This behavior is sometimes desired, but for me it’s not in most cases.

In the example below, you’d think that both Flows are being collected at the same time, but flow1 is collected until the Flow finishes emitting, and then flow2 is collected until it is finished emitting.

scope.launch {
  flow1
    .onEach { println(it) }
    .collect()
  
  // Will not run until flow1 finishes emitting
  flow2
    .onEach { println(it) }
    .collect()
}

To collect both in parallel, you’d need to write this:

scope.launch {
  flow1
    .collect { println(it) }
}
scope.launch {
  flow2
    .collect { println(it) }
}

This is where launchIn comes to the rescue to make this reach much easier in my opinion. Here is the equivalent using launchIn:

myFlow1
  .onEach { println(it) }
  .launchIn(coroutineScope)
myFlow2
  .onEach { println(it) }
  .launchIn(coroutineScope)

I like launchIn because it’s less code to write, I don’t have to have indentation, and I just found it easier to understand.

In no way does this mean that the normal launch() and collect() aren’t great things to use, but for most use cases, I’d suggest considering using launchIn().

My MutableStateFlow Didn’t Emit!

I am in love with MutableStateFlow which is part of the Kotlin Coroutines Library. It makes managing state, and exposing it as a reactive Flow so easy.

You just create a MutableStateFlow(initialValue), and then you can later on just set myMutableStateFlow.value = newValue, and if it has changed, it’ll emit a new event as a reactive event on the Flow!

This is amazing, but in order to make this work the way you want it to, you HAVE to use Immutable Data Structures.

Why? Glad you asked, here we go.

How MutableStateFlow’s “value” Property Works

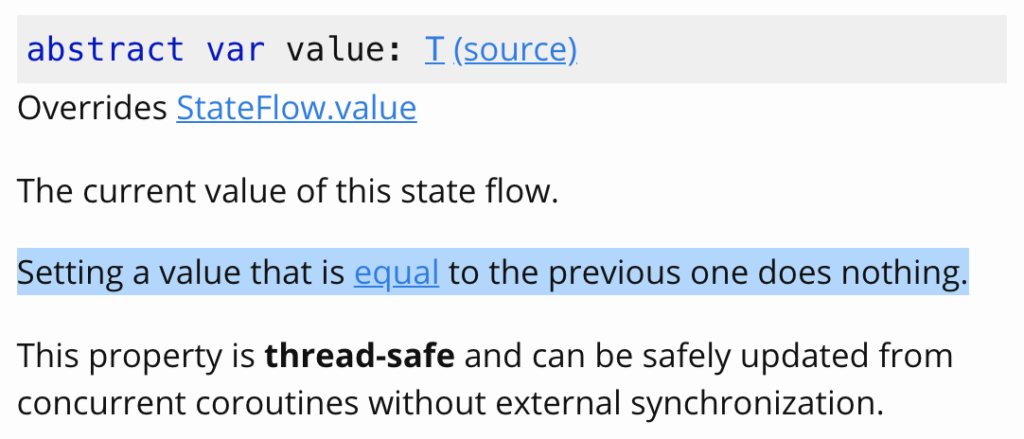
Just set mutableStateFlow.value=newValue and the value will be emitted! This Flow is a great way to keep track of state where you only want to emit when there is a change.

You can set your mutableStateFlow.value many times, but unless !oldValue.equals(newValue), then a new value won’t be emitted. That way subscribers don’t need to use distinctUntilChanged() to filter out duplicates.

Scenario where “My MutableStateFlow Didn’t Emit!

I’ve simplified a scenario I ran into to share how MutableStateFlow may not work the way you think you should. I banged my head on the wall trying to figure out what was happening, and hopefully this simplified example will save you a headache.

/** Class with Mutable Data */
data class SomePojo(var name: String = "placeholder")
val somePojo = SomePojo()
val mutableStateFlow = MutableStateFlow(somePojo)
println("INITIAL: ${mutableStateFlow.value}")

// Update the value
somePojo.name = "Something Different"

// Print MutableStateFlow current value, but realize the value has changed because the data in that object has been mutated
println("CURRENT: ${mutableStateFlow.value}")

// Try to assign the new value to the MutableStateFlow, but they are already equal!  This means no emissions will occur.
mutableStateFlow.value = somePojo

// The result is the same, and no value was emitted.
println("UPDATED: ${mutableStateFlow.value}")

The output will be:

INITIAL: SomePojo(name=placeholder)
CURRENT: SomePojo(name=Something Different)
UPDATED: SomePojo(name=Something Different)

How I Went Wrong

  • My state model was “SomePojo” which had a mutable var “name” on it.
  • The “somePojo” variable was initially set as mutableStateFlow.value
  • I set myPojo.name=”Something Different” to change the name.
  • I wanted to emit the new state, so set mutableStateFlow.value=somePojo.
  • My MutableStateFlow Didn’t Emit!
  • 🤔
  • The current value of mutableStateFlow.value was already set to myPojo, and I had modified the property “name” on it.
  • As seen above, MutableStateFlow.value will emit unless the oldValue.equals(newValue). Because I had modified the mutable property name, when the equals() comparison happened.
  • The value was already the same, and therefore no change occurred, and there was no emission.
  • Whoa… that’s confusing. Yes, but it makes sense now.

Conclusion

There are things you can do to avoid running into this problem. Use immutable data structures (classes with all val properties) with MutableStateFlow to avoid unexpected behavior.

If you mutate (change) the value of an object that’s currently the state of a mutable state flow, it won’t emit a new value when re-assigned because it only emits when the value has changed. In this case the mutable value has changed… but so has the underlying state, so when compared it looks as if nothing has changed.

Try for yourself with this Unit Test Gist: https://gist.github.com/handstandsam/1007031cea66e9862bed44840fafb92e

Wrapping Mockito Mocks for Reusability

My general advice about Mockito is to try and avoid it when you can. Ryan Harter has an awesome companion post called Replacing Mocks which shows some potential pitfalls of using Mockito Mocks, as well as how to avoid using it by restructuring code. However, sometimes Mockito can be the right tool to use for mocking dependencies in a unit test when a code refactor isn’t possible due to constraints. I use Mockito-Kotlin which helps leverage Mockito in Kotlin code.

In this post I show how you can wrap a Mockito mock to avoid using verbose syntax (“whenever”, “verify”, etc.) all over the place. I call this wrapper around the Mockito mock a “Fake”.

// Fake Wrapper around Mockito Mock (See implementation below)
val fakeOven = FakeOven()

// Access and Use Mockito Mock
val oven : Oven = fakeOven.mock

// Clean API to Setup Mocks (using Wrapper)
fakeOven.givenOvenResult(OvenResult.Success)

// Clean API to Verify Mocks (using Wrapper)
fakeOven.thenOvenSetTo(temperatureFahrenheit = 350, timeMinutes = 30)

Benefits:

  • Single Responsibility – Mocking logic out of your test class.
  • Cleaner Tests – Avoid using “when”, “whenever” and “verify” all over the place.
  • Less Duplication – Can be reused across tests and for future tests you may write.

Example: Baking with an Oven

In this example we bake a Cake which requires an Oven. We need to mock the Oven.

NOTE: We could try various approaches for this example, but for the purpose of explaining this strategy, we’ll use the “Fake” Mockito wrapper.

/** Class that uses [Oven] */
class Dessert(val oven: Oven) {
    fun bakeCake(): OvenResult {
        oven.setTemperatureFahrenheit(350)
        oven.setTimeMinutes(30)
        return oven.start()
    }
}
/** Class we will use Mockito to Mock */
class Oven {
    fun setTemperatureFahrenheit(tempF: Int) {
        // ...
    }

    fun setTimeMinutes(minutes: Int) {
        // ...
    }

    fun start(): OvenResult {
        // ...
    }
}
/** Whether the Oven command was successful, or something happened */
sealed class OvenResult {
    object Success : OvenResult()
    data class Failure(val e: Exception) : OvenResult()
}

Original Test 🤷🏽‍♂️

import com.nhaarman.mockitokotlin2.mock
import com.nhaarman.mockitokotlin2.verify
import com.nhaarman.mockitokotlin2.whenever
import org.junit.Test

/** Test Dessert Baking */
class DessertTest {

    @Test
    fun bakeCakeSuccess() {
        val oven: Oven = mock()
        val dessert = Dessert(oven)

        // Setup
        whenever(oven.start()).thenReturn(OvenResult.Success)

        // Execute Code
        dessert.bakeCake()

        // Verification
        verify(oven).setTemperatureFahrenheit(350)
        verify(oven).setTimeMinutes(30)
    }
}

FakeOven – Mockito Mock Wrapper 🤔

/** Wraps the Mockito mock for reuse */
class FakeOven {

    val mock: Oven = mock()

    fun givenOvenResult(ovenResult: OvenResult) {
        // Setup
        whenever(mock.start()).thenReturn(ovenResult)
    }

    fun thenOvenSetTo(temperatureFahrenheit: Int, timeMinutes: Int) {
        // Verification
        verify(mock).setTemperatureFahrenheit(temperatureFahrenheit)
        verify(mock).setTimeMinutes(timeMinutes)
    }
}

Updated Test – Using Fake Mockito Wrapper ✅

class DessertTestWithFake {

    @Test
    fun bakeCakeSuccess() {
        val fakeOven = FakeOven()
        val dessert = Dessert(fakeOven.mock)

        fakeOven.givenOvenResult(OvenResult.Success)
        dessert.bakeCake()
        fakeOven.thenOvenSetTo(
            temperatureFahrenheit = 350,
            timeMinutes = 30
        )
    }
}

We use “fakeOven.mock” to fulfill the “Oven” dependency, and control the behavior using the wrapper we have created.

val fakeOven = FakeOven()
val oven : Oven = fakeOven.mock

Conclusion

Isolate usage of Mockito, and avoid scattering it all over your tests. By using this pattern of wrapping a Mockito Mock in a fake, your tests that require Mockito are a little bit better.