Hitting Publish is the Hardest Part of Blogging

I had been sitting on the draft of my post “When You Should Use Null in Kotlin” since November (for 3 months) because after I had a colleague review it, I wasn’t sure if my views were valid.  My colleague told me about “null, the billion-dollar mistake” and asked if I was just trying to “stir the pot” with a possibly unpopular opinion. That made me question if my views were actually valid, so I didn’t hit “Publish”.

Draft was Last Modified 3 Months Ago

Validation

Earlier this month, Roman Elizarov (@relizarov), from the Kotlin libraries team posted an article which validated my thoughts I shared in my draft post, null is something to use, and not completely avoid:

I was excited to see a like-minded post from one of my software idols who designs the Kotlin language:

Chatting with Roman at Google I/O 2018

Thanks to this validation, I finally got up the courage to finish my post which took many hours and reviews, but I finally published my article. 😄 Thanks Roman (@relizarov)!

Non-null Opinions

I encourage you to share your opinion on topics where you have spent enough time digging into a topic to develop one.  So much of computer science is subjective, and there will always be varying opinions.  As long as you have identified reasons why you feel a certain way, those are valid.

It’s okay to share your thoughts.  Your opinion is non-null 😂.  Be humble enough to listen to others and allow yourself to use objective reasoning to help shape your understanding.

Leverage The Community

The Android community has varying opinions on many things, but that isn’t a bad thing.  There is no single way to do something, and whether or not something is the right solution depends on the use case, and the skills of the team.

Many members of the community are there to help.  I encourage you to reach out and ask for feedback from more than one person as it will help you get well rounded feedback.  Before I published the post I got feedback from @molsjeroen, @ataulm, @ZakTaccardi, @gpeal8 and @jarvisapps.  Each person had slightly different insights, and it helped me create a higher quality post.

A Checklist for Hitting Publish

  1. Write your content
  2. Add applicable content/images/code
  3. Review your content as if you were a reader
  4. Ask for reviews from 2+ people
  5. Address feedback
  6. Set a time limit (3? days)

I put together this checklist to help guide me in the future, and hope it will allow me to publish more posts!  I have at least 5 more drafts in my head that I need to get to next.  By publishing these articles, I’m able to get to the next one, and hopefully help someone publish theirs.

Why We Need “fat” AARs for Android Libraries

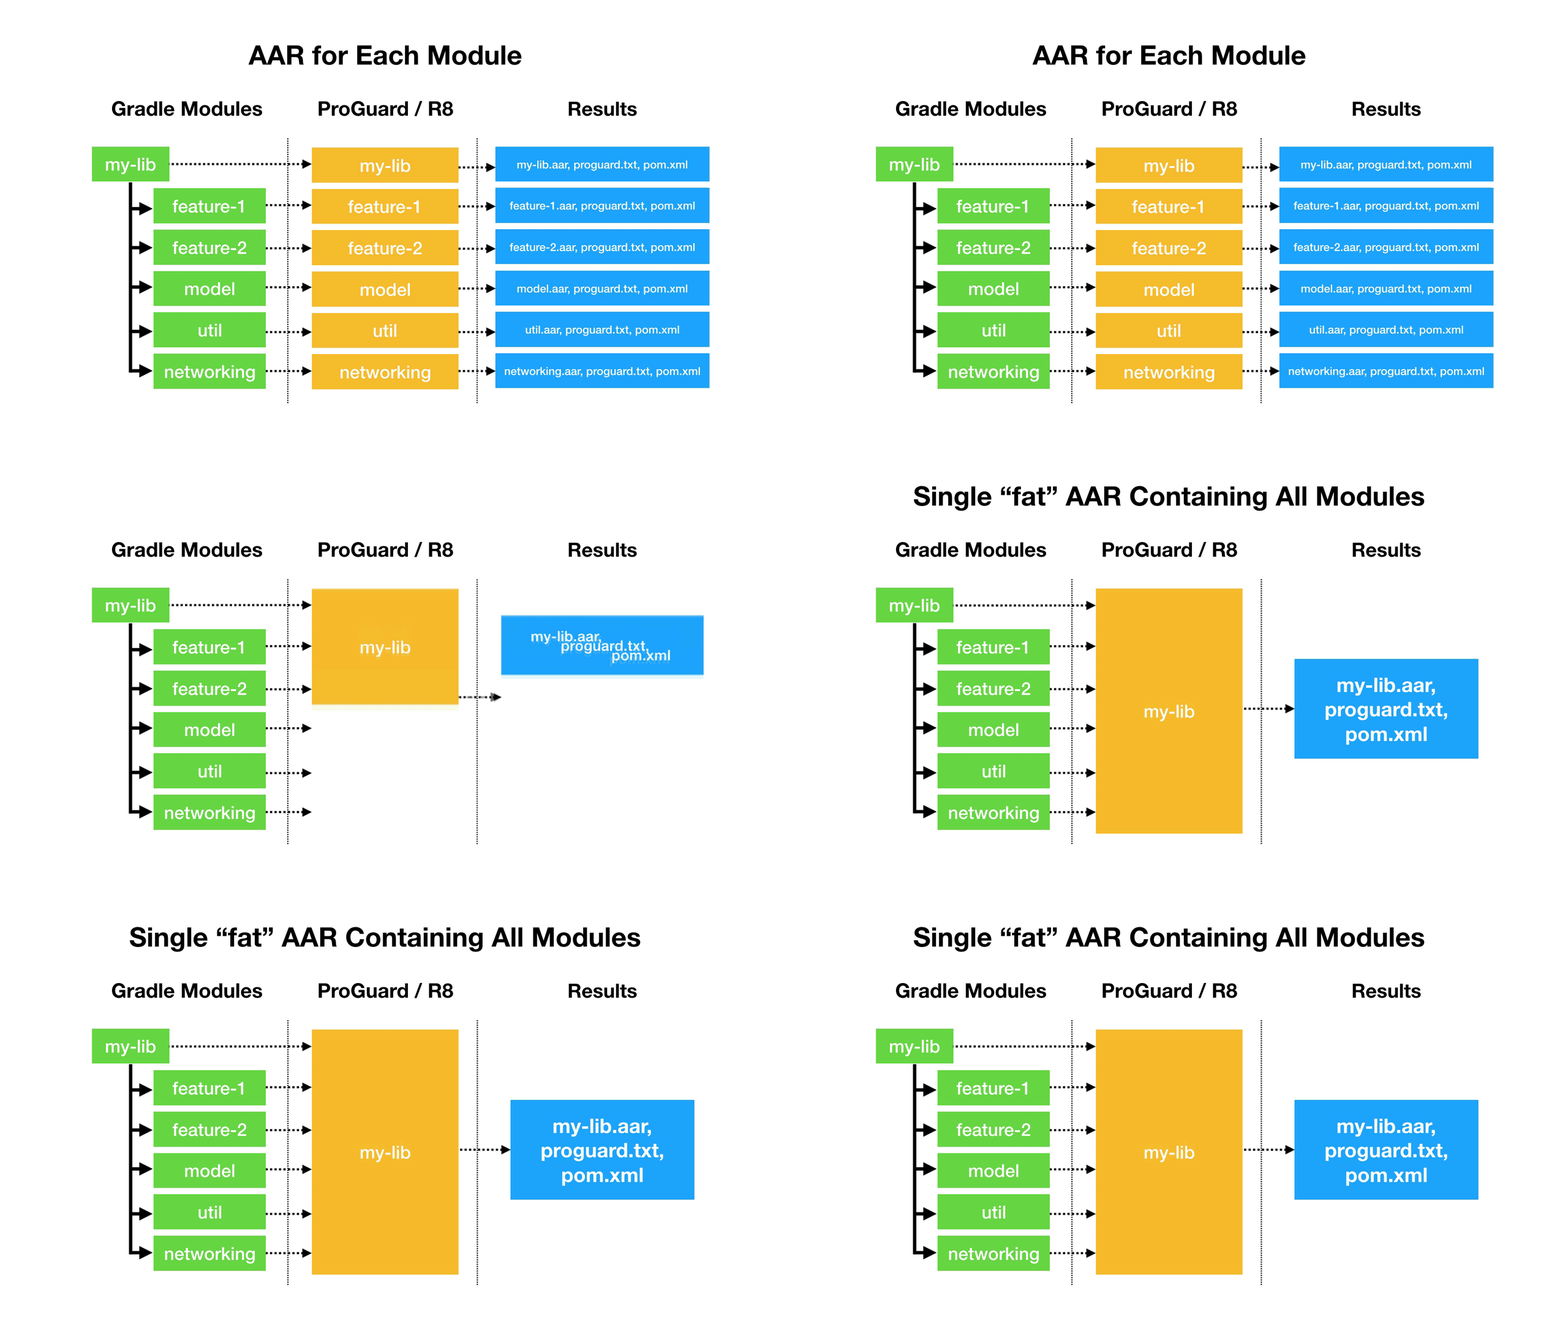
I want the ability to create a single (“fat”) AAR artifact from multiple Android Libraries (all from source).  Non-source, transitive dependencies will still be pulled in via a pom.xml file.

Requirements:

  1. I want to write and SDK that would be used by 3rd parties and possibly internal teams.  I want to write modular code on my side, with clean separation of concerns, yet only provide a single AAR artifact to users of my library.  Users of my library don’t need to know how I architected the internals, and in some cases I don’t want them to know.  I want to obfuscate my internal implementations to avoid accidental usage as well as for some security.
  2. I want to shrink and optimize my code with ProGuard (which is being replaced by R8) on my entire library, and generate only a single AAR file.  With current tooling, each module is only aware of its own code and resources when ProGuard is run.  This means that I can’t optimize or obfuscate my entire library/SDK in its entirety.  Because I must run ProGuard on each module individually at the current time, you end up with NoClassDefFoundErrors if you try to be aggressive with obfuscation.

The Use Case

For this post, think of an SDK you would get from an external vendor, or another team that contains their shrink-wrapped code that you need to plop into your app.  For an app like Twitter, that could mean:

  • Login page library
  • Video streaming player library
  • Home feed library
  • Emoji support library
  • etc.

Note: With the Twitter example I just mean to show that you can bundle discrete components of an app with clear boundaries between them.

When you get into a big app, you have to separate out components, and using Android Libraries to do this is a great decision.  That being said, I would never want “fat” AARs to be the only way to do things.  I just think it would solve some use cases when you are creating and SDK to be used by 3rd parties that don’t need to know how the internals of your code work.

Technical Reasons: Why Creating a “FAT” AAR Doesn’t Work

Apps/APKs can combine as many AARs into a single APK artifact.  That’s because there is a Manifest merge process that defines rules on how the AndroidManifest.xml, resources and assets are merged for the resulting APK file.  At the time the APK is created, ProGuard can be applied to optimize all byte code, remove unused classes, and perform code obfuscation.

Didn’t Someone Create a Library to Do This?

Kinda… A long time ago.  There was a partial workaround for manifest merging for Android Libraries using Android Gradle Plugin 2.x called “FAT” AAR, but it was limited, unofficial, and no longer works with Gradle 3.x.  There seems to be no plans to make it work with newer versions of Gradle.  It esentially tried to do its own hacky version of Manifest merging.

Argument Against: You only need to specify a single dependency in your build.gradle to import all of the transitive libraries. Why are you complaining?

This is true for the use case where you publish your artifacts correctly to a public Maven repository.  Your user would only need to care about adding a single Gradle dependency, and the others would be pulled down transitively.  All they would need to add is “com.example:my-lib:1.0.0” to their Gradle dependencies. This works great in a lot of cases, like the Android Support Library, where the dependencies are all published publicly, and users can cherry-pick the pieces they want.

In the use case I’m requesting this for, existing methods aren’t great for 2 reasons.

  1. I want to control what my shrink-wrapped artifacts look like, while still maintaining modularized code internally.  It’s easier to hand over a single AAR file when you need to distribute a library via a non-public Maven repository. Yes, I could ask users to create a file-based maven repository in the project, but that is ugly.
  2. I want to shrink and optimize all of my library before delivering it to users.  It is only possible to run ProGuard on each module individually at the current time, which means that code optimizations and obfuscation breaks when it is used aggressively on each module independently.

Finally

I’ve created this post to explain some of the current limits of building Android Libraries with the Android Gradle Plugin that I’ve run into, and to make a plea to the Android Tooling team to accept the issue for newer versions of Android Gradle Plugin.  ⬇Xavier Ducrohet, the Android SDK Tech Lead said this is being considered for Android Gradle Plugin 3.3, but isn’t on the roadmap yet.  Since 3.2 is almost out the door, I figured now is a good time to make a push for this issue.

If you have this same issue or use case, please ⭐ the issue, but also comment about how this uniquely effects your development.

Kotlin + buildSrc for Better Gradle Dependency Management

Multi-module Android projects are now the recommended way to take advantages of performance improvements with Android Gradle Plugin 3+.  However, as we add more modules to our project, we quickly run into the issue of dependency management.

Different ways of managing Gradle dependencies:
  1. Manual Management
  2. Google’s Recommendation using “ext”
  3. Kotlin + buildSrc

1) Manual Management 👎

This is the way most of us have been managing dependencies, but it requires a lot of manual changes whenever you upgrade a library to ensure that versions are updated correctly.

module_a/build.gradle

implementation "com.android.support:support-annotations:27.0.2"
implementation "com.android.support:appcompat-v7:27.0.2"
implementation "com.squareup.retrofit2:retrofit:2.3.0"
implementation "com.squareup.retrofit2:adapter-rxjava2:2.3.0"
implementation "io.reactivex.rxjava2:rxjava:2.1.9"

module_b/build.gradle

implementation "com.android.support:support-annotations:27.0.2"
implementation "com.android.support:appcompat-v7:27.0.2"
implementation "com.squareup.retrofit2:retrofit:2.3.0"
implementation "com.squareup.retrofit2:adapter-rxjava2:2.3.0"
implementation "io.reactivex.rxjava2:rxjava:2.1.9"

This is a lot of duplicated configuration that is hard to manage upgrades with, especially when you have a lot of modules.

2) Google’s Recommendation: Using Gradle Extra Properties 🙂

This is Google’s recommended way of doing this as seen in the Android documentation.  It is also used in lots of Android projects, like ButterKnife and Picasso.

This method is great for upgrading libraries like the support library.  Every support library dependency has the same version number, so only having to change this in one place is 💯.  The same things goes for Retrofit, and many other libraries.

Root-level build.gradle

ext {
  versions = [
    support_lib: "27.0.2",
    retrofit: "2.3.0",
    rxjava: "2.1.9"
  ]
  libs = [
    support_annotations: "com.android.support:support-annotations:${versions.support_lib}",
    support_appcompat_v7: "com.android.support:appcompat-v7:${versions.support_lib}",
    retrofit :"com.squareup.retrofit2:retrofit:${versions.retrofit}",
    retrofit_rxjava_adapter: "com.squareup.retrofit2:adapter-rxjava2:${versions.retrofit}",
    rxjava: "io.reactivex.rxjava2:rxjava:${versions.rxjava}"
  ]
}

module_a/build.gradle

implementation libs.support_annotations
implementation libs.support_appcompat_v7
implementation libs.retrofit
implementation libs.retrofit_rxjava_adapter
implementation libs.rxjava

module_b/build.gradle

implementation libs.support_annotations
implementation libs.support_appcompat_v7
implementation libs.retrofit
implementation libs.retrofit_rxjava_adapter
implementation libs.rxjava

This is a huge step ahead from manual management, but IDE support is lacking.  Check out this screencast of migrating to use Gradle Extra Properties (“ext”), and this Github pull request of the results.

While you can be content with using “ext” properties, I think you will be excited to use Kotlin in a buildSrc directory.

3) Kotlin + buildSrc == Android Studio Autocomplete 😎 🎉
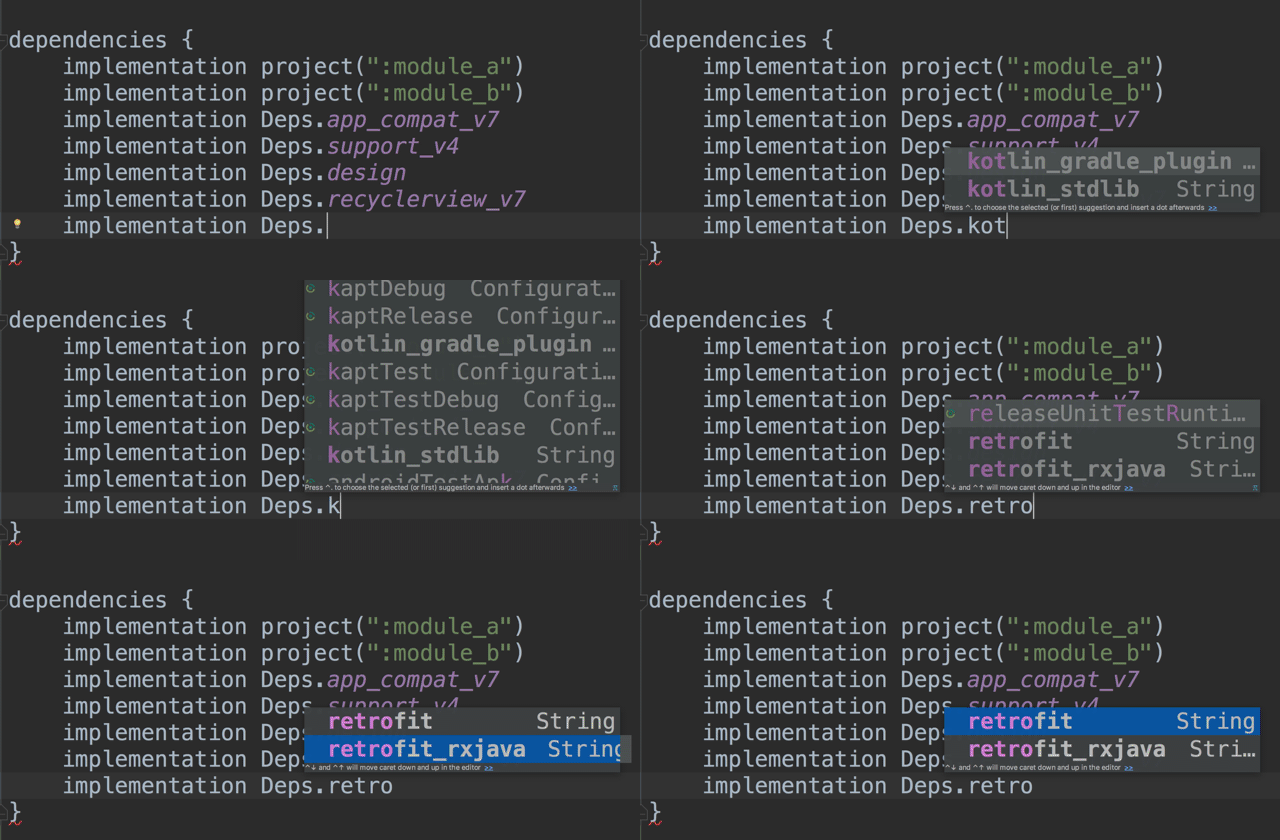
You can create a buildSrc module with Kotlin code to manage dependencies and get IDE completion support.

From the Gradle Documentation:

When you run Gradle, it checks for the existence of a directory called buildSrc. Gradle then automatically compiles and tests this code and puts it in the classpath of your build script. You don’t need to provide any further instruction.

You just need 2 files in your buildSrc module:

  1. build.gradle.kts
  2. Kotlin Code (In this case,Dependencies.kt)

buildSrc/build.gradle.kts

plugins {
    `kotlin-dsl`
}

buildSrc/src/main/java/Dependencies.kt

object Versions {
    val support_lib = "27.0.2"
    val retrofit = "2.3.0"
    val rxjava = "2.1.9"
}

object Libs {
 val support_annotations = "com.android.support:support-annotations:${Versions.support_lib}"
 val support_appcompat_v7 = "com.android.support:appcompat-v7:${Versions.support_lib}"
 val retrofit = "com.squareup.retrofit2:retrofit:${Versions.retrofit}"
 val retrofit_rxjava_adapter = "com.squareup.retrofit2:adapter-rxjava2:${Versions.retrofit}"
 val rxjava = "io.reactivex.rxjava2:rxjava:${Versions.rxjava}"
}

After we have done a Gradle Sync, following making the changes above, we can now access any of the values in Android Studio.

The result looks very similar to what “ext” looked like, but we have autocomplete and click support (to take you to the definition).

module_a/build.gradle

implementation Libs.support_annotations
implementation Libs.support_appcompat_v7
implementation Libs.retrofit
implementation Libs.retrofit_rxjava_adapter
implementation Libs.rxjava

module_b/build.gradle

implementation Libs.support_annotations
implementation Libs.support_appcompat_v7
implementation Libs.retrofit
implementation Libs.retrofit_rxjava_adapter
implementation Libs.rxjava

Check out this screencast and this Github pull request showing migration from Gradle Extra Properties “ext” to use Kotlin + buildSrc.

Conclusion

I highly recommend the “Kotlin + buildSrc” option.  It may not seem like it’s that big of a deal, but managing Gradle dependencies is a pain, and having autocomplete and click support is a game changer.  No more switching back and forth between files manually!

Related Caster.io Lessons on Gradle Dependency Management (FREE)

  1. Gradle Dependency Management: Using Gradle Extra Properties (ext)
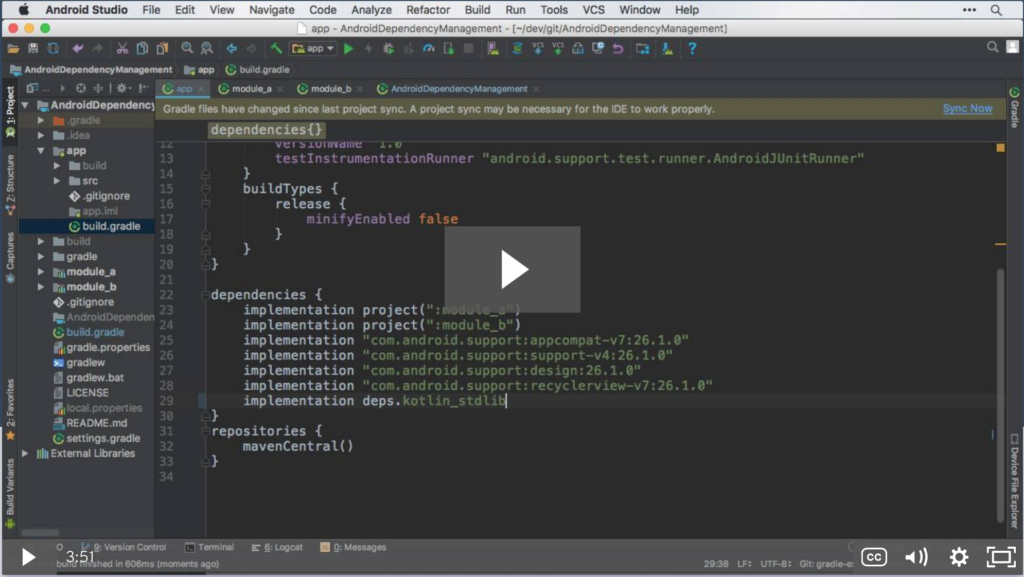
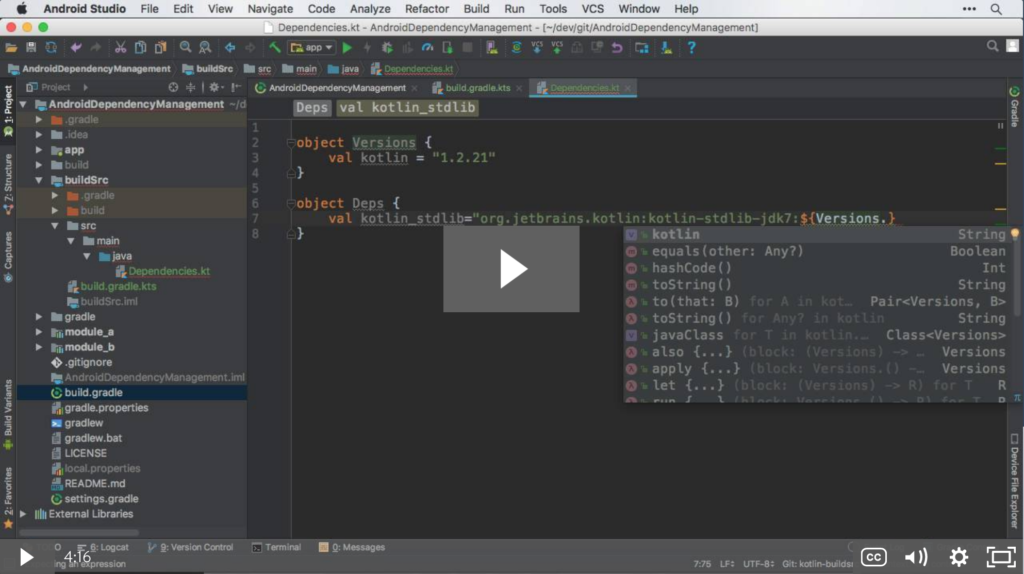
  2. Gradle Dependency Management: Using Kotlin and buildSrc for build.gradle Autocomplete in Android Studio
Related Links

Hat Tips/Thanks

Questions/Comments?

Reach out to me on Twitter at @HandstandSam

AnDevCon 2017 – How Yahoo Finance Scales on Android – Vikram Bodicherla

I saw Vikram‘s talk at Droidcon NYC 2016 talk about app performance, and wanted to make sure I made it to his talk.  He talks about overall processes for a successful development team along with tools and tips for shipping apps.

Developers shouldn’t be afraid to dip your toes into “product”.
Contribute to feature definition to make your voice heard as a user and for technical implementation.

Understanding your users – Fantasy Football Example:
You should be aware of who is using your app. You might think everyone using a fantasy football app are very serious users, but we find that 12% randomly pick, and 60% are first year users. Try to find patterns between different types of users of your app. Build personas of your users. Building personas of your users is a way to explain behavior that would be hard to explain otherwise. Give these personas name and put them up on the wall in your office. Know who your users are and design for them.

Personas for fantasy football includes:

  • Seasoned pros
  • People that are forced to join by their friends
  • People that are serious, but learning
  • “average” users

Data Driven Decisions via Experiments:
DAUs and Downloads are really “Vanity Metrics”, since they don’t gain a ton of insight. Data driven insights are real; not opinions. Wrong decisions can be validated quickly, so feel empowered to test, measure, and grow. Instead of doing costly user research, you can push something to a small group of users, and gain data there vs. expensive user research.

Each experiment should have:

  • A hypothesis
  • An owner
  • A deadline for the end of the experiment.
  • Planned removal of the code from your app. You learned something from it, now “Let it go!!!”

Scrum
Planning is a good investment. You can see how long things will take, determine dependencies, and people can show interest in pieces of the work.  Agile is important because it’s not adverse to change like Waterfall is.

Types of stories in Scrum:

  • User story
  • Engineering story

Scrum story checklist:

  • Clear definition
  • Acceptance criteria
  • Edge cases and error scenarios
  • Analytics
  • Animations and design

Grooming

  • should be (1x/week for 1 hour)
  • It helps the team to understand stories -> Determine level of effort for stories (Points)
  • Stories should have reasonable detail. Be very critical and make sure the story is well defined.
  • Don’t get hung up on one story. If your getting hung up, move on and take that offline so you don’t waste your entire grooming on one thing.
  • NEVER write stories during Grooming.
  • NEVER point a story that doesn’t have all the details.

If you get roll-over and carry-over after a sprint consistently, you’re doing something wrong and should revisit your processes.

Daily stand-ups should be no greater than 10 minutes and should provide high level updates. Low level updates should be taken “offline”, or “parking lotted”.

At the end of the sprint, you can hold a retrospective and demo completed stories.  Please prepare up front for this so we don’t have to wait for you to launch the emulator or recompile your project.

“If you’re are not practicing scrum in sprit, you are better off not doing it.”

Continuous Delivery

  • Minimizing the time between “code complete” and “deployable”
  • deployable != deploy
  • This can only be achieved with continuous integration (CI)
  • If you do deploy immediately to your users, you get immediate feedback, but not always the best for your users. Vikram recommend every 2 weeks on average, but depends.
  • Have internal alpha and beta programs for internal users to try the app before it goes to production.

Pull Request (PR) Tools

  • facebook/mention-bot – Can tag reviewers based on “git blame” history
  • SonarCube
  • https://codecov.io for Code Coverage
  • Danger -> Keep PRs <500 lines, PR message should be >25 chars.
  • Emulator in an iframe, running the code in the PR.  -> https://appetize.io Removes need to compile and install.

APK storage and deployment:

Culture

  • How you act/think/interact. Keep high standards, because you are what your lowest standard is.
  • Ownership is important. Communicate deviations and compromises so it’s not lost. Proactively check app quality issues and triage as soon as you can.
  • Set goals, but aim for 70%. If you get 100%, then your goals are not high enough.

Meeting etiquite

  • Everyone needs to have value, or they shouldn’t be there
  • Reject meetings if they are not needed
  • Meeting owner should have adgenda, goals and come out with action items.
  • There should be a hard start and end type.

Code is a liability. Once it’s out there, you have to support it. Changing code is expensive.  Deleting code is a good thing.

Feature Flags – Client-side feature flags are important, along with remote feature flags.  Client-side flags should take priority, but if it’s on, then use the remote flag.

AnDevCon 2017 – A Room With a ViewModel – Mark Murphy (CommonsWare)

Word of the day: “Transmogrify”
“to transform, especially in a surprising or magical manner.”

Mark draws a great comparison between Room and Retrofit as they both use annotation processing, and describe either a URL path, or a DB query.  The @Query annotation in Room, is similar to the path in Retrofit that is provided to @GET, @POST, etc.

Parameters can be sent with the syntax :postalCodes.  You can pass parameters into a query this way:

@Query(“SELECT * FROM Customer WHERE postalCode IN (:postalCodes)”)
List<Customer> findCustomersInPostalCodes(String… postalCodes)

Cool DB Testing Tip for Android Instrumentation Tests: In-memory databases work the same way that SQLite databases do that are saved to the disk. In-memory database are great for instrumentation tests because they are fast, and when you are done with it, it’s gone from memory, and doesn’t persist to disk.  It’s not recommended to use in-memory databases in true client apps however.

Types used in Room need a @TypeConverter.  You can specify the type converters to be used in the following way:

@TypeConverters({TypeConverter.class})

Caveats about relations:
You can use @ForeignKey on a child, but… <OMG head explosion />.  Foreign keys are there, but there aren’t any magical methods generated to retrieve a child. You can just get an ID for the child, and then have to re-query for that. You can specify cascading deletes however which is useful.

Room Migrations – Create instances of Migration –  A little more sane than just plain SQLite.

Note about SQLCipher – It was last updated in 2009, and the APIs are really hard (if not impossible) to integrate with Room.

LiveData – Room works really well with Rx programming. 🙂

Predictions: We will go through a lot of iterations of the APIs as kinks are worked out and things stabilized.  The guess is that a final version would be available around Google I/O 2018.

Check out Mark Murphy on the internet:

AnDevCon 2017 – An Introduction to RxJava – Matt Dupree

Here are some notes I took from Matt Dupree’s talk.  It was a really great intro to Rx, and done in a different way than most Rx talks I’ve seen.  He creates mental building blocks to get us from the Java Array to the Rx Observable.

“We are missing an abstraction”
Array -> Iterable -> Sequence -> Observable

Goal of this talk: Escape from “Callback Hell” (Too many nested callbacks, and Observables are here to help).

In Java, the “Iterable” interface allow us to abstract away from an Array, hiding us from the underlying implementation like LinkedList, HashSet, etc.  We just care that we are going through the items when we have an Iterable, and don’t really car how it’s done.

A button clicks example used:
* If you knew all your button clicks up front, you’d just do a “for” loop
* Instead you have an onClickListener since you don’t know when it’ll happen
* You instead subscribe to an observable stream (which looks like a loop), and for each observable event, you perform the action.

Interesting point: With an observable, data is not in memory necessarily, but you write code like it is.  This is another layer of abstraction that is helpful in doing delcarative programing instead of imperative programming.

Declarative Programming
This is “WHAT” I want to happen.

vs.

Imperative Programming
This is “HOW” I want it to happen.

Cool tip about “Debouncing”: I hadn’t heard of this before, but he shows another use case regarding a search text box, and he showed how EASY it was to use debouncing.  Debouncing can help you wait for the stream to settle, and in this case you can wait 300ms after the last event. You can just say wait until the observable hasn’t been called in XXX milliseconds, and if that’s the case, then continue on.

Resources:

Note: “Rx” means Reactive Extensions. (I, personally hear the term “Rx” so much, that I forget that it means something else sometimes)

Troubleshooting Auto Verification of Seamless Android App Deep Linking

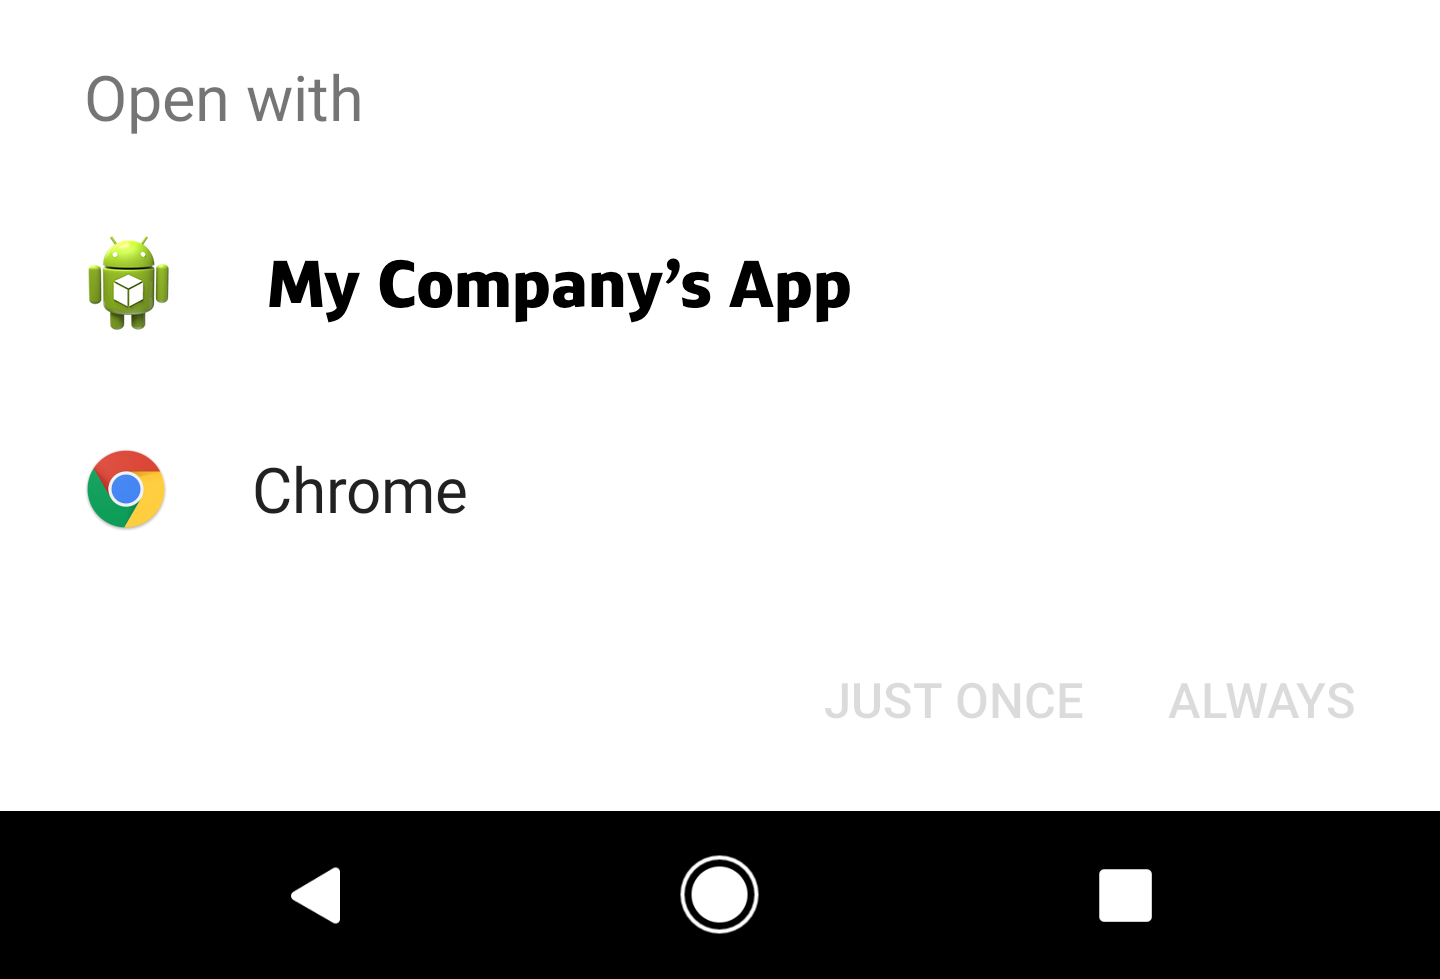
You’ve read all of the Android documentation on how to add seamless deep-links into your app, but it still isn’t working, and you’re seeing the app-chooser dialog.


Here are a few things that helped me with troubleshooting, and hopefully they’ll help you as well.

Checklist for troubleshooting “autoVerify”:

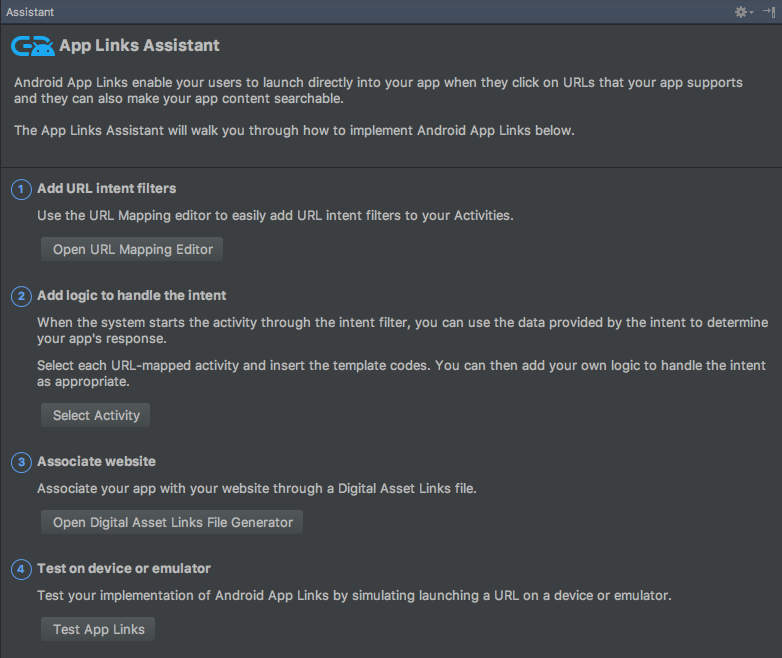
  1. Have you use App Links Assistant in Android Studio?  There are tons of new features here to help you debug issues.
  2. Did you add an intent filter for your DeepLinkActivity with autoVerify=”true” to your manifest?
    <activity
        android:name=".deeplink.DeepLinkActivity"
        android:theme="@android:style/Theme.NoDisplay">
        <intent-filter android:autoVerify="true">
            <action android:name="android.intent.action.VIEW" />
            <category android:name="android.intent.category.DEFAULT" />
            <category android:name="android.intent.category.BROWSABLE" />
            <data android:scheme="https" android:host="mycompany.com" />
        </intent-filter>
    </activity>
  3. Is there an assetlinks.json file publicly accessible (the real internet, not just your corporate VPN) in the correct place like…
    https://HOST/.well-known/assetlinks.json

    for EVERY single one of the HOSTs listed in your manifest intent-filters?  Unless every, single one of them is valid, not even links to valid hosts will work.

  4. Is your the sha256 hash of your DEBUG and RELEASE keystores both in your assetlinks.json file?  It doesn’t hurt to include both signatures.
    keytool -list -v -keystore my-keystore.keystore
  5. Have you monitored the Logcat filtered for SingleHostAsyncVerifier and IntentFilterIntentSvc?  They print out logs after an adb install that tell you the status of auto-verification. Filter for IntentFilterIntentSvc, and if you see “Success:true”, then you’re good!  See more details here.
    I IntentFilterIntentSvc: Verification 6 complete. Success:true. Failed hosts:.


Best of luck, hopefully this helps a little!

Related Helpful Blog Posts:

How do I write static methods in Kotlin?

When I was starting to write Kotlin code, and one problem I faced was how the heck do I do static methods like I can add in Java?

The solution… The companion object in your Kotlin class.

class MyClass() {
  companion object {
    fun myStaticMethod() {
      //Do Stuff Here
    }
  }
}

Accessing this static method via Kotlin:

MyClass.myStaticMethod()

Accessing this static method via Java:

MyClass.Companion.myStaticMethod()

To avoid having to use the “.Companion” syntax, use the @JvmStatic annotation, allowing you to access the method without “.Companion”:

class MyClass() {
  companion object {
    @JvmStatic
    fun myStaticMethod() {
      //Do Stuff Here
    }
  }
}

Accessing this static method via Java and @JvmStatic:

MyClass.myStaticMethod()

Identifying an Android Device – Available Identifiers

Here are various IDs can be obtained programmatically on Android that can be used to identify a device or installation. I’ve tried to provide a little bit of information about each one and what permissions are required to obtain it.

Identifier Example Value Permission Required
Android ID via Settings.Secure 2fc4b5912826ad1 NONE
Android Build.SERIAL HT6C90202028 NONE
Android Build.MODEL Pixel XL NONE
Android Build.BRAND google NONE
Android Build.MANUFACTURER Google NONE
Android Build.DEVICE marlin NONE
Android Build.PRODUCT marlin NONE
IMEI 352698276144152 READ_PHONE_STATE
Phone Number 2028675309 READ_PHONE_STATE or READ_SMS
ICCID (Sim Serial Number) 311477629513071 READ_PHONE_STATE

Android ID via Settings.Secure

This is a 64-bit quantity that is generated and stored when the device first boots. It is reset when the device is wiped.  It is unique device-wide per OS install, but only unique per application starting with Android O (with old applications grandfathered in).

String androidId = Settings.Secure.getString(context.getContentResolver(), Settings.Secure.ANDROID_ID);

Android Build.SERIAL

Since Android 2.3 (“Gingerbread”) this is available via android.os.Build.SERIAL. Devices without telephony are required to report a unique device ID here; some phones may do so also.

A hardware serial number, if available. Alphanumeric only, case-insensitive.

String serial = android.os.Build.SERIAL;

Android Build.MODEL

The end-user-visible name for the end product.

String model = android.os.Build.MODEL;

Android Build.BRAND

The consumer-visible brand with which the product/hardware will be associated, if any.

String brand = android.os.Build.BRAND;

Android Build.MANUFACTURER

The manufacturer of the product/hardware.

String manufacturer = android.os.Build.MANUFACTURER;

Android Build.DEVICE

The name of the industrial design.

String device = android.os.Build.DEVICE;

Android Build.PRODUCT

The name of the overall product.

String product = android.os.Build.PRODUCT;

IMEI (International Mobile Equipment Identity)

Returns the unique device ID, for example, the IMEI for GSM and the MEID or ESN for CDMA phones. Return null if device ID is not available.

String imei = ((TelephonyManager) context.getSystemService(Context.TELEPHONY_SERVICE)).getDeviceId();

Phone Number

Returns the phone number string for line 1, for example, the MSISDN or a GSM phone. Return null if it is unavailable.

String phoneNumber = ((TelephonyManager) context.getSystemService(Context.TELEPHONY_SERVICE)).getLine1Number();

ICCID (Sim Serial Number)

Returns the serial number of the SIM, if applicable. Return null if it is unavailable.

String iccid = ((TelephonyManager) context.getSystemService(Context.TELEPHONY_SERVICE)).getSubscriberId();

Related Links:

Android Zombie Processes – Is My App Still Alive?

To the eye, it may seem like your Android application is “dead” when you “kill” the app via the task manager, but you may be surprised that in many cases, the application process lives on.

Here are some ADB commands that you can diagnose and investigate what’s going on, on the device.

Determine Running Processes via ADB

All Processes

adb shell ps

Your Process

adb shell ps | grep com.mydomain.myappnamegoeshere

An Android Service registered to your application will prevent your process from being killed if it is currently running.  Therefore you need to be careful and aware that your singleton variables in your application are aware of this.  Read more about this here: Processes and Application Life Cycle.

void onTaskRemoved (Intent rootIntent)

You can leverage the Service::onTaskRemoved() method in Android to catch this “swipe” event where the user intends to “kill” your app via the task manager, even if services continue to run in the background.  This can be useful to catch this event if you want to end a user session for instance.  This can also be useful if your intention is to stop services when the user dismisses your app, as you can programatically stop the service at this point in time as well.

Note: If you have set ServiceInfo.FLAG_STOP_WITH_TASK when starting the Service, then you will not receive this callback; instead, the service will simply be stopped.