Using the `kotlin-dsl` Gradle Plugin forces Kotlin 1.4 Compatibility 😱

I previously wrote an article “Sharing Gradle Configuration in Multi-Module Android Projects” about re-using Gradle configuration using the “apply” feature to reduce boilerplate and provide consistency. It’s super helpful and handy, but there is now a better way to do the same kind of thing using Gradle Convention Plugins.

Gradle Convention Plugins

There is a great post by Tony Robalik that goes into the benefits of Gradle Convention Plugins. I say it is “better” because it can be pre-compiled, written in Kotlin and tested in Kotlin. These convention plugins are most easily added in buildSrc, so I figured I’d start there when adding it to my existing project.

My journey writing a Gradle Convention Plugin and how I ran into Kotlin 1.4

So, in a large Android project I added the “kotlin-dsl” plugin to the buildSrc module and things blew up. I’m using the latest version of Gradle 7.4.2, yet it is telling me:

Language version 1.4 is deprecated and its support will be removed in a future version of Kotlin

I had specified Kotlin 1.6.10 everywhere! What was I doing wrong?

Nothing. It’s intentional. Gradle even calls out why on their site:

Gradle plugins written in Kotlin target Kotlin 1.4 for compatibility with Gradle and Kotlin DSL build scripts, even though the embedded Kotlin runtime is Kotlin 1.5.

https://docs.gradle.org/current/userguide/compatibility.html#kotlin

Even though it is intentional, it wasn’t immediately clear to me, and to others, but I understand the thinking behind it now, and in this post show you how you can get around it if you need to.

Martin Bonnin has a great post talking about how you could get around this by doing some crazy things like creating shadow jars, but his answer of “Should I use this in production?” was “it depends”, and where possible, I try to not use complex workarounds (even though this post is a less complex workaround 😂).

Gradle 7.4.2 still targets Kotlin 1.4 with the kotlin-dsl plugin, even though 1.5.31 is embedded now in Gradle 7.4.2. Gradle plugin compatibility is very important when distributing plugins publicly, but if you are just going to use them in your team or organization, you may not want to support old version of Kotlin going back to 1.4.

In order to use the version of Kotlin available in the version of Gradle you have, you need to specify the version yourself to override the default.

import org.jetbrains.kotlin.gradle.tasks.KotlinCompile

plugins {
    `kotlin-dsl`
}

afterEvaluate {
    tasks.withType<KotlinCompile>().configureEach {
        kotlinOptions {
            apiVersion = "1.5"
            languageVersion = "1.5"
        }
    }
}

This will allow you to use Kotlin 1.5 syntax now when using the “kotlin-dsl” plugin!

One thing that is weird about this is the need for afterEvaulate. I’m not 100% sure why it was needed, but it’s how they specify it in Gradle source code, and it doesn’t work without adding afterEvaluate.

But… what about Kotlin 1.6?

If you really want to use Kotlin 1.6 though, fear not! Kotlin 1.6.10 is going to be available with Gradle 7.5 when it comes out. When it does, you should be able to use this configuration to use 1.6 compatibility:

import org.jetbrains.kotlin.gradle.tasks.KotlinCompile

plugins {
    `kotlin-dsl`
}

afterEvaluate {
    tasks.withType<KotlinCompile>().configureEach {
        kotlinOptions {
            apiVersion = "1.6"
            languageVersion = "1.6"
        }
    }
}

Kotlin/Gradle Version Table when using kotlin-dsl

Gradle VersionEmbedded Kotlin VersionDefault Api Version
7.5 (Unreleased as of April 14, 2022)1.6.101.4
7.3+1.5.311.4
7.0+1.4.301.4

What do you recommend?

If you are only going to use this plugin internally, and everyone is using the same version of Kotlin everywhere, this seems pretty safe. If you are looking to open source something for public use, you may need to call out a minimum Gradle version required use your Plugin.

Should I put my Gradle Convention Plugin in buildSrc?

This is the first place you should try it out. You will have the same issue with any code you put in buildSrc though, where if any code changes, all code and tests in buildSrc have to be re-run which increases build times.

If you plan to use this a lot going forward, use an includeBuild to add in your Convention Plugins going forward so that you only re-compile when that code changes, and so you could publish a binary to avoid any compilation at all.

Reviewers

Thanks Martin Bonnin and Tony Robalik for reviewing the article. Also special thanks to Martin for helping me dig into the Gradle source to figure this out!

Kotlin Multiplatform: Building a “Fat” iOS Framework for iosArm64 and iosX64

If you are building a Kotlin Multiplatform library which will be consumed by an existing iOS application, using a framework is a great way to do this. Frameworks are typically compiled for a specific target architecture which can then be run on an iPhone, iPad or iOS Simulator on your Intel Macbook.

If you are going use your Kotlin Multiplatform library as a framework in an existing app, you will want to provide a “Fat” framework which will contain both Arm64 and X64 architectures. This article contains the configuration I used to build the “Fat” framework. This is not a full build.gradle.kts file, but just the additional parts needed for a Kotlin Multiplatform project to build a “Fat” framework.

⚠️Use an XCFramework instead ⚠️

This “Fat” framework method no longer works with XCode 12+. Use an XCFramework instead.


I ended up with this Error Message in XCode 12.4: “Building for iOS Simulator, but the linked and embedded framework ‘my_library.framework’ was built for iOS + iOS Simulator.”

This Stack Overflow post shows you how to create an XCFramework from your two frameworks, and I’ll follow up with a blog post on how to do it with an XCFramework a bit later. This solutions ends up combining the two frameworks into a single XCFramework.

xcrun xcodebuild -create-xcframework \
    -framework /path/to/ios.framework \
    -framework /path/to/sim.framework \
    -output combined.xcframework

Custom Gradle Task to Build “Fat” framework

import org.jetbrains.kotlin.gradle.tasks.FatFrameworkTask

kotlin {
    // Set a name for your framework in a single place and reuse the variable
    val libName = "my_library"

    // Configure your Kotlin Multiplatform lib to generate iOS binaries
    // NOTE: This will only work on Macs
    ios {
        binaries.framework(libName)
    }

    // You can choose your output directory
    val frameworkDestinationDir = buildDir.resolve("cocoapods/framework")

    tasks {

        // Custom task to build the DEBUG framework
        // ./gradlew universalFrameworkDebug
        register("universalFrameworkDebug", FatFrameworkTask::class) {
            baseName = libName
            from(
                iosArm64().binaries.getFramework(libName, "Debug"),
                iosX64().binaries.getFramework(libName, "Debug")
            )
            destinationDir = frameworkDestinationDir
            group = libName
            description = "Create the debug framework for iOS"
            dependsOn("linkDebugFrameworkIosArm64")
            dependsOn("linkDebugFrameworkIosX64")
        }

        // Custom task to build the RELEASE framework
        // ./gradlew universalFrameworkRelease
        register("universalFrameworkRelease", FatFrameworkTask::class) {
            baseName = libName
            from(
                iosArm64().binaries.getFramework(libName, "Release"),
                iosX64().binaries.getFramework(libName, "Release")
            )
            destinationDir = frameworkDestinationDir
            group = libName
            description = "Create the release framework for iOS"
            dependsOn("linkReleaseFrameworkIosArm64")
            dependsOn("linkReleaseFrameworkIosX64")
        }
    }
}

Here are two custom gradle tasks that build a “Fat” framework for debug or release. In this I have it outputting to the build/cocoapods/framework directory, but you can configure that as you like.

Gradle Task for “Fat” iOS framework

  • Build a “Fat” debug version of the framework
    • ./gradlew universalFrameworkDebug
  • Build a “Fat” release version of the framework
    • ./gradlew universalFrameworkRelease

Importing the iOS Framework into XCode

I previously wrote a blog post about how to do this which has a companion video along with it. 👇

Thanks and Related Resources

I didn’t figure this all out myself. I just got it to work for me and extracted out the bare minimum you need to make this work. Thanks to Swapnil Patil for letting me know that “Fat” frameworks are possible. Thanks so much to Marco Gomiero for his post Introducing Kotlin Multiplatform in an existing project.

Sharing Gradle Configuration in Multi-Module Android Projects

Using multiple modules in our Android projects help us split apart our code into logical components.  They also can enable faster incremental builds, and more modular code.  One problem with multi-module projects is that there is a lot of verboseness of configuration.  This post shows you a method of sharing common configuration between your Android Library modules in order to cut down on boilerplate Gradle configuration.

I made this change in a PR in my ShoppingApp project on GitHub and ended up deleting a net 90 lines of code over 7 library modules.

apply from: “____.gradle”

You can add the contents of another Gradle file into your current one by using “apply from: ” and specifying the file whose content you want to add.

apply from: "$rootProject.projectDir/android-library.gradle"

$rootProject.projectDir

Modules can exist in different directory structures, so by leveraging the $rootProject.projectDir property, we specify paths based on the root project directory.

Original Library Module build.gradle

apply plugin: 'com.android.library'
apply plugin: 'kotlin-android'

android {
    compileSdkVersion Versions.compile_sdk

    defaultConfig {
        minSdkVersion Versions.min_sdk
        targetSdkVersion Versions.target_sdk
        versionCode 1
        versionName "1.0"

        testInstrumentationRunner "android.support.test.runner.AndroidJUnitRunner"
    }
}

dependencies {
    implementation project(Modules.models)
    implementation Libs.kotlin_std_lib
}

Resulting Library Module build.gradle

apply from: "$rootProject.projectDir/android-library.gradle"

dependencies {
    implementation project(Modules.models)
    implementation Libs.kotlin_std_lib
}

Shared Gradle File

apply plugin: 'com.android.library'
apply plugin: 'kotlin-android'

android {
    compileSdkVersion Versions.compile_sdk

    defaultConfig {
        minSdkVersion Versions.min_sdk
        targetSdkVersion Versions.target_sdk
        versionCode 1
        versionName "1.0"

        testInstrumentationRunner "android.support.test.runner.AndroidJUnitRunner"
    }
}

If You Do Something 3+ Times, Extract Out Functionality

Whenever it’s possible and makes sense, use common configuration to reduce boilerplate.  This same rule applies if you are writing code, or writing Android Gradle configuration.  This post shares an “easy win”, that you may be able to use to help better manage your multi-module project. There is so much more you can do to clean up your builds by leveraging buildSrc where you can write in Kotlin, Java or Groovy, but that’s for another post.

Why We Need “fat” AARs for Android Libraries

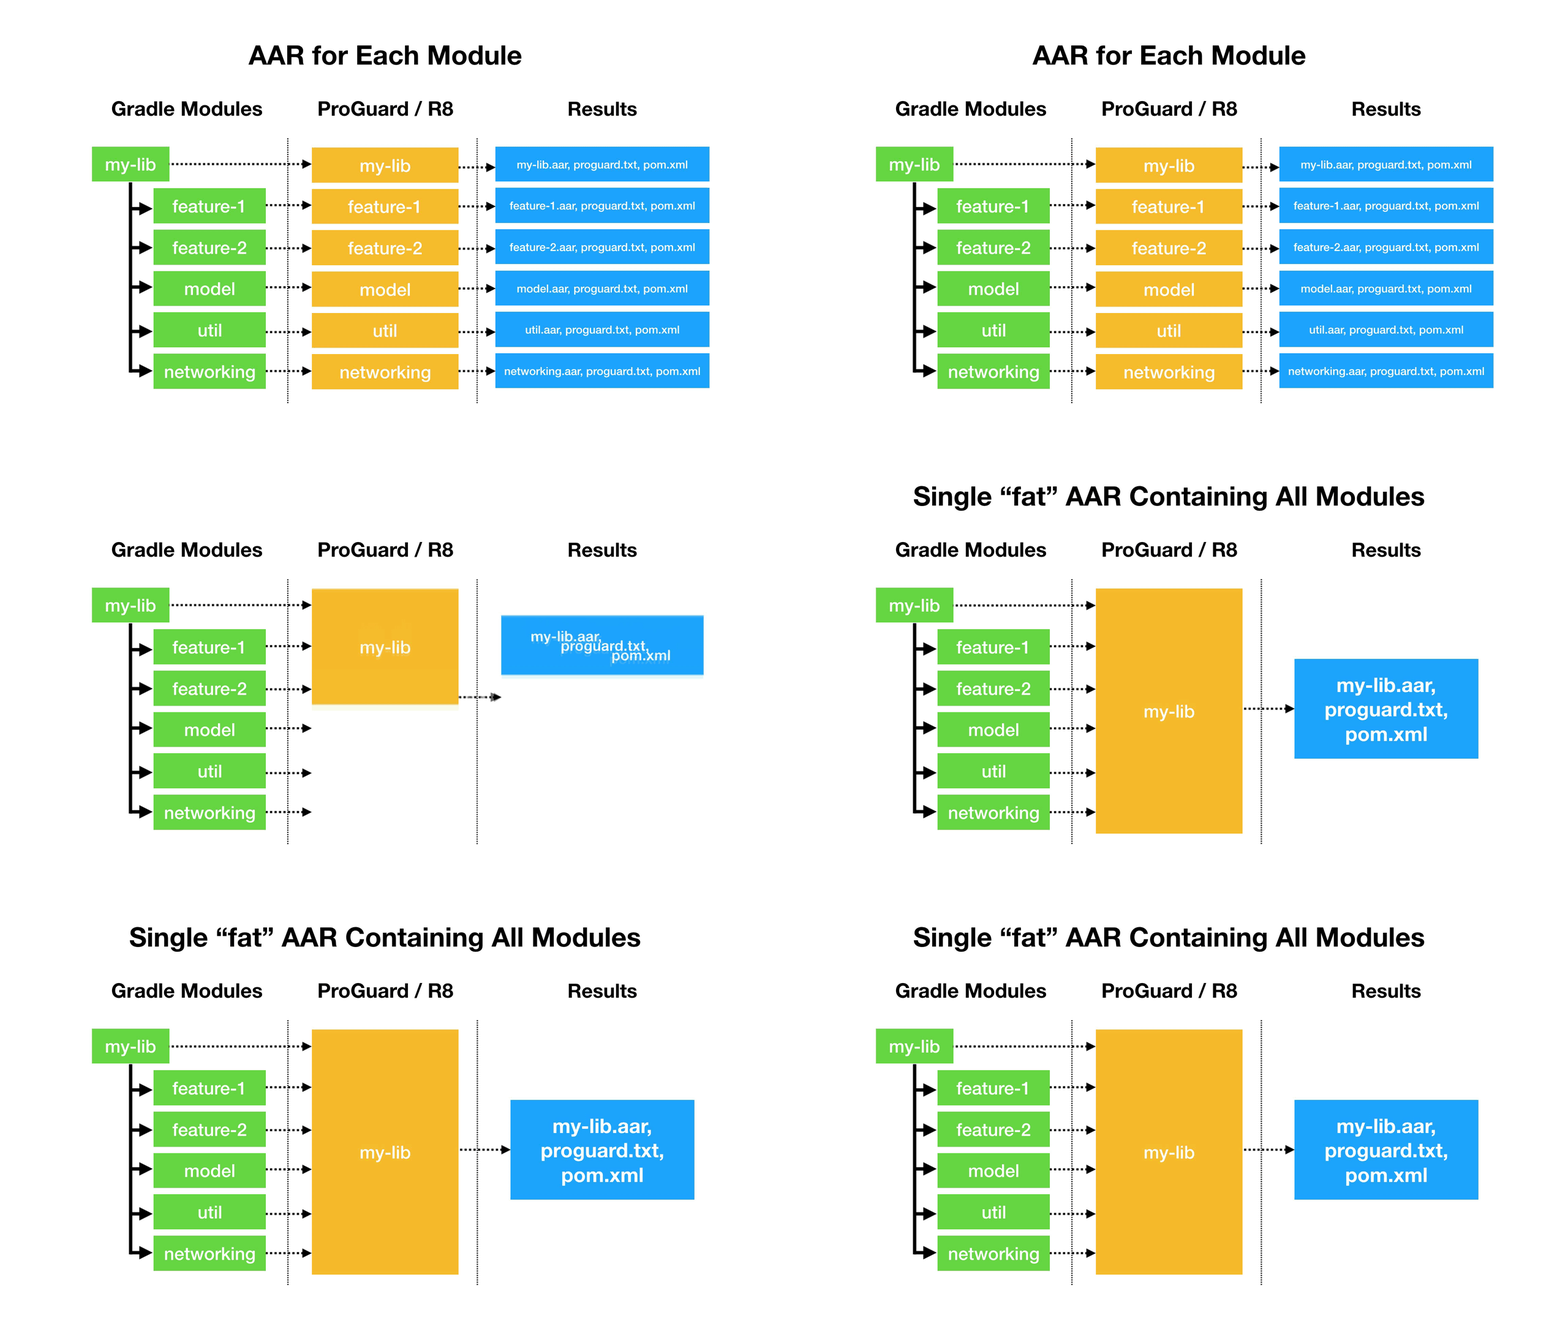
I want the ability to create a single (“fat”) AAR artifact from multiple Android Libraries (all from source).  Non-source, transitive dependencies will still be pulled in via a pom.xml file.

Requirements:

  1. I want to write and SDK that would be used by 3rd parties and possibly internal teams.  I want to write modular code on my side, with clean separation of concerns, yet only provide a single AAR artifact to users of my library.  Users of my library don’t need to know how I architected the internals, and in some cases I don’t want them to know.  I want to obfuscate my internal implementations to avoid accidental usage as well as for some security.
  2. I want to shrink and optimize my code with ProGuard (which is being replaced by R8) on my entire library, and generate only a single AAR file.  With current tooling, each module is only aware of its own code and resources when ProGuard is run.  This means that I can’t optimize or obfuscate my entire library/SDK in its entirety.  Because I must run ProGuard on each module individually at the current time, you end up with NoClassDefFoundErrors if you try to be aggressive with obfuscation.

The Use Case

For this post, think of an SDK you would get from an external vendor, or another team that contains their shrink-wrapped code that you need to plop into your app.  For an app like Twitter, that could mean:

  • Login page library
  • Video streaming player library
  • Home feed library
  • Emoji support library
  • etc.

Note: With the Twitter example I just mean to show that you can bundle discrete components of an app with clear boundaries between them.

When you get into a big app, you have to separate out components, and using Android Libraries to do this is a great decision.  That being said, I would never want “fat” AARs to be the only way to do things.  I just think it would solve some use cases when you are creating and SDK to be used by 3rd parties that don’t need to know how the internals of your code work.

Technical Reasons: Why Creating a “FAT” AAR Doesn’t Work

Apps/APKs can combine as many AARs into a single APK artifact.  That’s because there is a Manifest merge process that defines rules on how the AndroidManifest.xml, resources and assets are merged for the resulting APK file.  At the time the APK is created, ProGuard can be applied to optimize all byte code, remove unused classes, and perform code obfuscation.

Didn’t Someone Create a Library to Do This?

Kinda… A long time ago.  There was a partial workaround for manifest merging for Android Libraries using Android Gradle Plugin 2.x called “FAT” AAR, but it was limited, unofficial, and no longer works with Gradle 3.x.  There seems to be no plans to make it work with newer versions of Gradle.  It esentially tried to do its own hacky version of Manifest merging.

Argument Against: You only need to specify a single dependency in your build.gradle to import all of the transitive libraries. Why are you complaining?

This is true for the use case where you publish your artifacts correctly to a public Maven repository.  Your user would only need to care about adding a single Gradle dependency, and the others would be pulled down transitively.  All they would need to add is “com.example:my-lib:1.0.0” to their Gradle dependencies. This works great in a lot of cases, like the Android Support Library, where the dependencies are all published publicly, and users can cherry-pick the pieces they want.

In the use case I’m requesting this for, existing methods aren’t great for 2 reasons.

  1. I want to control what my shrink-wrapped artifacts look like, while still maintaining modularized code internally.  It’s easier to hand over a single AAR file when you need to distribute a library via a non-public Maven repository. Yes, I could ask users to create a file-based maven repository in the project, but that is ugly.
  2. I want to shrink and optimize all of my library before delivering it to users.  It is only possible to run ProGuard on each module individually at the current time, which means that code optimizations and obfuscation breaks when it is used aggressively on each module independently.

Finally

I’ve created this post to explain some of the current limits of building Android Libraries with the Android Gradle Plugin that I’ve run into, and to make a plea to the Android Tooling team to accept the issue for newer versions of Android Gradle Plugin.  ⬇Xavier Ducrohet, the Android SDK Tech Lead said this is being considered for Android Gradle Plugin 3.3, but isn’t on the roadmap yet.  Since 3.2 is almost out the door, I figured now is a good time to make a push for this issue.

If you have this same issue or use case, please ⭐ the issue, but also comment about how this uniquely effects your development.

Kotlin + buildSrc for Better Gradle Dependency Management

Multi-module Android projects are now the recommended way to take advantages of performance improvements with Android Gradle Plugin 3+.  However, as we add more modules to our project, we quickly run into the issue of dependency management.

Different ways of managing Gradle dependencies:
  1. Manual Management
  2. Google’s Recommendation using “ext”
  3. Kotlin + buildSrc

1) Manual Management 👎

This is the way most of us have been managing dependencies, but it requires a lot of manual changes whenever you upgrade a library to ensure that versions are updated correctly.

module_a/build.gradle

implementation "com.android.support:support-annotations:27.0.2"
implementation "com.android.support:appcompat-v7:27.0.2"
implementation "com.squareup.retrofit2:retrofit:2.3.0"
implementation "com.squareup.retrofit2:adapter-rxjava2:2.3.0"
implementation "io.reactivex.rxjava2:rxjava:2.1.9"

module_b/build.gradle

implementation "com.android.support:support-annotations:27.0.2"
implementation "com.android.support:appcompat-v7:27.0.2"
implementation "com.squareup.retrofit2:retrofit:2.3.0"
implementation "com.squareup.retrofit2:adapter-rxjava2:2.3.0"
implementation "io.reactivex.rxjava2:rxjava:2.1.9"

This is a lot of duplicated configuration that is hard to manage upgrades with, especially when you have a lot of modules.

2) Google’s Recommendation: Using Gradle Extra Properties 🙂

This is Google’s recommended way of doing this as seen in the Android documentation.  It is also used in lots of Android projects, like ButterKnife and Picasso.

This method is great for upgrading libraries like the support library.  Every support library dependency has the same version number, so only having to change this in one place is 💯.  The same things goes for Retrofit, and many other libraries.

Root-level build.gradle

ext {
  versions = [
    support_lib: "27.0.2",
    retrofit: "2.3.0",
    rxjava: "2.1.9"
  ]
  libs = [
    support_annotations: "com.android.support:support-annotations:${versions.support_lib}",
    support_appcompat_v7: "com.android.support:appcompat-v7:${versions.support_lib}",
    retrofit :"com.squareup.retrofit2:retrofit:${versions.retrofit}",
    retrofit_rxjava_adapter: "com.squareup.retrofit2:adapter-rxjava2:${versions.retrofit}",
    rxjava: "io.reactivex.rxjava2:rxjava:${versions.rxjava}"
  ]
}

module_a/build.gradle

implementation libs.support_annotations
implementation libs.support_appcompat_v7
implementation libs.retrofit
implementation libs.retrofit_rxjava_adapter
implementation libs.rxjava

module_b/build.gradle

implementation libs.support_annotations
implementation libs.support_appcompat_v7
implementation libs.retrofit
implementation libs.retrofit_rxjava_adapter
implementation libs.rxjava

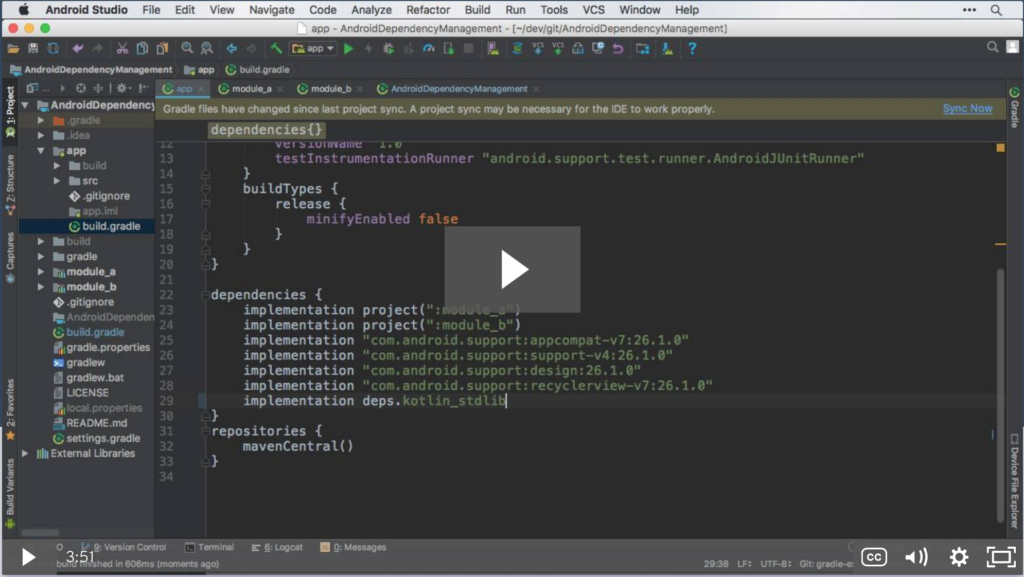
This is a huge step ahead from manual management, but IDE support is lacking.  Check out this screencast of migrating to use Gradle Extra Properties (“ext”), and this Github pull request of the results.

While you can be content with using “ext” properties, I think you will be excited to use Kotlin in a buildSrc directory.

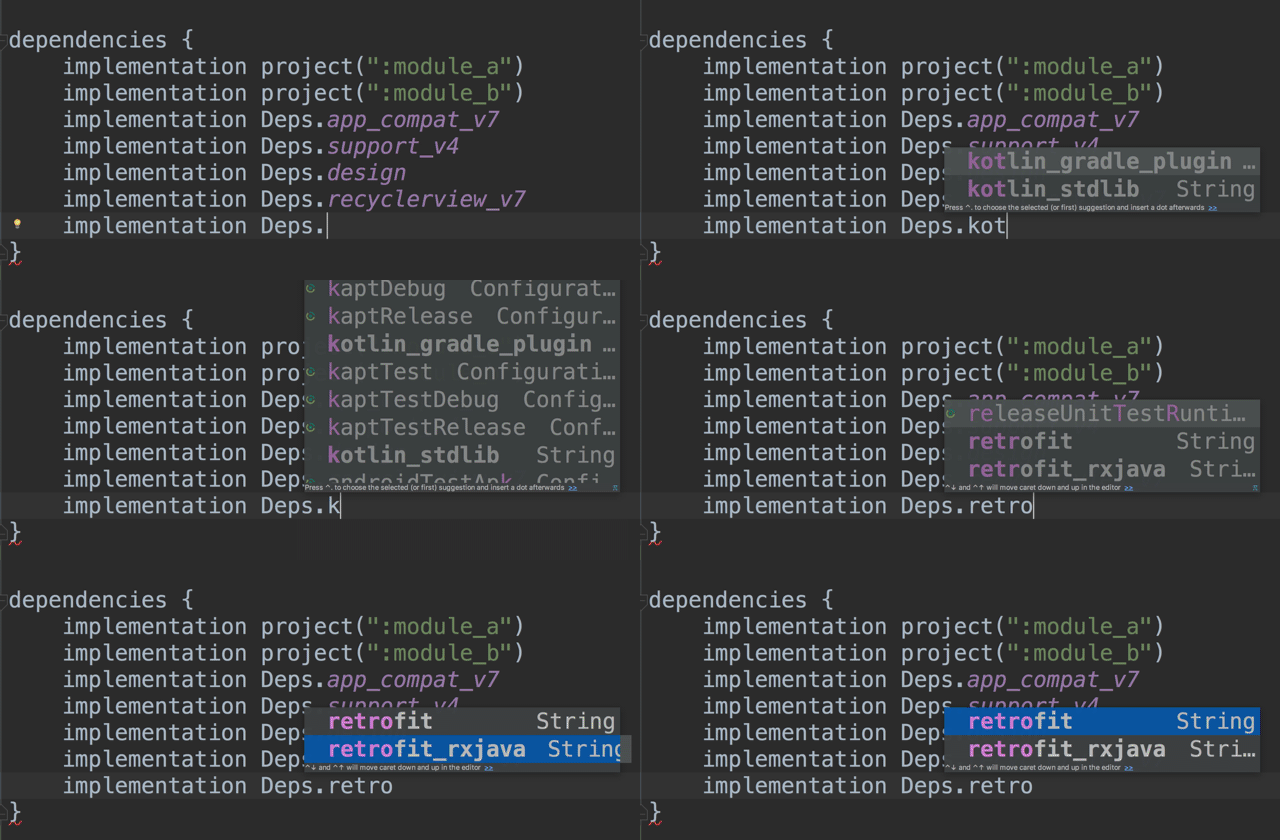
3) Kotlin + buildSrc == Android Studio Autocomplete 😎 🎉

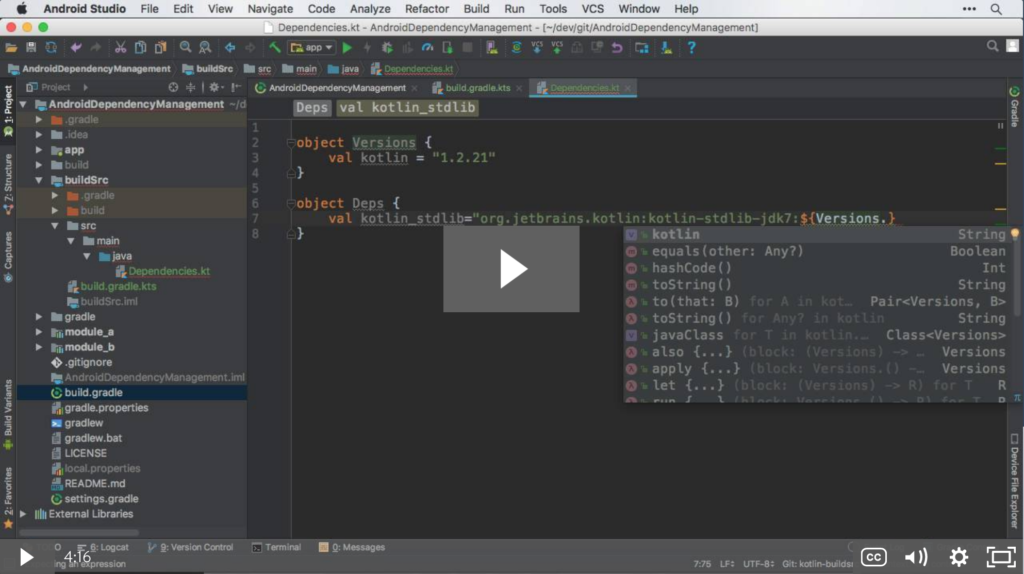
You can create a buildSrc module with Kotlin code to manage dependencies and get IDE completion support.

From the Gradle Documentation:

When you run Gradle, it checks for the existence of a directory called buildSrc. Gradle then automatically compiles and tests this code and puts it in the classpath of your build script. You don’t need to provide any further instruction.

You just need 2 files in your buildSrc module:

  1. build.gradle.kts
  2. Kotlin Code (In this case,Dependencies.kt)

buildSrc/build.gradle.kts

plugins {
    `kotlin-dsl`
}

buildSrc/src/main/java/Dependencies.kt

object Versions {
    val support_lib = "27.0.2"
    val retrofit = "2.3.0"
    val rxjava = "2.1.9"
}

object Libs {
 val support_annotations = "com.android.support:support-annotations:${Versions.support_lib}"
 val support_appcompat_v7 = "com.android.support:appcompat-v7:${Versions.support_lib}"
 val retrofit = "com.squareup.retrofit2:retrofit:${Versions.retrofit}"
 val retrofit_rxjava_adapter = "com.squareup.retrofit2:adapter-rxjava2:${Versions.retrofit}"
 val rxjava = "io.reactivex.rxjava2:rxjava:${Versions.rxjava}"
}

After we have done a Gradle Sync, following making the changes above, we can now access any of the values in Android Studio.

The result looks very similar to what “ext” looked like, but we have autocomplete and click support (to take you to the definition).

module_a/build.gradle

implementation Libs.support_annotations
implementation Libs.support_appcompat_v7
implementation Libs.retrofit
implementation Libs.retrofit_rxjava_adapter
implementation Libs.rxjava

module_b/build.gradle

implementation Libs.support_annotations
implementation Libs.support_appcompat_v7
implementation Libs.retrofit
implementation Libs.retrofit_rxjava_adapter
implementation Libs.rxjava

Check out this screencast and this Github pull request showing migration from Gradle Extra Properties “ext” to use Kotlin + buildSrc.

Conclusion

I highly recommend the “Kotlin + buildSrc” option.  It may not seem like it’s that big of a deal, but managing Gradle dependencies is a pain, and having autocomplete and click support is a game changer.  No more switching back and forth between files manually!

Related Caster.io Lessons on Gradle Dependency Management (FREE)

  1. Gradle Dependency Management: Using Gradle Extra Properties (ext)

  2. Gradle Dependency Management: Using Kotlin and buildSrc for build.gradle Autocomplete in Android Studio

Related Links

Hat Tips/Thanks

Questions/Comments?

Reach out to me on Twitter at @HandstandSam