SQLDelight 1.x Quick Start Guide for Android

SQLDelight is most well known as a Kotlin multiplatform database library. As an Android Developer, the most compelling reasons to use SQLDelight are:

  • Kotlin first
  • SQL first
  • Typesafe generated code
  • Unit tests don’t require an Android device

Documentation for how to use SQLDelight on just Android (without Kotlin mutliplatform) is lacking, so I wanted to create this guide to get people going fast on just Android.  This example is here to get you started, but does not reflect best coding practices.  I did this in order to make this quick start guide concise, and approachable.

1) Add Gradle Plugin to the buildscript classpath

In your project’s root build.gradle file, add the following dependency under buildscript dependencies.

classpath "com.squareup.sqldelight:gradle-plugin:1.3.0"

2) Apply the Gradle Plugin to your App or Module

You need to add the SQLDelight Gradle Plugin to your app or module because SQLDelight uses code generation from SQL files (*.sq), instead of code generation based on annotations (kapt).  This gives us incremental builds, but requires us to add a plugin to our root build.gradle file.  By doing code generation from SQL files, SQLDelight can generate code that works on any platform, because at the end of the day you are just executing SQL statements.

apply plugin: "com.squareup.sqldelight"

3) Add/Write the SQL (.SQ) File

You need to create a source folder for your SQL (*.sq) files at “src/main/sqldelight” folder, next to “java” or “kotlin” source folder. In this example, we’ll be representing a “item” in a shopping cart (Example from Shopping App) and the ItemInCartEntity.sq file in the following location:

MODULE_OR_APP/src/main/sqldelight/com/handstandsam/sqldelightquickstart/ItemInCartEntity.sq

ItemInCartEntity.sq

CREATE TABLE itemInCart (
    label TEXT NOT NULL UNIQUE PRIMARY KEY,
    image TEXT NOT NULL,
    quantity INTEGER NOT NULL DEFAULT 0,
    link TEXT
);

selectAll:
SELECT *
FROM itemInCart
ORDER BY label;

insertOrReplace:
INSERT OR REPLACE INTO itemInCart(
  label,
  image,
  quantity,
  link
)
VALUES (?, ?, ?, ?);

selectByLabel:
SELECT *
FROM itemInCart
WHERE label = ?;

empty:
DELETE FROM itemInCart;

deleteByLabel:
DELETE
FROM itemInCart
WHERE label = ?;

4) Install the SQLDelight Android Studio Plugin

The Android Studio Plugin is not required, but is super helpful for syntax highlighting, code completion, warnings and navigation.

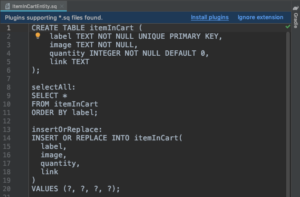
.sq file without the SQLDelight Android Studio Plugin

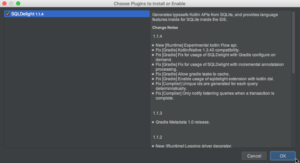
Adding the SQLDelight Android Studio Plugin

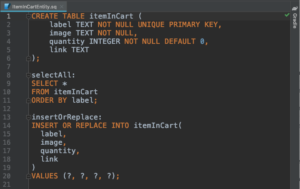
A .sq file after the SQLDelight Android Studio Plugin is Installed

5) Add the Dependency Used for in Memory Unit Tests

You need the JdbcSqliteDriver for Unit Tests. This allows you to run your database tests without Android device. This means blazing fast tests without the hassle of connecting a device!

Add the following Unit Test dependency:

testImplementation "com.squareup.sqldelight:sqlite-driver:1.3.0"

Note: You don’t have to write unit tests and could technically skip this and the next step, but do yourself the favor and write tests from the beginning.

6) Write Unit Tests

Now that everything is set up, you should write a unit test that runs on your computer to make sure it’s all working.  This is a huge benefit over the Room library that comes with Android Jetpack because we can completely decouple ourselves from knowing what Android is.  This allows us to verify our setup and to have a quick feedback loop to ensure everything is working.

Use the JdbcSqliteDriver for an in memory version of your database for unit tests to avoid state between tests. However, be sure to also call Database.Schema.create(sqlDriver) or your in memory tests will not work. In order to make sure I call it, I use an “apply” to make sure I do it along with creating an instance of the driver.

private val inMemorySqlDriver = JdbcSqliteDriver(JdbcSqliteDriver.IN_MEMORY).apply {
    Database.Schema.create(this)
}

Here is the full ItemDatabaseTest.kt file containing the Unit Test.

package com.handstandsam.sqldelightquickstart

import com.squareup.sqldelight.sqlite.driver.JdbcSqliteDriver
import org.junit.Assert.assertEquals
import org.junit.Test

class ItemDatabaseTest {

    private val inMemorySqlDriver = JdbcSqliteDriver(JdbcSqliteDriver.IN_MEMORY).apply {
        Database.Schema.create(this)
    }

    private val queries = Database(inMemorySqlDriver).itemInCartEntityQueries

    @Test
    fun smokeTest() {
        val emptyItems: List = queries.selectAll().executeAsList()
        assertEquals(emptyItems.size, 0)

        queries.insertOrReplace(
            label = "Pineapple",
            image = "https://localhost/pineapple.png",
            quantity = 5,
            link = null
        )

        val items: List = queries.selectAll().executeAsList()
        assertEquals(items.size, 1)

        val pineappleItem = queries.selectByLabel("Pineapple").executeAsOneOrNull()
        assertEquals(pineappleItem?.image, "https://localhost/pineapple.png")
        assertEquals(pineappleItem?.quantity?.toInt(), 5)
    }
}

7) Add the SQLDelight Android Driver Dependency

Now that we have the plugin working and unit tests passing, we need to integrate with our Android app. Add this “implementation” AndroidSqliteDriver dependency on SQLDelight.

implementation "com.squareup.sqldelight:android-driver:1.3.0"

If you only have an “app” module, then add it to that, but if you are in a multi-module project, I would highly suggest creating a “db” module (or similar) for this code.

8) Write your SQLDelight Android Code

In order to just show this working on Android, I pasted the code into the MainActivity, which is not what you should do, but it helps you validate that it’s actually working on Android.

You will need to use the AndroidSqliteDriver in order for SQLDelight to correctly write to the Android database. The JdbcSqliteDriver was helpful for allowing us to do in-memory unit testing, but it only keeps the database in memory, and would never save between app launches.

val androidSqlDriver = AndroidSqliteDriver(
    schema = Database.Schema,
    context = applicationContext,
    name = "items.db"
)

val queries = Database(androidSqlDriver).itemInCartEntityQueries

val itemsBefore: List = queries.selectAll().executeAsList()
Log.d("ItemDatabase", "Items Before: $itemsBefore")

for (i in 1..3) {
    queries.insertOrReplace(
        label = "Item $i",
        image = "https://localhost/item$i.png",
        quantity = i.toLong(),
        link = null
    )
}

val itemsAfter: List = queries.selectAll().executeAsList()
Log.d("ItemDatabase", "Items After: $itemsAfter")

9) Run The Code on Android

Hit the run button and filter Logcat so you can see that you have successfully added and retrieved data from SqlDelight on Android!

10) Peek at the “Magically” Generated Code

It’s cool to see where the plugin puts the code it generates in “build/sqldelight” and it may help you understand how SQLDelight works. The generated code is super easy to read since it uses Kotlin Data Classes, and the SQL code is just taken almost directly from your .sq file that you already wrote, but wrapped in a type-safe way.

Conclusion

These steps are all you need to get started with SQLDelight 1.x on Android.  Here is a pull request that contains all the changes mentioned in this post: https://github.com/handstandsam/SQLDelightQuickStart/pull/1/files.  This article was written when version 1.1.4 was released, but has been updated to version 1.3.0.  Check out the SQLDelight change-log to see the latest released version.

Enjoy the beautiful generated Kotlin code which is generated from our .sq files, and enjoy validating your code via unit tests that can run without an Android device!

Related Links:

“It Depends” Is The Answer To Your Android Question

Android Questions:

  • Should I use Kotlin Multiplatform? “It Depends”
  • Should I use Kotlin Multiplatform for UI? “It Depends”
  • Should I use an Actor or StateFlow? “It Depends”
  • Should I use Mockito? “It Depends”
  • Should I put my Kotlin code in src/main/java? “It Depends”
  • Should I use Flutter? “It Depends”
  • Should I wrap a 3rd party library’s API? “It Depends”
  • Should I install the Android Q Beta? “It Depends”
  • Should I use Dagger? “It Depends”
  • Should I use Kotlin or Java? “It Depends”
  • Should I use React Native? “It Depends”
  • Should I use Dependency Injection? “It Depends”
  • Should I use OkHttp? “It Depends”
  • Should I use Multiple Activities or a Single Activity? “It Depends”
  • Should I upgrade to the latest Support Library? “It Depends”
  • Should I use a library that’s in Alpha? “It Depends”
  • Should I use Room or SqlDelight? “It Depends”
  • Should I write Espresso tests? “It Depends”
  • Should I bump my minSdk to 28? “It Depends”
  • Should I use MVP or MVVM or MVI or MVC? “It Depends”
  • Should I use RxJava or LiveData? “It Depends”
  • Should I learn Android or iOS? “It Depends”
  • Should I start a blog? “It Depends”
  • Should I start a side project? “It Depends”
  • … Insert Your Question Here  … “It Depends”

“It Depends” Is Technically Correct 💯% of the Time

While “It Depends” is technically correct since there is no absolute answer in software, it still doesn’t make it a good answer.  “Probably Should” is an answer well, but when you think about it, it’s still a variation of “It Depends”.

“It Depends” Is a Crappy Answer

Juhani brings up a great point about responsibility in his tweet above.  Opinions are great because they are shaped by experience.  As you gain experience, it’s important to share your opinions and discoveries because they will help provide insight and context into a topic.  That empowers the person searching for the answer to make a decision, because you can’t write software with “It Depends”, since it won’t compile. 😂

There Is No Perfect Answer

My goal of this post was to point out that there are tons of ways to do things, but based on your team, use case and target audience, there is no good 100% right answer for any topic.  I can strongly urge you to use Kotlin, but if you are building something that people are willing to pay millions of dollars from and they need Java, then Java is your right answer.  The important part is to keep listening to opinions and discoveries that are brought up, but know they are not a one-size-fits-all solution.

I’m happy to share my opinion and experiences with you on any topic if you reach out to me on Twitter @HandstandSam, and I’ll do my best not to answer with “It Depends”. 🙂

When You Should Use Null in Kotlin

I was recently reviewing code with a developer that is learning Kotlin and they were adamant that:

“You should never use null. Null is BAD.” 


Null has got a bad rap.  Yes, it’s to be avoided in most code, but in Kotlin, null is part of the type system and the compiler will tell you when you haven’t handled it appropriately.  However, just because it’s easy to identify null in Kotlin doesn’t mean we should use it everywhere.  There are perfectly appropriate safe uses of null in Kotlin.

Valid usages of null in Kotlin

1) When Representing “No Value”

 var user: User? = null

If you need a way to represent whether a value is initialized or whether it has no value, then null is appropriate in this case.

2) Consuming External Data Sources

If you need a way to represent whether a value is available or unavailable, then null is appropriate in this case as well.

Apps must consume external data sources that we don’t have full control over.  When operating in a non-hermetic environment, we run into cases where some data sources are not reliable and may provide null content.  Whether it is a REST API, or an Android System Service, representing data that may not be available as a nullable type is important because it allows us to create code paths to handle both cases.

Functional Purity

While it seems ideal to never have null in your code, it’s not always possible to avoid, and sometimes shouldn’t be avoided.

Using a Sealed Class to Avoid Using Null

sealed class UserWrapper {
  object UninitializedUser : UserWrapper()
  data class InitializedUser(val user: User): UserWrapper()
}

Creating a sealed class for the sole purpose of avoiding the use of null introduces unnecessary boilerplate code.

Don’t get me wrong, sealed classes are one of my favorite features of Kotlin though, and are great if you need to handle more scenarios than just initialized or uninitialized, but if that’s all you need, then using null is a valid approach.

Using a Nullable Field

val user : User?

Using a nullable field is much more concise in your definition than a sealed class.  It’s also more concise to use a ?. operator instead of an “if” or “when” statement to process your sealed class.

Offensive Programming

If you really want to, you can run around with a bunch of !! (double bangs) in your code.  However, you are living dangerously and your code will crash if the value is null.  This may be what you are looking for though if you are trying to follow practices of Offensive Programming.

//This will crash if the user is null
handleNonNullUser(user!!)

Defensive Programming has us cover all possible code paths just in case it might occur.  When you do have these extra code paths, provide some fallback logic or warning logs.

Ways of Handling Null

If you check once that the value is non-null, the Kotlin compiler is smart enough for you to write your code without providing any !!.  Then process the non-null val after it’s been checked once, to avoid multiple checks throughout my code. Here are some ways to do this:

Null Comparison 😐
if (user != null) {
  handleNonNullUser(user)
} else {
  Log.w(TAG, "user was null")
  handleNullUser(user)
}

This is very Java-esque, but it does the trick.

Let 🙂
user?.let {
  //Work with non-null user
  handleNonNullUser(user)
}

I like using let because it allows us to write much more idiomatic Kotlin.  It does not allow us to handle null, “else” case though.

Early Exit 👍
fun handleUser(user : User?) {
  user ?: return //exit the function if user is null
  //Now the compiler knows user is non-null
}

If the value is null, you can exit the method immediately, otherwise you can operate on the non-null value (because the Kotlin compiler is that smart).

Immutable Shadows 👥😲

Using immutable “variable shadows” a really cool way of providing null safety.  It will do an “Early Exit” if the value is null, otherwise it will assign the non-null value of the var to an immutable val allowing the compiler to know the value is non-null.  Thanks to Gabriel Peal for this tip!

var user : User? = null

fun handleUser() {
  val user = user ?: return //Return if null, otherwise create immutable shadow
  //Work with a local, non-null variable named user
}

Conclusion

There is no doubt that you will write better code if you try and stick with non-null and vals where you can. However, if you run into a scenario where using null is the right thing to do, then don’t fight it.

Code appropriately using one of the techniques I’ve shared in this article to handle null effectively.  These techniques allow you to avoid having to use the !! operator which can lead to NullPointerExceptions.  The whole point of having a nullable type in Kotlin is to allow you to avoid NullPointerExceptions at compile time, instead of them sneaking up on your at run time.

You may be thinking that this post is similar to Roman Elizarov’s post “Null is your friend, not a mistake“, and you would be right.  His post inspired me to finally publish this, and you can read more of the story behind publishing this post here.

Hitting Publish is the Hardest Part of Blogging

I had been sitting on the draft of my post “When You Should Use Null in Kotlin” since November (for 3 months) because after I had a colleague review it, I wasn’t sure if my views were valid.  My colleague told me about “null, the billion-dollar mistake” and asked if I was just trying to “stir the pot” with a possibly unpopular opinion. That made me question if my views were actually valid, so I didn’t hit “Publish”.

Draft was Last Modified 3 Months Ago

Validation

Earlier this month, Roman Elizarov (@relizarov), from the Kotlin libraries team posted an article which validated my thoughts I shared in my draft post, null is something to use, and not completely avoid:

I was excited to see a like-minded post from one of my software idols who designs the Kotlin language:

Chatting with Roman at Google I/O 2018

Thanks to this validation, I finally got up the courage to finish my post which took many hours and reviews, but I finally published my article. 😄 Thanks Roman (@relizarov)!

Non-null Opinions

I encourage you to share your opinion on topics where you have spent enough time digging into a topic to develop one.  So much of computer science is subjective, and there will always be varying opinions.  As long as you have identified reasons why you feel a certain way, those are valid.

It’s okay to share your thoughts.  Your opinion is non-null 😂.  Be humble enough to listen to others and allow yourself to use objective reasoning to help shape your understanding.

Leverage The Community

The Android community has varying opinions on many things, but that isn’t a bad thing.  There is no single way to do something, and whether or not something is the right solution depends on the use case, and the skills of the team.

Many members of the community are there to help.  I encourage you to reach out and ask for feedback from more than one person as it will help you get well rounded feedback.  Before I published the post I got feedback from @molsjeroen, @ataulm, @ZakTaccardi, @gpeal8 and @jarvisapps.  Each person had slightly different insights, and it helped me create a higher quality post.

A Checklist for Hitting Publish

  1. Write your content
  2. Add applicable content/images/code
  3. Review your content as if you were a reader
  4. Ask for reviews from 2+ people
  5. Address feedback
  6. Set a time limit (3? days)

I put together this checklist to help guide me in the future, and hope it will allow me to publish more posts!  I have at least 5 more drafts in my head that I need to get to next.  By publishing these articles, I’m able to get to the next one, and hopefully help someone publish theirs.

Kotlin + buildSrc for Better Gradle Dependency Management

Multi-module Android projects are now the recommended way to take advantages of performance improvements with Android Gradle Plugin 3+.  However, as we add more modules to our project, we quickly run into the issue of dependency management.

Different ways of managing Gradle dependencies:
  1. Manual Management
  2. Google’s Recommendation using “ext”
  3. Kotlin + buildSrc

1) Manual Management 👎

This is the way most of us have been managing dependencies, but it requires a lot of manual changes whenever you upgrade a library to ensure that versions are updated correctly.

module_a/build.gradle

implementation "com.android.support:support-annotations:27.0.2"
implementation "com.android.support:appcompat-v7:27.0.2"
implementation "com.squareup.retrofit2:retrofit:2.3.0"
implementation "com.squareup.retrofit2:adapter-rxjava2:2.3.0"
implementation "io.reactivex.rxjava2:rxjava:2.1.9"

module_b/build.gradle

implementation "com.android.support:support-annotations:27.0.2"
implementation "com.android.support:appcompat-v7:27.0.2"
implementation "com.squareup.retrofit2:retrofit:2.3.0"
implementation "com.squareup.retrofit2:adapter-rxjava2:2.3.0"
implementation "io.reactivex.rxjava2:rxjava:2.1.9"

This is a lot of duplicated configuration that is hard to manage upgrades with, especially when you have a lot of modules.

2) Google’s Recommendation: Using Gradle Extra Properties 🙂

This is Google’s recommended way of doing this as seen in the Android documentation.  It is also used in lots of Android projects, like ButterKnife and Picasso.

This method is great for upgrading libraries like the support library.  Every support library dependency has the same version number, so only having to change this in one place is 💯.  The same things goes for Retrofit, and many other libraries.

Root-level build.gradle

ext {
  versions = [
    support_lib: "27.0.2",
    retrofit: "2.3.0",
    rxjava: "2.1.9"
  ]
  libs = [
    support_annotations: "com.android.support:support-annotations:${versions.support_lib}",
    support_appcompat_v7: "com.android.support:appcompat-v7:${versions.support_lib}",
    retrofit :"com.squareup.retrofit2:retrofit:${versions.retrofit}",
    retrofit_rxjava_adapter: "com.squareup.retrofit2:adapter-rxjava2:${versions.retrofit}",
    rxjava: "io.reactivex.rxjava2:rxjava:${versions.rxjava}"
  ]
}

module_a/build.gradle

implementation libs.support_annotations
implementation libs.support_appcompat_v7
implementation libs.retrofit
implementation libs.retrofit_rxjava_adapter
implementation libs.rxjava

module_b/build.gradle

implementation libs.support_annotations
implementation libs.support_appcompat_v7
implementation libs.retrofit
implementation libs.retrofit_rxjava_adapter
implementation libs.rxjava

This is a huge step ahead from manual management, but IDE support is lacking.  Check out this screencast of migrating to use Gradle Extra Properties (“ext”), and this Github pull request of the results.

While you can be content with using “ext” properties, I think you will be excited to use Kotlin in a buildSrc directory.

3) Kotlin + buildSrc == Android Studio Autocomplete 😎 🎉

You can create a buildSrc module with Kotlin code to manage dependencies and get IDE completion support.

From the Gradle Documentation:

When you run Gradle, it checks for the existence of a directory called buildSrc. Gradle then automatically compiles and tests this code and puts it in the classpath of your build script. You don’t need to provide any further instruction.

You just need 2 files in your buildSrc module:

  1. build.gradle.kts
  2. Kotlin Code (In this case,Dependencies.kt)

buildSrc/build.gradle.kts

plugins {
    `kotlin-dsl`
}

buildSrc/src/main/java/Dependencies.kt

object Versions {
    val support_lib = "27.0.2"
    val retrofit = "2.3.0"
    val rxjava = "2.1.9"
}

object Libs {
 val support_annotations = "com.android.support:support-annotations:${Versions.support_lib}"
 val support_appcompat_v7 = "com.android.support:appcompat-v7:${Versions.support_lib}"
 val retrofit = "com.squareup.retrofit2:retrofit:${Versions.retrofit}"
 val retrofit_rxjava_adapter = "com.squareup.retrofit2:adapter-rxjava2:${Versions.retrofit}"
 val rxjava = "io.reactivex.rxjava2:rxjava:${Versions.rxjava}"
}

After we have done a Gradle Sync, following making the changes above, we can now access any of the values in Android Studio.

The result looks very similar to what “ext” looked like, but we have autocomplete and click support (to take you to the definition).

module_a/build.gradle

implementation Libs.support_annotations
implementation Libs.support_appcompat_v7
implementation Libs.retrofit
implementation Libs.retrofit_rxjava_adapter
implementation Libs.rxjava

module_b/build.gradle

implementation Libs.support_annotations
implementation Libs.support_appcompat_v7
implementation Libs.retrofit
implementation Libs.retrofit_rxjava_adapter
implementation Libs.rxjava

Check out this screencast and this Github pull request showing migration from Gradle Extra Properties “ext” to use Kotlin + buildSrc.

Conclusion

I highly recommend the “Kotlin + buildSrc” option.  It may not seem like it’s that big of a deal, but managing Gradle dependencies is a pain, and having autocomplete and click support is a game changer.  No more switching back and forth between files manually!

Related Caster.io Lessons on Gradle Dependency Management (FREE)

  1. Gradle Dependency Management: Using Gradle Extra Properties (ext)

  2. Gradle Dependency Management: Using Kotlin and buildSrc for build.gradle Autocomplete in Android Studio

Related Links

Hat Tips/Thanks

Questions/Comments?

Reach out to me on Twitter at @HandstandSam

How do I write static methods in Kotlin?

When I was starting to write Kotlin code, and one problem I faced was how the heck do I do static methods like I can add in Java?

The solution… The companion object in your Kotlin class.

class MyClass() {
  companion object {
    fun myStaticMethod() {
      //Do Stuff Here
    }
  }
}

Accessing this static method via Kotlin:

MyClass.myStaticMethod()

Accessing this static method via Java:

MyClass.Companion.myStaticMethod()

To avoid having to use the “.Companion” syntax, use the @JvmStatic annotation, allowing you to access the method without “.Companion”:

class MyClass() {
  companion object {
    @JvmStatic
    fun myStaticMethod() {
      //Do Stuff Here
    }
  }
}

Accessing this static method via Java and @JvmStatic:

MyClass.myStaticMethod()