Last week I showed you how to create a Kotlin Multiplatform project, and run it in a browser as JavaScript. This week, I wanted to show you how to export that exact same code as an XCode Framework that can be used within your iOS application.
Screencasts
There are 5 posts filed in Screencasts (this is page 1 of 1).
Intro to Kotlin Multiplatform JavaScript
One of the compilation targets of Kotlin Multiplatform is JavaScript. It’s pretty awesome that I can take the same Kotlin code and tools I write Android with, and write code that runs in a browser (or in Node.js).
Here is the video I’ve created to walk you through the creation of a Kotlin Multiplatform Project using the templates in Intellij IDEA, and what you can do to get your Kotlin running as JavaScript in the Browser!
Here are the code snippets mentioned in the video:
./gradlew build js(LEGACY) {
browser {
webpackTask {
output.libraryTarget = "this" // Will add to window
}
binaries.executable()
}
} fun printHi() {
println("Hello World Sam!")
}
fun main(args: Array) {
printHi()
} helloworldsam.printHi()Unlocking Biometric Prompt – Fingerprint & Face Unlock
AndroidX Biometric gives us a single API for supporting Biometrics on Android devices via the BiometricPrompt, and a fallback Fingerprint dialog for API 23-27. This post does a side-by-side comparison of what it looks like on the Pixel 4, Pixel 3, and an API 26 Emulator to show you what it looks like on different devices, hardware and different builder configurations.
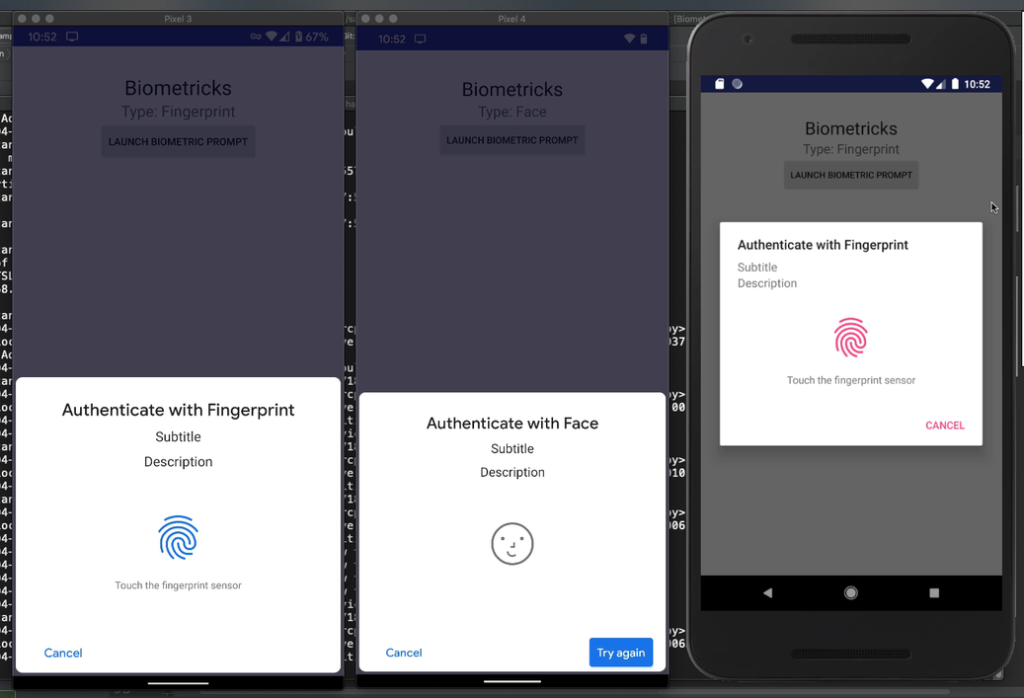
Currently, the Pixel 4 is the only device that supports Face Unlock via the Biometric Prompt. There aren’t even emulators that support it. I ended up with a Pixel 4, and wanted to create this post with you to save you some 💰 and⌚.
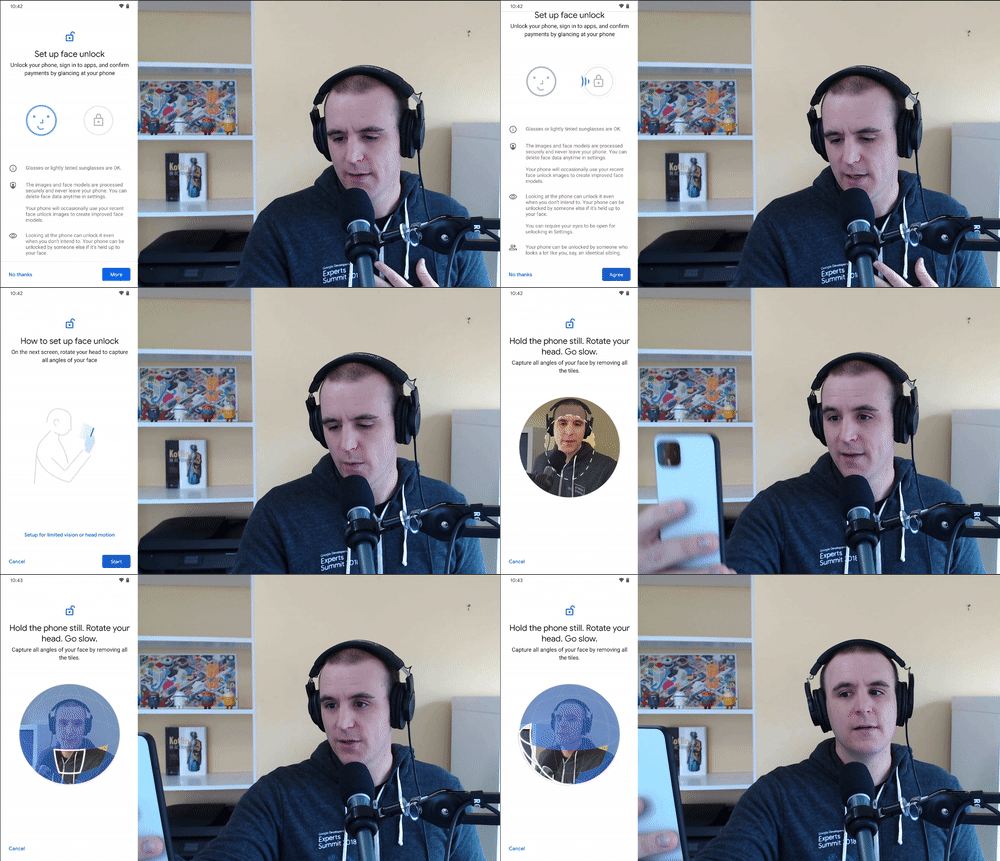
What is the Android Biometric Prompt?
The Android Biometric Prompt was released as part of the Android OS in API 28 (Pie) to replace the FingerprintManager. Its goal is to make a standard way of interacting with Biometrics via the operating system, and also support multiple types of biometric types such as Fingerprint, Face & TBD.
- August 2018 – Biometric Prompt Released & Fingerprint Manager Deprecated
- October 2019 – Pixel 4 with Face Unlock Released
- November 2019 – AndroidX Biometric Released
One of the downsides of the Biometric Prompt is that we are asked to use the terminology “Biometric” instead of “Fingerprint” or “Face” because the BiometricManager doesn’t tell us the type of biometric the user will use. Read more about how to provide better user experiences through tailored biometric messaging in my previous post.
Using AndroidX Biometric
I’m going to show you various configurations of the library in this post, but refer the documentation from Google for more information.
BiometricPrompt.PromptInfo.Builder()
 .setTitle("Authenticate with Face")
 .setNegativeButtonText("Cancel")
 .setConfirmationRequired(true)
 .build()
Face Unlock Success

Face Unlock Fail & Retry

Confirmation Required
There is a configuration parameter for Biometric Prompt Info Builder called “setConfirmationRequired” which, when set to false, passively authenticates the user without any interaction (other than looking at the phone). Note: This only works for Face Unlock since a Fingerprint is confirmation.
.setConfirmationRequired(false)

.setConfirmationRequired(true)

NOTE: There is a setting which allows a user to ALWAYS confirm when using Face Unlock, so be aware of that when building your applications.
Conclusion
Use AndroidX Biometric. It feels like they were still working out the kinks when they release Biometric Prompt in API 28. The AndroidX Library has some device specific workarounds and the fallback dialog for API 23-27. It’s weird that there isn’t better documentation about the user experience for each biometric type, which is why I wrote this post. Hopefully you won’t have to spend hundreds of dollars on a Pixel 4 now, and have a better idea of what the Biometric Prompt looks like under different configurations.
Links:
- AndroidX Biometric
- Android Documentation on Using Biometric Prompt
- “Overview of Biometric Auth” at Droidcon London 2019 If you want some background of how you would write code to use the Android Biometric Prompt, check out this talk from Michael Bailey (@yogurtearl).
- Learn how I create the GIFs in this post here.
Companion Video on AsyncAndroid
Android Device Mirroring and Recording
Mirroring and Recording what is on your physical Android Device to your computer isn’t trivial, but is an important skill to have as a developer. Being able to share and record what you see on your Android screen is super helpful for live demos, your GitHub PRs, and blog posts. There are a lot of ways to do this, but there is no perfect way of doing it. I’ll walk you through my flow in this post.
![]()
I used Vysor for a long time, and think it’s a great tool to use to mirror your device onto your computer. Vysor is really easy to use, but the free version does have feature limitations such as mirroring quality, and advertisements every 15 minutes. When I tried scrcpy with my development setup, I found that for me it worked the best out of any of the other tools to do this.
See the scrcpy GitHub page for all the instructions, but if you are on a Mac, already have “adb” configured, and have homebrew, then just run brew install scrcpy. After it’s installed you can just type “scrcpy” into your terminal and it’ll launch device mirroring.
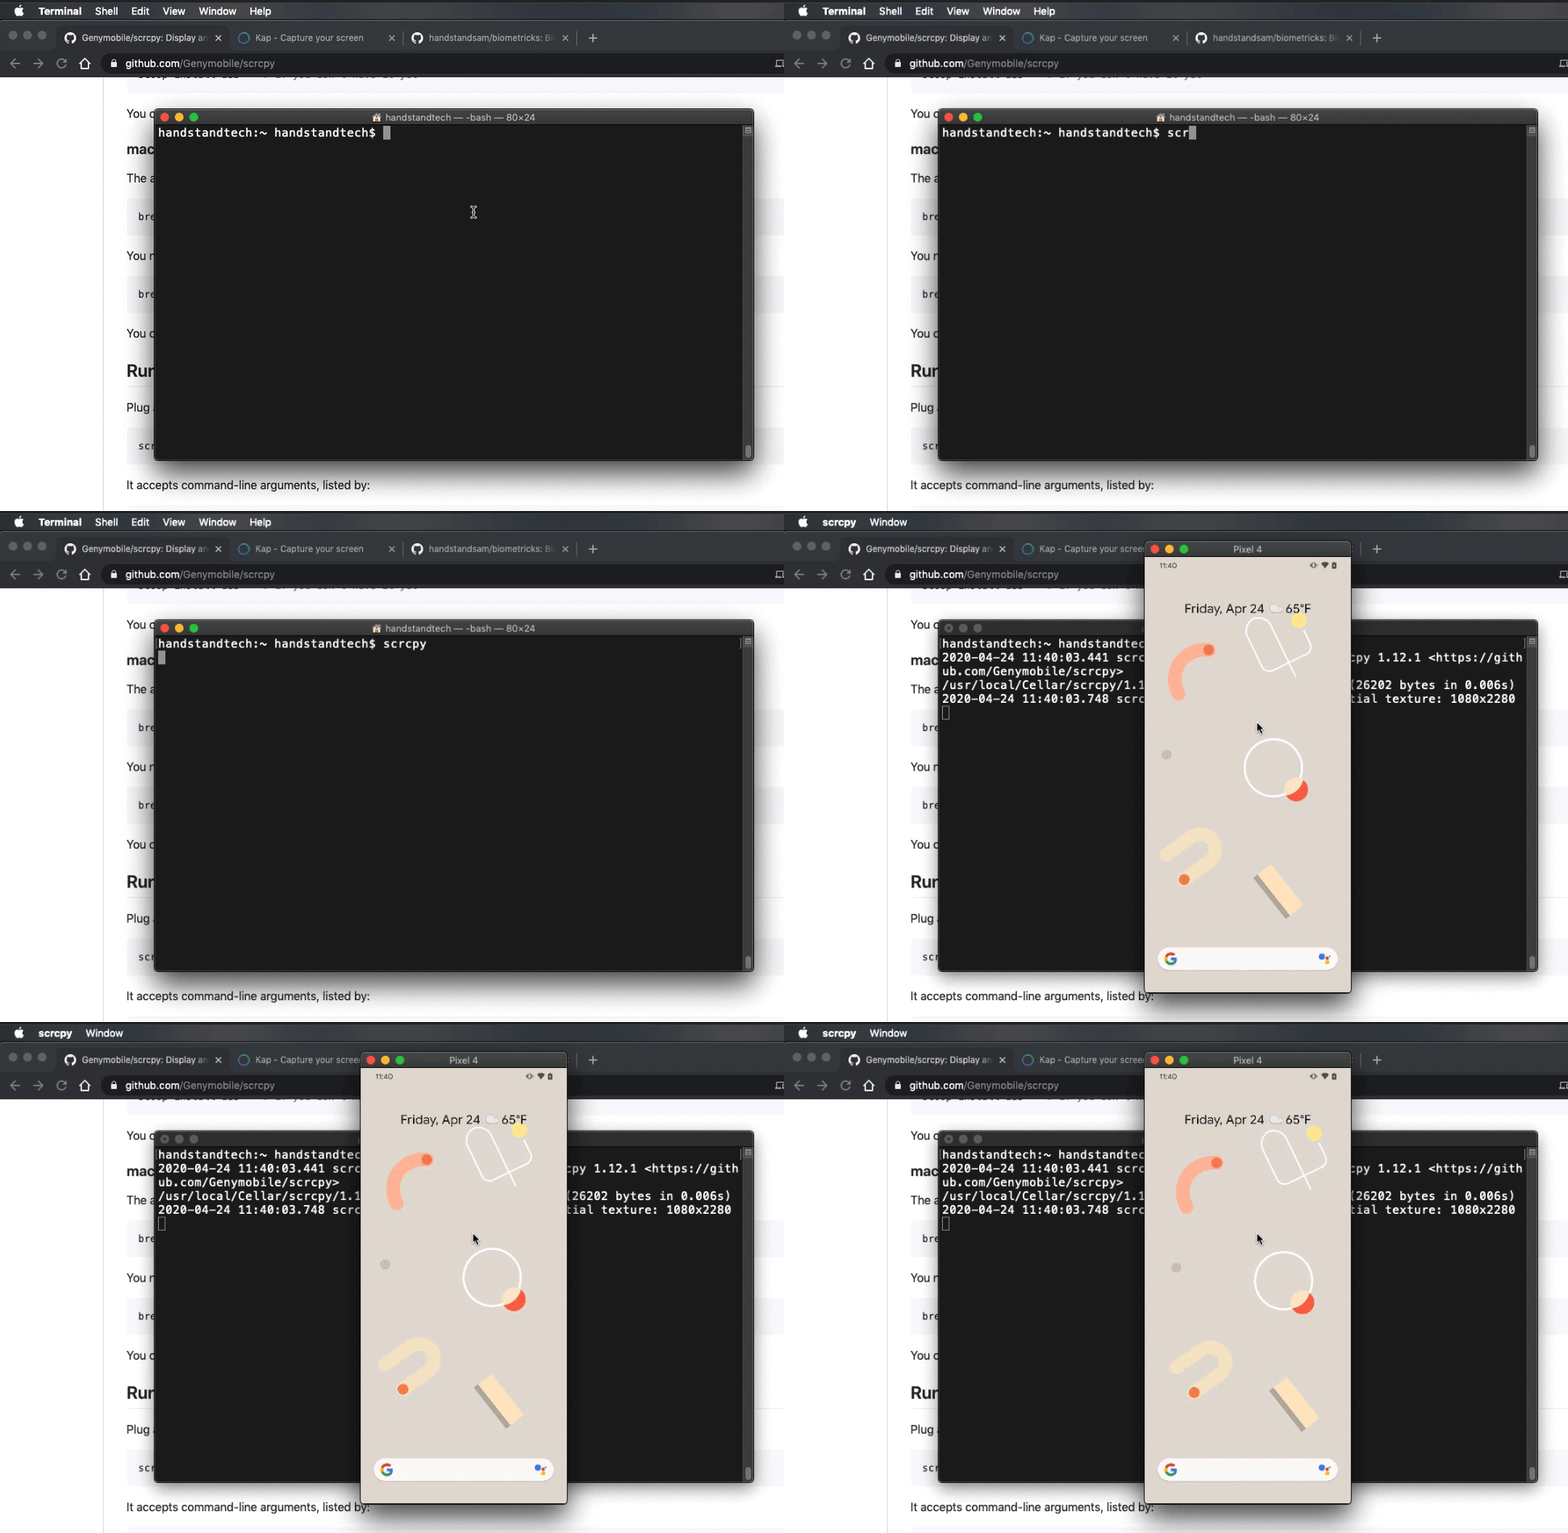
Now that you have your Android device mirroring on your computer, you need to record it. There are a lot of tools that allow you to screen record into a GIF, but I use Kap. You can launch Kap via the menu bar with this icon:
![]()
Then select an area of your screen manually,
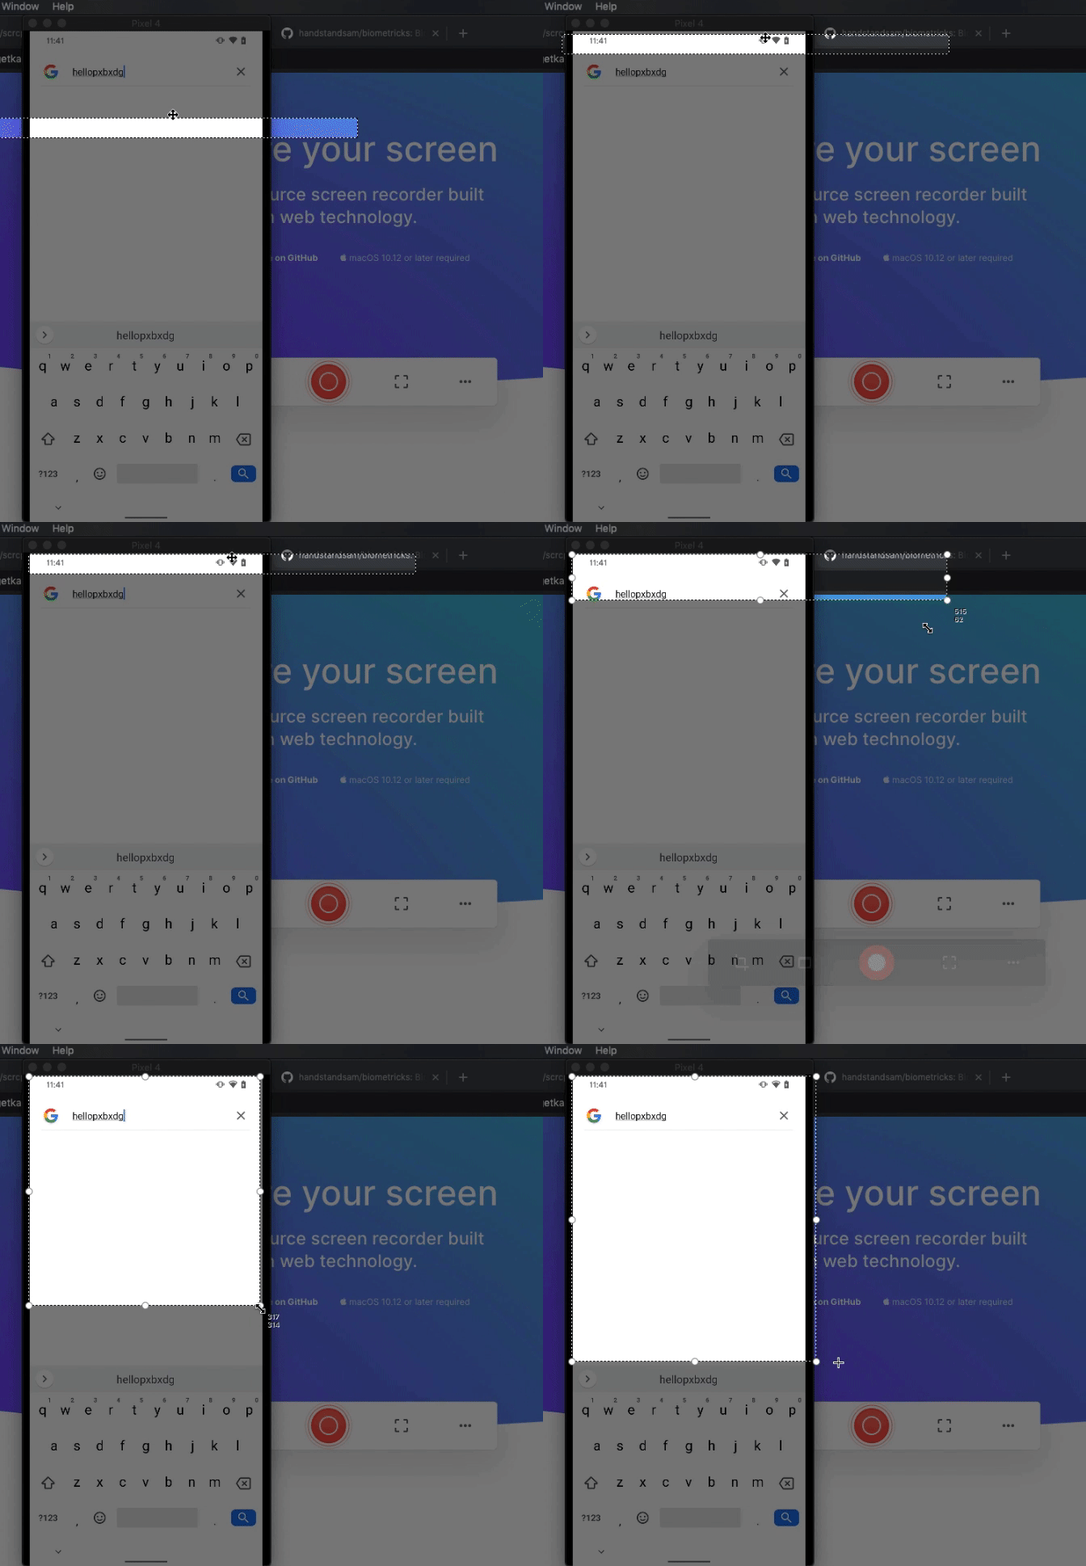
… or choose an open application window.

After you are done recording, stop the recording with the button in the menu bar.
![]()
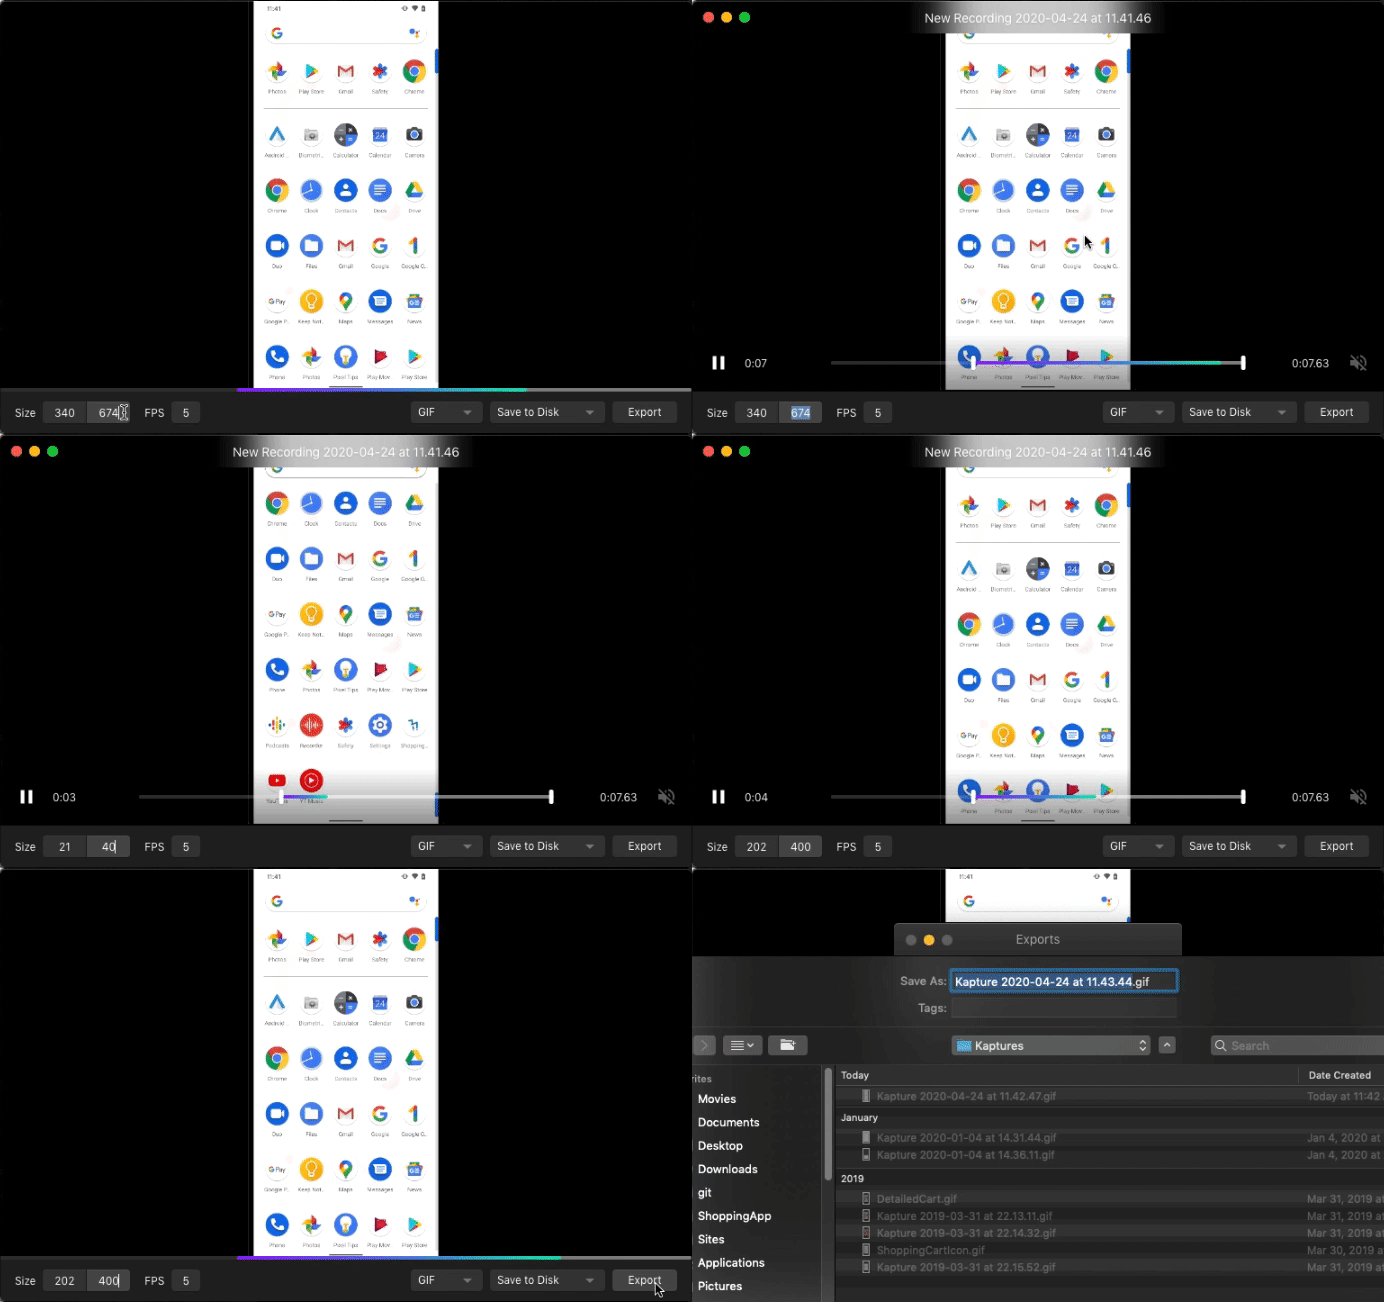
Trim your content, select resolution, frames per second (FPS), export format (GIF, MP4), and export!
Drag and drop the file into your GitHub PR. NOTE: 10MB is the limit for image attachments in a PR, so adjust your frames per second and image resolution to find the right size.
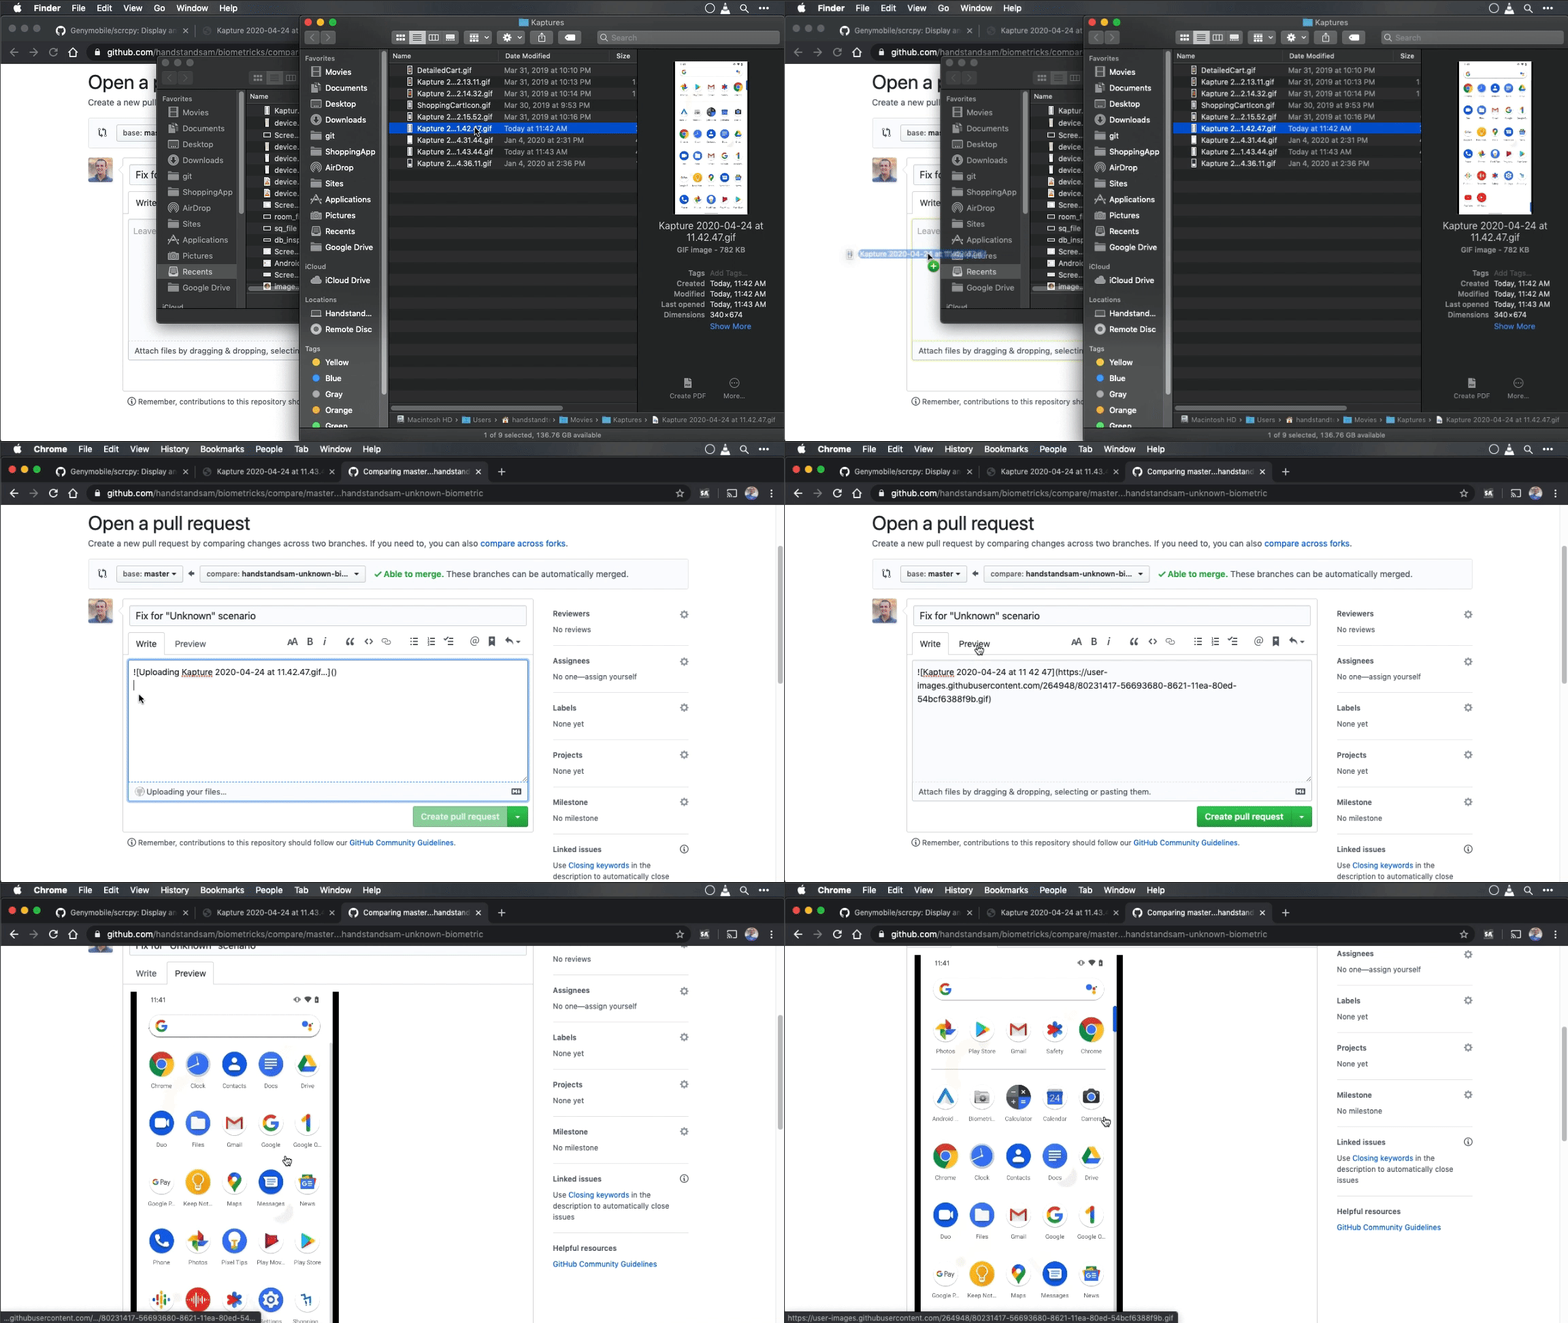
Your PR has a GIF of your device! 🎉 This makes your PR a lot easier to understand to a reviewer, and anyone looking back at this PR in the future.
Conclusion
Adding GIFs to PRs and blog posts really keep readers engaged. It especially did if you are actually reading this far 😎. I hope my you find my recommendations something that help your Android development and content creation!
Links:
- GenyMobile/scrcpy -> https://github.com/Genymobile/scrcpy
- Kap -> https://getkap.co
- Biometricks -> https://github.com/handstandsam/biometricks
- Vysor -> https://www.vysor.io/
- Android Studio -> https://developer.android.com/studio/index.html
Companion Video on AsyncAndroid
How to Record a Screencast on a Mac using Quicktime Player
One of the best ways to share technical knowledge with others is by showing them. Screencasts allow the viewer to see the exact steps you take to accomplish something, which I find to be very helpful. Also, by creating screencasts, you’ll save time by not having to show the same thing to multiple people.