Report of your Android App’s Permissions

Permission Awareness

Knowing what you ship to your users is key, and permissions are one part of it. If you just look at your src/main/AndroidManifest.xml file, and think that’s all the permissions you will be shipping to the Play Store, you may find your self surprised that it may not be true. Applications can declare permissions, but 3rd party libraries and modules can declare them as well. Only the final, AndroidManifest.xml that has been generated via the manifest merging process is the source of truth.

In this article I share how the merged manifest is created, where you can find it, and a small Python script I created to parse the file and print out a list of permissions.

What is the “manifest merge” process?

There is a “manifest merge” process which takes all libraries and modules that your application relies on which ends up generating the final AndroidManifest.xml file. Merging the manifest is important because dependencies you rely on can bring in extra permissions you don’t define in your application yourself.

Where do I get my merged AndroidManifest.xml file?

Option 1: Grab the merged manifest from the build directory.

  • Build your APK via Android Studio or the command line.
    • Example ./gradlew app:assembleRelease
  • Locate your merged AndroidManifest.xml in the build directory: app/build/intermediates/merged_manifests/release/AndroidManifest.xml

Option 2: (You only have the APK, but didn’t build it yourself)

  • Copy/paste the APK you have into Android Studio. Then open it, and view the AndroidManifest.xml. At that point, you can view it there, or copy out the contents to use with the script.
  • Alternatively you can use something like apktool if you don’t have Android Studio.

How do I view all the permissions?

If you are looking to just see if a single permission has been declared, just search through the large AndroidManifest.xml file.

How do I create a permission report?

Sometimes it is nice to know what all your permissions are in a nice clean way. There are thousands of ways you could do this, but I created a python script that creates a clean alphabetized list of all your permissions.

Example Output

android.permission.ACCESS_NETWORK_STATE
android.permission.ACCESS_WIFI_STATE
android.permission.CAMERA
android.permission.FOREGROUND_SERVICE
android.permission.INTERNET
android.permission.VIBRATE

Instructions

  • Download print_permissions_from_androidmanifest.py and place it in a directory.
  • Open your APK in Andorid Studio (by double clicking on it in your build folder)
  • Copy the contents of AndroidManifest.xml to the clipboard, and save it to a file named AndroidManifest.xml in the same directory as print_permissions_from_androidmanifest.py.
  • Run python print_permissions_from_androidmanifest.py

Conclusion

It’s nice to cleanly see what permissions you are requesting when you send your app. There are probably better ways to do something like this, and if you know of some, I’ll be happy to link them in this post!

Install Referrer Kotlin Extension

There isn’t a Kotlin Extension (KTX) library for Google Play’s InstallReferrer Library, so I wanted to share how I wrapped the API in a very Kotlin friendly way.

The Install Referrer API allows you to securely retrieve referral content from Google Play.  This can help you understand how you are acquiring new users in your app, and help you provide customized experiences tailored to where a user came from. For instance, if someone downloaded the app on a “New York” section of your website, you could open the “New York” section of the app on first app launch.

I hope this wrapper helps you!

https://gist.github.com/handstandsam/686a1bb551d0426b51dd612890f64986

Introducing “Saydle 🔊” – A Real-time Gradle Audio Notification Script for Mac OS

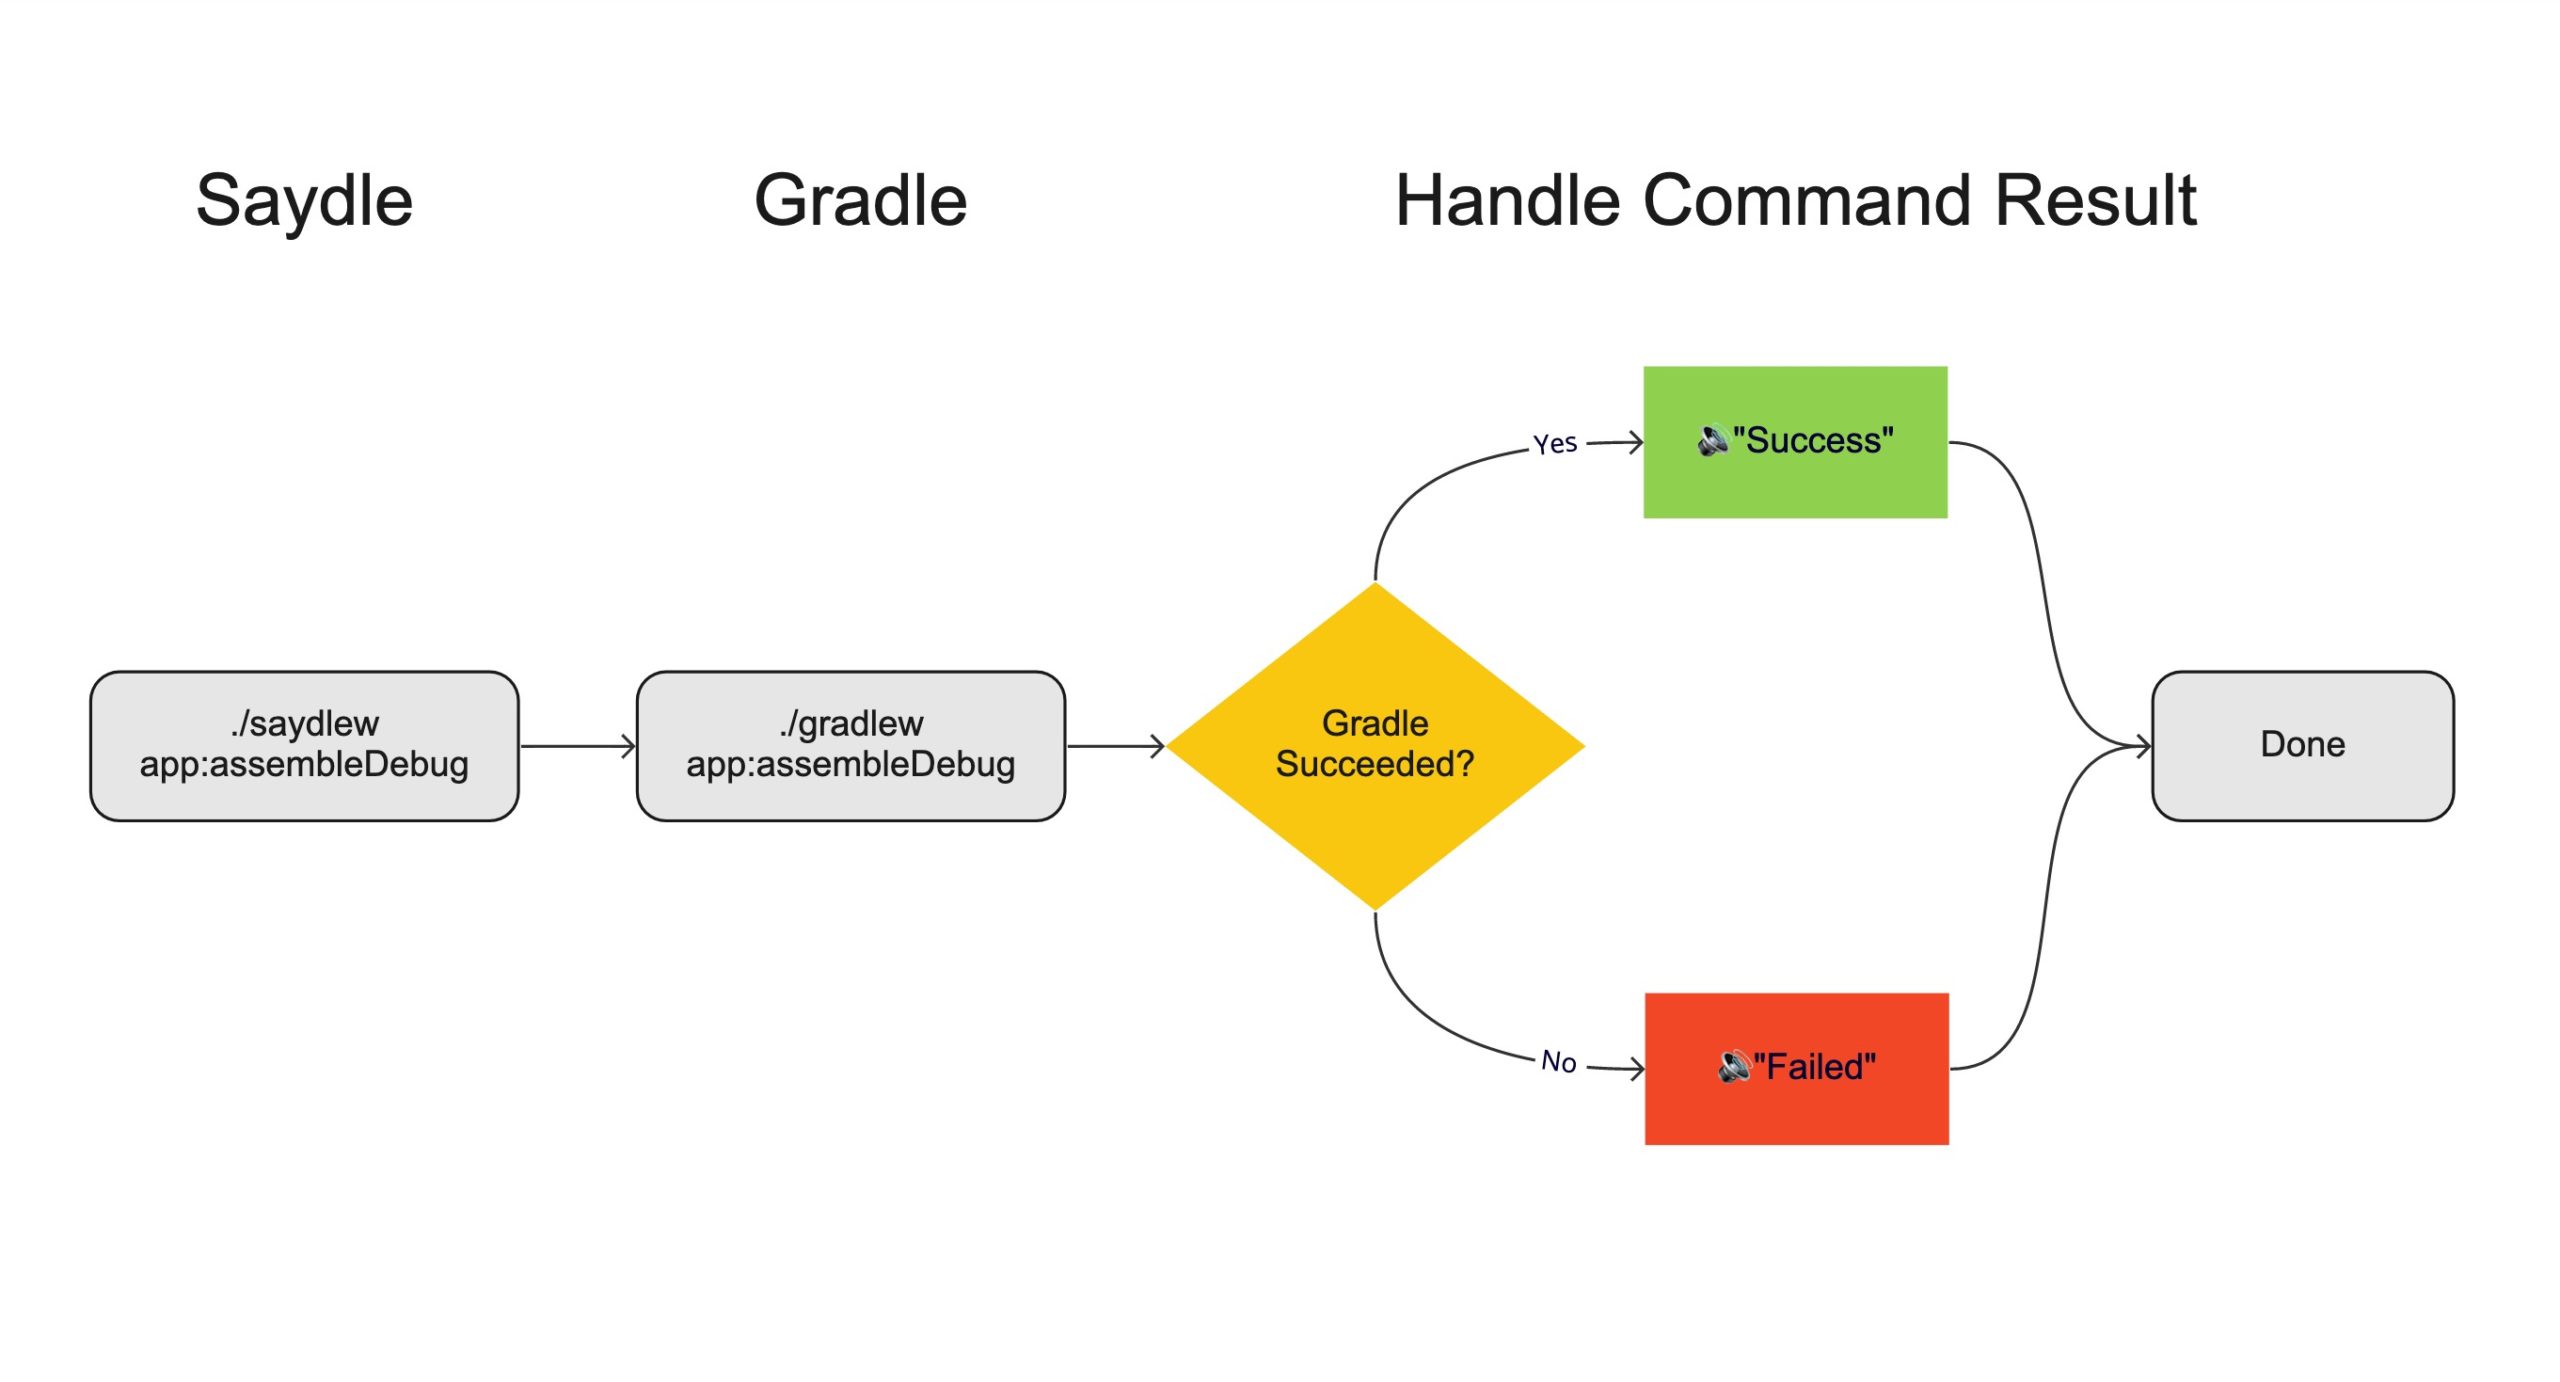
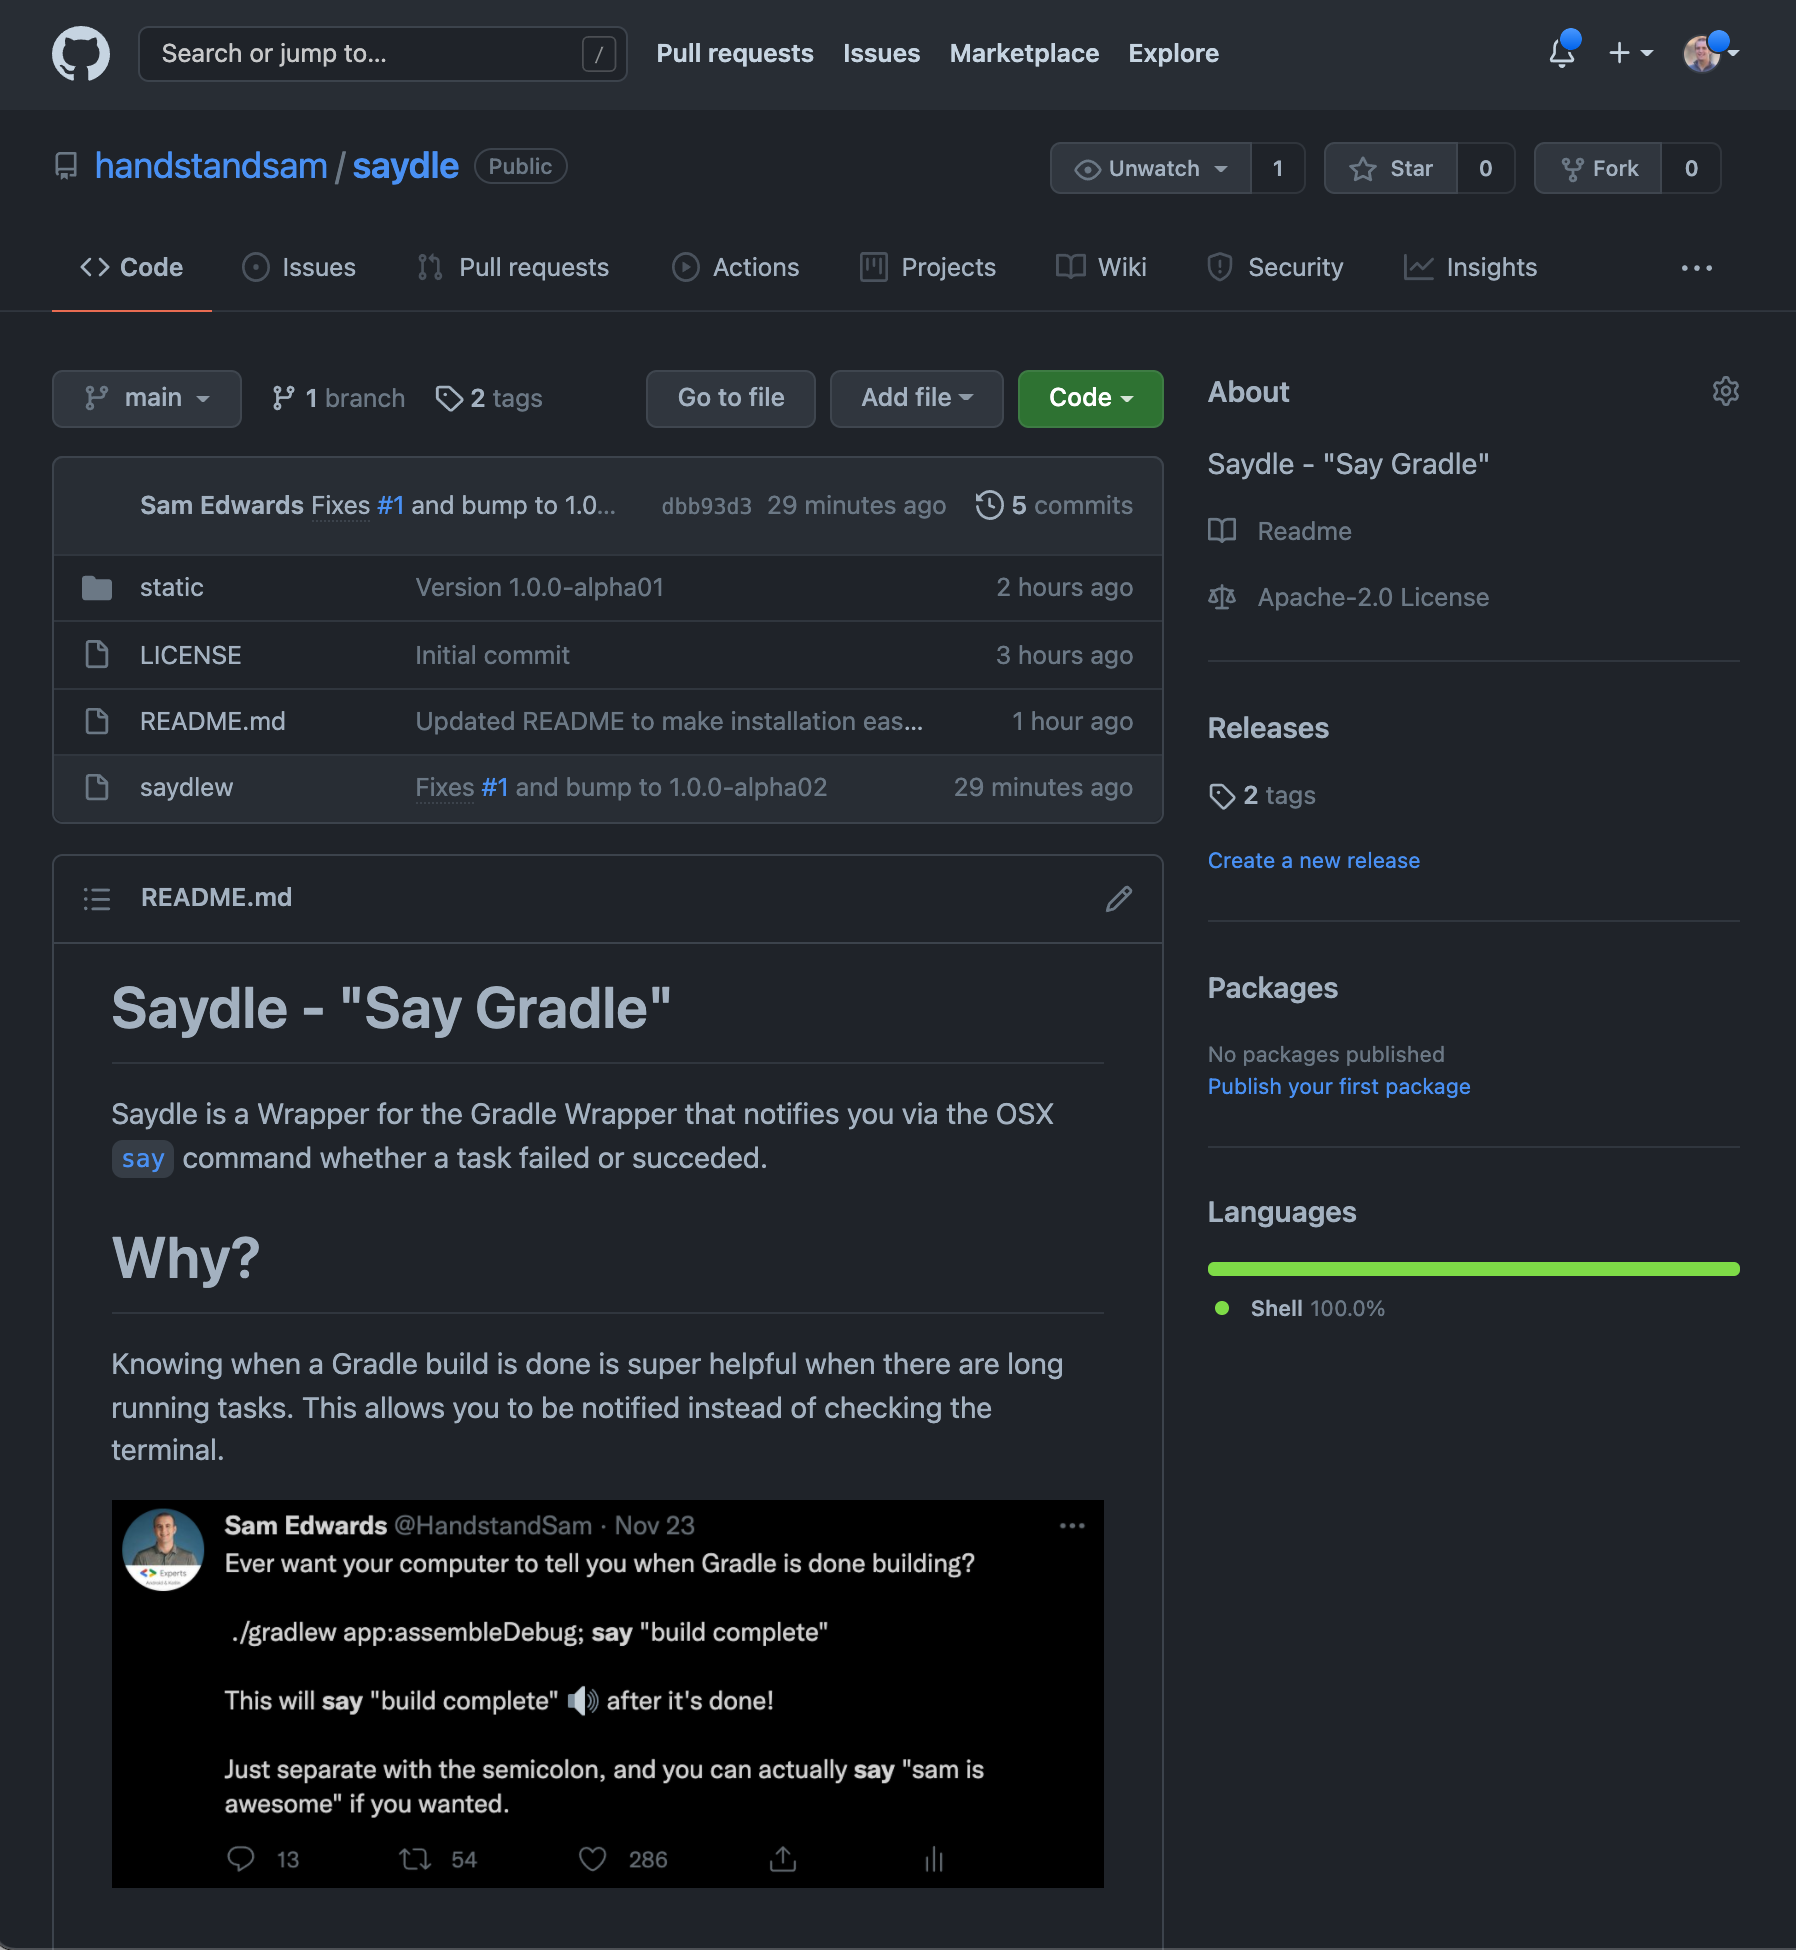
Saydle 🔊 is a Wrapper for the Gradle Wrapper (gradlew) that notifies you via the Mac OS say command whether a task failed or succeeded.

Why?

Knowing when a Gradle build is done is super helpful when there are long running tasks. This allows you to be notified instead of checking the terminal.

https://twitter.com/HandstandSam/status/1463207029007339520

How does it work?

  • Instead of using ./gradlew, use ./saydlew instead. That’s it!
  • Example: ./saydlew app:assembleDebug

Try It Out

Check out the install instructions on GitHub.

Saydle 🔊 on GitHub

Feedback?

Let me know what you think on Twitter at @Handstandsam, or report issues on GitHub.

Jetpack Compose – Text Shadows

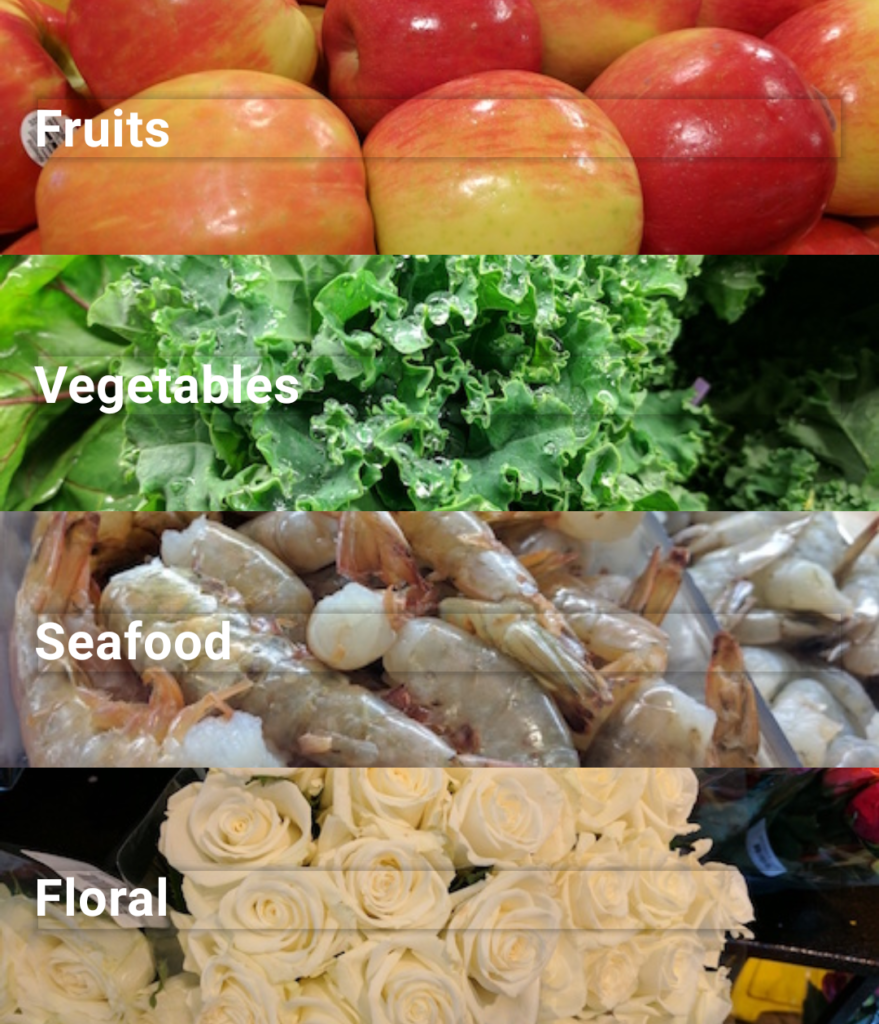
This post is a journey of the steps I took while figuring out how to do a Text Shadow with Jetpack Compose. If you want to skip the journey and just get the solution, jump to the end of the post!


As of version 1.0 of Jetpack Compose, Text Shadows don’t exist in the same way they used to on TextView. 😿

Adding a Shadow on a TextView looked like this:

<TextView
    android:id="@+id/text"
    style="@style/CategoryRowTitle"
    tools:text="Category" />
<style name="CategoryRowTitle" parent="TextAppearance.AppCompat">
    <item name="android:textSize">24sp</item>
    <item name="android:textColor">@color/white</item>
    <item name="android:shadowColor">@color/black</item>
    <item name="android:shadowDx">4</item>
    <item name="android:shadowDy">4</item>
    <item name="android:shadowRadius">8</item>
</style>

Adding a Shadow to Text in Jetpack Compose

You try can put a “shadow” on your Text Composable, but it’ll create a shadow behind the text container, not the actual characters. 🤔

Text(
    text = "Fruits",
    modifier = Modifier
        .shadow(elevation = 2.dp)
)

Creating a Custom Shadow in Jetpack Compose

I did my best to create a shadow myself by making a copy of the text, setting it to a dark color, and offsetting it by 2.dp.

@Composable
fun TextWithShadow(
    text: String,
    modifier: Modifier
) {
    Text(
        text = text,
        color = Color.DarkGray,
        modifier = modifier
            .offset(
                x = 2.dp,
                y = 2.dp
            )
            .alpha(0.75f)
    )
    Text(
        text = text,
        color = Color.White,
        modifier = modifier
    )
}

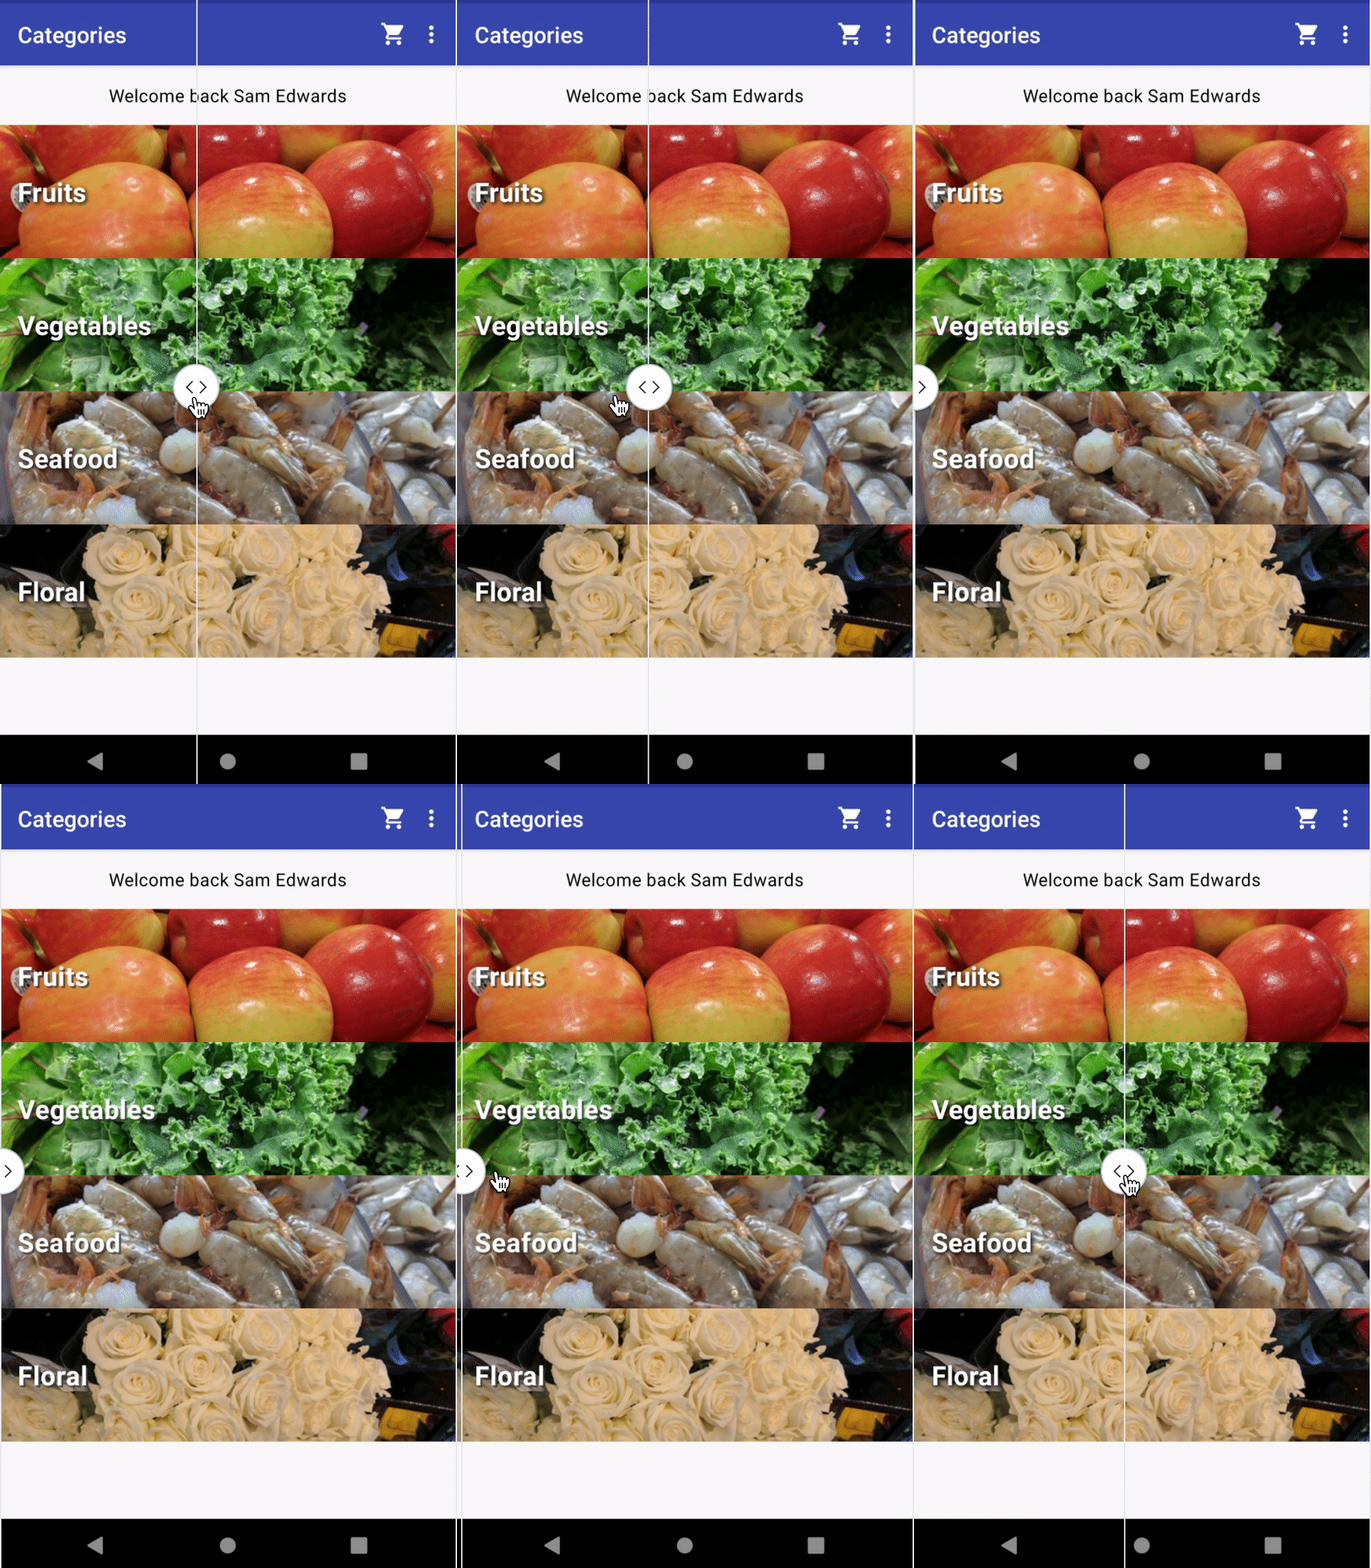
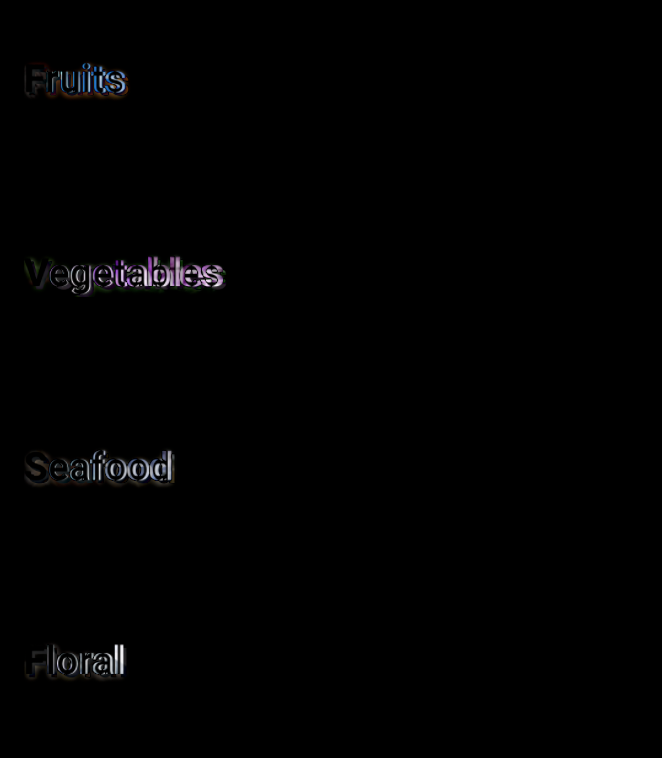
Looks great! But small differences.

Let’s Cheat and Use an AndroidView in Compose 😃

Compose has amazing interoperability with the Android View system. If something isn’t perfect in Compose, we can always just use the Android View version. Pixel perfect match! However, this wouldn’t work in Compose for Desktop because it keeps us tied to the Android View system.

@Composable
fun ComposeAndroidTextView(
    text: String,
    modifier: Modifier
) {
    AndroidView(
        modifier = modifier,
        factory = { context ->
            AppCompatTextView(context).apply {
                setTextAppearance(R.style.ItemRowTitle)
                this.text = text
            }
        }
    )
}

Let’s Try Again with Compose… StackOverflow? 🤔

I did find this Stack Overflow post that was similar, but not exactly what I needed. Here is what it had:

val textPaintStroke = Paint().asFrameworkPaint().apply {
    isAntiAlias = true
    style = android.graphics.Paint.Style.STROKE
    textSize = 64f
    color = android.graphics.Color.BLACK
    strokeWidth = 12f
    strokeMiter = 10f
    strokeJoin = android.graphics.Paint.Join.ROUND
}

val textPaint = Paint().asFrameworkPaint().apply {
    isAntiAlias = true
    style = android.graphics.Paint.Style.FILL
    textSize = 64f
    color = android.graphics.Color.WHITE
}

Canvas(
    modifier = Modifier.fillMaxSize(),
    onDraw = {
        drawIntoCanvas {
            it.nativeCanvas.drawText(
                "Sample",
                0f,
                120.dp.toPx(),
                textPaintStroke
            )
            it.nativeCanvas.drawText(
                "Sample",
                0f,
                120.dp.toPx(),
                textPaint
            )
        }
    }
)

What’s the Perfect Way to Match a TextView Shadow with Compose?

I’m not really sure. Update: I figured it out thanks to Antonio Leiva!

style = MaterialTheme.typography.h4.copy(
    shadow = Shadow(
        color = shadowColor,
        offset = Offset(4f, 4f),
        blurRadius = 8f
    )
)

I wanted to share my journey in figuring this out, but also thank everyone in the community for helping find the “right” way to do it in compose!
DIY Projector Movie Theater for $545.34

This post goes into the setup I ended up with for my DIY Movie Theater. I’m not an A/V purist, so take that into consideration.

The original reason I wanted to get a projector was so I could watch a movie outside with my kids, but then it snowballed a bit. The budget projectors in the $100-$150 range didn’t have great reviews, and I wanted something a little better. This post shows what I ended up with that is now hobbled together. It works pretty great, after some trouble shooting.

Problem 1: Dolby Digital Audio

These cheaper projectors can’t process audio when it is encoded for 5.1 surround sound. When I played a kids show like “Mickey Mouse Clubhouse”, the projector played sound fine, but when I tried a movie, there was no audio at all. I went down a few rabbit holes, but finally figured out that the projector couldn’t handle Dolby Digital Audio.

I thought that bluetooth could help here, but that doesn’t work with dolby audio either, and the bluetooth audio just didn’t hold up at high volumes. It would sometimes make cracking noises.

In order to listen to something with Dolby Digital Audio, you’ll have to strip out the audio before it gets to the projector. Some people would use a stereo receiver, but I got an HDMI audio extractor and that does the trick. It’s another adapter to bring along, but allows the audio to be pulled from the HDMI signal, but then allows the HDMI signal to carry on to the projector.

Problem 2: Video Source

The projector I got doesn’t have any software on it like Chromecast or Roku, so you’ll have to bring that yourself. That works well if you’re in range of your WiFi signal, but if you go away from there, be ready to have something that hooks offline via HDMI, or USB. Another thing to note is that you may think your Phone can just be mirrored to the screen, but many video apps will show a blank screen for it.

It Finally Works! 🧟

We just finished watching The Mandalorian on Disney+ on the “Movie Theater”, and it was a MUCH better experience than watching it on our 55 inch 4k TV (That we had got on sale for $330 2.5 years ago). Having it on a big screen just really makes it something you “feel” instead of just “watch”.

The Hardware

TOTAL Price: $545.34

Final Thoughts

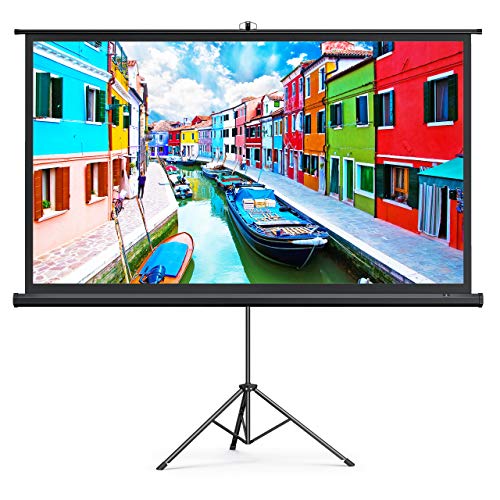
The projector quality at 1080p is good, but it’s not REALLY good. It’s enough for me though, and we control the amount of light in the basement, so the picture is nice. I got the soundbar later on after trying some bluetooth speakers, and that made a huge difference. Having a large, high quality projector screen is critical, but if you have weak sound, it’s just not the same.

The Best Way to Collect a Flow in Kotlin – launchIn

At some point you’ll need to collect (receive items) from a Flow (reactive stream) within a Kotlin Coroutine.  More than likely you will use a launch on a CoroutineScope, and then collect like this:

scope.launch {
  flow
    .onEach { println(it) }
    .collect()
}

This works great, but there is a better way for most use cases. It’s using a function called launchIn. What’s launchIn? It’s just shorthand to do what you did above. This is the equivalent logic as above, but using launchIn.

flow
  .onEach { println(it) }
  .launchIn(scope)

This is less code to write, but more importantly it’ll get you out of some hard to debug situations when collecting from Flows. The non obvious thing to understand is that collect() will block the coroutine until the flow has finished emitting. This behavior is sometimes desired, but for me it’s not in most cases.

In the example below, you’d think that both Flows are being collected at the same time, but flow1 is collected until the Flow finishes emitting, and then flow2 is collected until it is finished emitting.

scope.launch {
  flow1
    .onEach { println(it) }
    .collect()
  
  // Will not run until flow1 finishes emitting
  flow2
    .onEach { println(it) }
    .collect()
}

To collect both in parallel, you’d need to write this:

scope.launch {
  flow1
    .collect { println(it) }
}
scope.launch {
  flow2
    .collect { println(it) }
}

This is where launchIn comes to the rescue to make this reach much easier in my opinion. Here is the equivalent using launchIn:

myFlow1
  .onEach { println(it) }
  .launchIn(coroutineScope)
myFlow2
  .onEach { println(it) }
  .launchIn(coroutineScope)

I like launchIn because it’s less code to write, I don’t have to have indentation, and I just found it easier to understand.

In no way does this mean that the normal launch() and collect() aren’t great things to use, but for most use cases, I’d suggest considering using launchIn().

Kotlin Actors – No Drama Concurrency

Kotlin Actors are part of the Kotlin Coroutines library. I’ll walk you through the reasons why I use Kotlin Actors to achieve concurrency, while leveraging Coroutines to process reactive events in unknown order.

Concurrency?

  • Allows events to happen out-of-order or in partial order, without affecting the final outcome.
  • This allows for leveraging parallel execution without giving up determinism.

Why Does Android need Reactive Programming?

  • Click Events
  • Intents
  • Networking Requests
  • Disk Writes
  • etc.

Kotlin Coroutines?

Essentially, Kotlin Coroutines are light-weight threads. They are launched in a context of some CoroutineScope.

Kotlin Actors?

  • A Single Kotlin Coroutine
  • Processes incoming Messages
  • Backed by a Channel
  • Concurrent

Actors receive Messages (Intentions) via a Channel

Channels are the only way to safely communicate across Coroutines.

This example implements a Shopping Cart Dao from my GitHub Project ShoppingApp. I’ve created a type called Intention which are sent across the channel as messages. The intentions represent actions I want to perform, but keep my data thread safe.

sealed class Intention {
    class FindByLabel(
        val label: String,
        val deferred: CompletableDeferred<ItemWithQuantity?>
    ) : Intention()

    class Upsert(val itemWithQuantity: ItemWithQuantity) : Intention()

    class Remove(val itemWithQuantity: ItemWithQuantity) : Intention()

    object Empty : Intention()
}

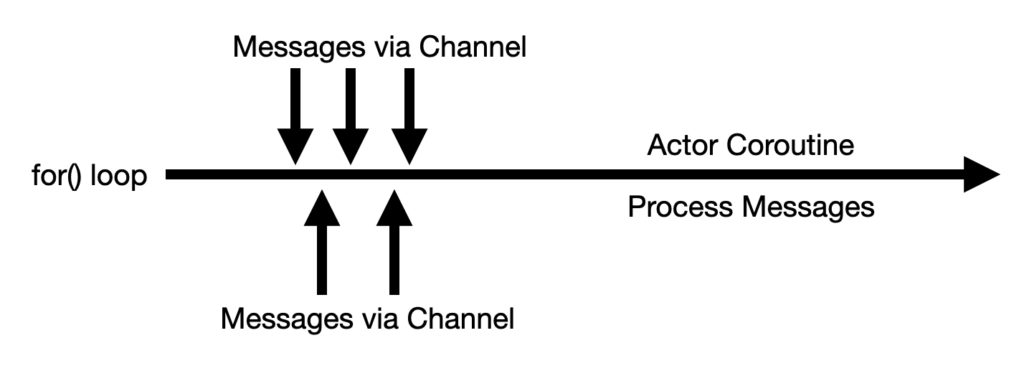
Actors Process Messages Sequentially in a for() loop

These messages (Intentions) come in across a Channel from other Coroutines, get queued, and then get processed by the Actor sequentially to achieve concurrency.

scope.actor<Intention> {
    for (intention in channel) {
        // Process Messages/Intentions
        when (intention) {
            is Intention.FindByLabel -> {
                // ...
            }
            is Intention.Upsert -> {
                // ...
            }
            is Intention.Remove -> {
                // ...
            }
            is Intention.Empty -> {
                // ...
            }
        }
    }
}

Sending Messages to the Actor – send() vs offer()

To send messages to the actor, you send a message to it using actor.send(intention) or actor.offer(intention). Here are the differences between them (from the Kotlin documentation of SendChannel).

CompletableDeferred to await() Results

We send in messages to the actor, but sometimes we want to wait for a result once the message has been processed by the actor. We use CompletableDeferred to do this. We await() the result, like in this example where we are querying for a value:

class FindByLabel(
    val label: String,
    val deferred: CompletableDeferred<ItemWithQuantity?>
) : Intention()
// ---
val deferred = CompletableDeferred<ItemWithQuantity?>()
actor.send(
    Intention.FindByLabel(
        label = label,
        deferred = deferred
    )
)
val result : ItemWithQuantity? = deferred.await()

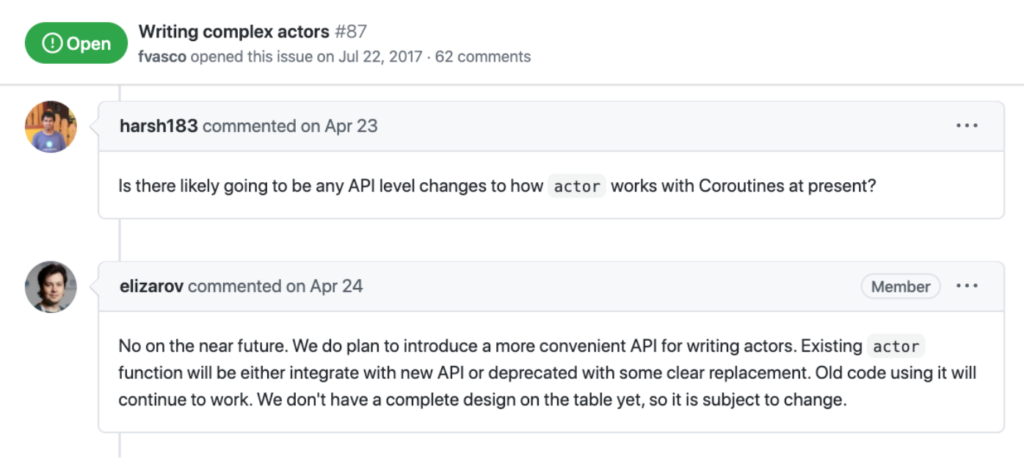
Aren’t Actors Marked with @ObsoleteCoroutineApi?

Yes, but complex actors will also support the same use cases, and there will be a clear path. Also, there is no planned replacement at this point. See the response from the Kotlin Coroutines tech lead from the GitHub issue:

Video & Slides

I was able to present this to Boston Android meetup group and 18 other meetup groups on Tuesday, July 14th which was an amazing experience. The video will be available soon and I’ll be sure to put it here. Here are the slides for now.

Links

Where Should I Put Kotlin Code in an Android Project?

Based on the results of a poll of 371 Android developers, the majority of responses endorse using “src/main/java” for Kotlin code in Android only projects.  My answer is always it depends, but let’s see why you would use “src/main/java” the majority of the time, and why you’d want to use “src/main/kotlin” in some cases.

Why src/main/java?

79% of people say it should go in “src/main/java”.  Here’s why:

  • The official documentation Android Developer Documentation recommends it, and shows additional configuration you must add to support a “src/main/kotlin” source set.
    android {
       sourceSets {
           main.java.srcDirs += 'src/main/kotlin'
       }
    }
    
  • When you create a new project Kotlin project in Android Studio, it uses “src/main/java” as the location for your Kotlin code.
  • I personally really like it for the reason that all of your source is in a single place, making it easier to find related code in a project mixed with Java.  This can help maintain consistency to have all your code in one location for any project that has or had Java code in the past.
  • There are no longer issues with the Kotlin Gradle Plugin which prevented you from mixing Kotlin and Java code in the same directory.

Why src/main/kotlin?

21% of people say it should go in  “src/main/kotlin”.  Here’s why:

  • Some projects like the clean separation of the languages into different directories.  While this is nice idea, from a pragmatic standpoint, having all your code in a single place is the ideal for discovery and browsing in my opinion.
  • Some projects are 100% Kotlin, so having this directory structure clearly calls this is a single to only write code in Kotlin.  This comes with the configuration overhead of each module, but if you share Gradle config between multiple projects, you’d only have to do this once.
  • OkHttp does it, but realize this is because it’s a Kotlin only project that is meant to be used on multiple platforms (including the JVM & Android).

Kotlin Source Sets beyond Android

The answers above only apply for Android only projects.  Kotlin is more than just a programming language used on Android.  It’s being used for Kotlin Multiplatform to create code that runs on iOS, it’s used in Kotlin Native to get blazing fast, low level speed and Kotlin JS to run in your Node server or web application.

You can see how some Kotlin Multiplatform projects are using source source sets such as “commonMain” where common code used for all platforms is kept, and then you can have additional source sets like “iosMain” for platform specific implementations.

I’m not going to pretend that I’m a Kotlin Multiplatform expert, but check out the official documentation, and the KaMPKit Github Repo from TouchLab to see a sample project of Kotlin Multiplatform.

Toggling to your Debug Activity

Toggling to your Debug/Diagnostic Activity made easy.
android:taskAffinity=”com.handstandsam.app.diagnostic”

AndroidManifest.xml, Activity declaration, add a taskAffinity property…

<activity
    android:name="com.handstandsam.app.diagnostic.DiagnosticActivity"
    android:icon="@drawable/ic_launcher_diagnostic"
    android:label="Diagnostic"
    android:launchMode="singleTask"
    android:taskAffinity="com.handstandsam.app.diagnostic"
    android:screenOrientation="portrait"
    android:theme="@style/AppTheme">
    <intent-filter>
        <action android:name="android.intent.action.MAIN" />
        <category android:name="android.intent.category.LAUNCHER" />
    </intent-filter>
</activity>    

I just had a breakthrough regarding the definition of debug activities in your app. If you specify a different taskAffinity for your debug activity, it’ll show appear in your task launcher like a separate app allowing you to toggle back and forth, making it super easy to jump around.

Thanks to the library Chuck for using this method so I was able to figure out! https://github.com/jgilfelt/chuck/blob/master/library/src/main/AndroidManifest.xml

Determine TLS Version & Cipher Suite Used in OkHttp Calls

Working with SSL Handshakes is no fun (to an application developer like me), but with an OkHttp 3 Interceptor, and the nicely typed TlsVersion and CipherSuite objects, it becomes a lot less painful.

If you want to know which TLS version and Cipher Suite was ACTUALLY used for a specific request, use this OkHttp 3 Interceptor:


You’ll get Logcat output that looks like this:

OkHttp3-SSLHandshake: TLS: TLS_1_2, CipherSuite: TLS_ECDHE_RSA_WITH_AES_256_CBC_SHA

With OkHttp 3, you can specify what TLS version(s) and Cipher Suite(s) you want your calls to support (But it only works on Lollipop and higher).

Check out the OkHttp 3 documentation on HTTPS for more info.

Note: You can get newer versions of TLS (Like 1.1 and 1.2) working on < Lollipop, but that has to be done outside the OkHttp 3 configuration unfortunately. See how to do that here.  Maybe this is a good reason to bump your minSdk to 21 🙂