Compose for Web (WASM) – What and Why?

As a former web-developer myself, I still gravitate back to browser-based UIs. They are so easy to access from anywhere, and are globally available. It’s hard to argue the utility of the amazing web platform. Compose for Web (WASM) is the latest technology in Kotlin Multiplatform and I’m pretty bullish about it.

In this post I’ll take you through what it is and why I think it’s going to be pretty big.

My Past Explorations into Kotlin + Web

I have previously dabbled in Kotlin Multiplatform for JavaScript and Compose HTML in my ShoppingApp project. I find them both very exciting, but I’ve only seen them useful in limited use cases.

I’ve started digging to Compose for Web (WASM), but wanted to give some context to start as there are similarly named things and disambiguation is needed.

Kotlin/JS

This JavaScript (Kotlin/JS) compilation target is here to stay, and is useful not only in the browser, but for backends using Node.js. This technology allows code to be compiled to JavaScript, but doesn’t have any concept of UI itself.

Kotlin/JS is great for complex business logic so it doesn’t have to be re-written and tested in multiple languages.

Kotlin/JS is not so great at size (KBs), and therefore a hard sell to use in Web UIs. I pitched some password validation rule logic to a set of Angular web devs and was told that the JavaScript that was generated was over 10x the size it would be if they wrote it in typescript. That was fair, but I can see the argument tipping the other way if there is really complex business logic. At that point, the consistency and maintainence costs can be more important than page load time (which should get better as time goes on). Note: The reason why the generated JavaScript is so large is because it needs to bring along the Kotlin Standard Library (stdlib), implemented in JS. That is an upfront cost though, so adding additional logic should be fairly linear.

Compose HTML (Previously “Compose for Web”)

Compose HTML allows the compose runtime to render HTML elements. While very cool from a technical standpoint, the marketing behind this has fizzled out (rightfully so) to try and make room for “Compose for Web” (WASM), and create less ambiguity. You can see in this JetBrains blog post first announcing it where it was branded “Compose for Web”, but is now specifically named Compose HTML to disambiguate.

This reminds me of Mosaic, which allows you to leverage the Compose runtime to create terminal apps.

Both are very cool from a technical standpoint, and allow you to leverage the Compose runtime, but you have to bind to platform specific UI elements. Because of this additional work, the developer friction will most likely prevent broader adoption.

Convergence on Compose Multiplatform UI

Jetpack Compose for Android had incredible investment for multiple years and created really solid foundational UI components. The goal is to reuse code that is already written for Jetpack Compose, and bring it to other platforms. That’s why JetBrains uses the same package and classnames in compose-multiplatform. These implementations of compose-multiplatform enable Kotlin Multiplatform UI for Desktop, iOS and now Web (WASM).

These additional (non-Android) multiplatform implementations render to a 2 Dimensional (2D) canvas using SKIA (similar technique used by Flutter). Note: As of very recently, Flutter now leverages the Impeller as the 2D rendering for better performance.

Because a developer can now code against a single set of Compose APIs that can render UIs across multiple platforms, the value is there to start seeing more use cases for Compose Multiplatform UI.

What is Compose for Web (WASM)?

Compose for Web (WASM) leverages Web-Assembly (WASM) to run native binaries in the browser. For browser based UIs, this is a very real future as it’s already supported in Chrome, Safari, Firefox and more. For myself (someone who does Compose UI development for Android), Compose for Web allows me to re-use my existing skills, and create UIs that can be shared via a URL. Not only that, but it is code that will be familiar to other developers on my team, and therefore make it more approachable and have better chance for success.

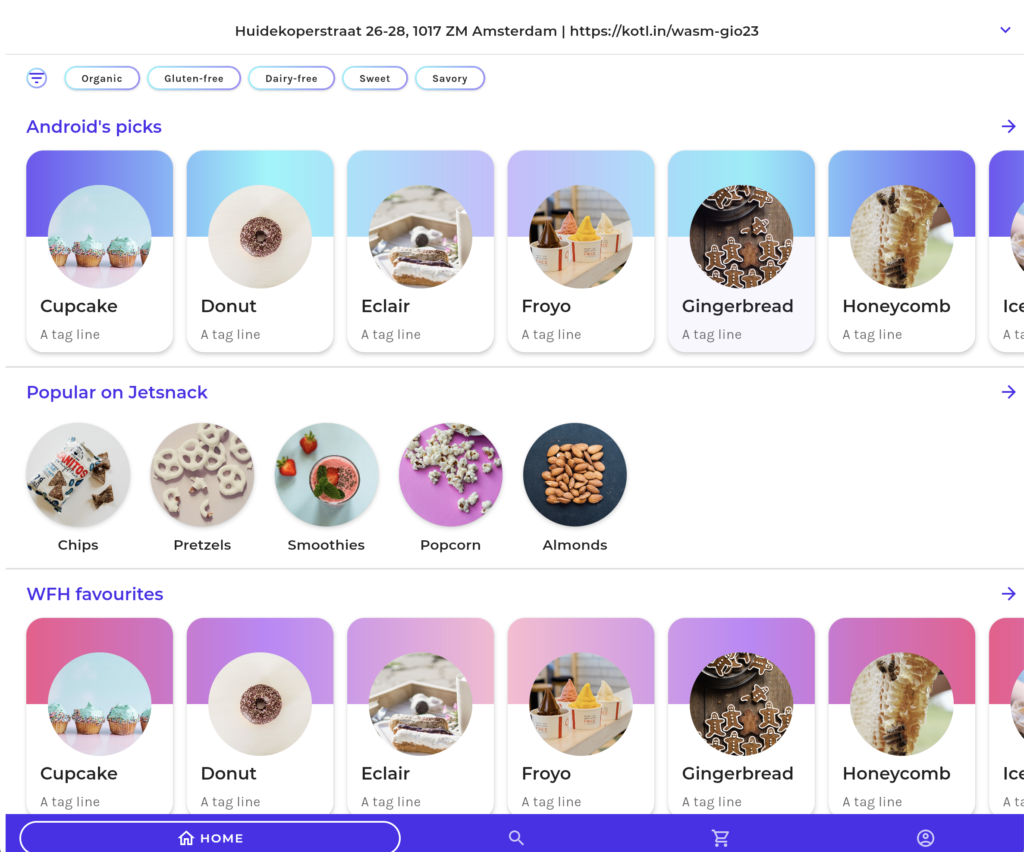
This Compose for Web technology is current incubating, but is really powerful. Run the samples and check it out, but there are animations and images, and gradients. It’s beautiful.

Getting a mobile developer to learn React requires a full paradigm shift and isn’t scalable. The same could be said about shifting to coding in Swift and iOS. Being able to create a consistent set of solutions on a single technology will drive adoption.

Why Compose for Web (WASM)?

I think this will be big for Kotlin developers to get their code running in a browser. I am currently building developer tools for small projects, and making them accessible to everyone in an organization is so much easier to do via a web url instead of having to download an APK and run it.

I have always wanted to share a design system library with others in an organization via a URL. That friction for installing an application is just so cumbersome.

Additionally, we can start to do many test/run cycles in the browser if that test/debug cycle story gets better. I already do that today with Compose for Desktop as it removes the need for a device at all. Android Studio’s Compose previews work great in some use cases, but other times it is nicer to run a bit more code via Compose for Desktop.

With WASM, we will get native performance with this technology, and soon be able to access system level APIs to make very powerful applications.

Next: Under The Surface of Compose for Web (WASM)

I want to dive deeper into Compose for Web (WASM). I’ve been running the samples locally and dived into the generated html, js and wasm files generated by the Compose for Web implementation. As I learn more I’ll share what I learn.

Other related articles I found after writing this:

To be continued…

Adding Compose to Existing Espresso Tests with createEmptyComposeRule()

As the documentation says, you can combine both Espresso and Compose in an Android instrumentation test. In order to interact with Compose in an instrumentation test you need a ComposeTestRule.

Problem

Typically you would create a ComposeTestRule with createComposeRule() in a part of your app that is compose only, but that will create a blank ComponentActivity and launch it showing a blank screen.

@get:Rule
val composeTestRule = createComposeRule()

This is great if you are looking to just use composeTestRule.setContent { Text("Hi")} in your test, but if you are integrating with an existing Espresso test, this will not be the case.

You could use the createAndroidComposeRule<MyActivity>(), however that will also use an ActivityTestRule underneath the hood and launch the Activity, which will change the behavior of your existing test. 🤔

@get:Rule
val composeTestRule = createAndroidComposeRule<MyActivity>()

Solution

If all you want to do is keep the Espresso test the same way it is, but also interact with some compose elements, use createEmptyComposeRule() and it will all work! 🎉

@get:Rule
val composeTestRule = createEmptyComposeRule()

Conclusion

Now you can interact with compose elements along with view elements, exactly like the documentation says. 😃

composeTestRule.onNodeWithText("Something").assertIsDisplayed()

Using Java Reflection with Kotlin Companion Objects

Kotlin companion objects allow you to add static data and methods associated with a class. This is similar to how Java has static fields and methods. The problem is that Java doesn’t really know what a companion object it, so trying to access one using standard Java reflection might make you go crazy. 🤪

package com.handstandsam

/** This is contrived example of a companion object */
class SpecialFeature {
  companion object {
    var enabled: Boolean = false
  }
}

The decompiled Java class (created by the Kotlin Compiler) results in this:

package com.handstandsam;

import kotlin.Metadata;
import kotlin.jvm.internal.DefaultConstructorMarker;
import org.jetbrains.annotations.NotNull;

public final class SpecialFeature {
   private static boolean enabled;

   @NotNull
   public static final Companion Companion = new Companion((DefaultConstructorMarker)null);

   public static final class Companion {
      public final boolean getEnabled() {
         return SpecialFeature.enabled;
      }

      public final void setEnabled(boolean var1) {
         SpecialFeature.enabled = var1;
      }

      private Companion() {
      }

      public Companion(DefaultConstructorMarker $constructor_marker) {
         this();
      }
   }
}

The Kotlin Standard Lib for Java has a really cool method called companionObjectInstance that allows you to grab an instance of the declared companion object from the KClass object.

Why is companionObjectInstance helpful?

When Kotlin is compiled to Java Class files, the companion object has a fully qualified class name of com.handstandsam.SpecialFeature$Companion.

Mapping Kotlin -> Java Byte Code can make your head hurt, so by using this companionObjectInstance helper method, we don’t have to figure out how to get an instance of the companion object, or figure out the fully qualified class name.

val companionObjectJavaClass = com.handstandsam.SpecialFeature::class.java
val companionObjectInstance = companionObjectJavaClass.kotlin
        .companionObjectInstance!!

Now that we have an instance of the companion object class, and know the Java class, we can use reflection to set the value of the enabled property on the companion object.

companionObjectInstance::class.java
    .methods
    .first { it.name == "setEnabled" }
    .invoke(companionObjectInstance, true)

Note: setEnabled is the name, and it is a method here. You might expect this to just be a property which is what I assumed, but when compiled to java byte code, it is marked private and has a getter and a setter.

Bonus: Accessing private properties using Java Reflection

You could alternatively use Java reflection to change the backing private static boolean enabled field directly if you choose.

If you wanted to set the private static field value itself, rather than calling the setter, you can grab the declared field, and set it to accessible which allows us to bypass the private visibility. This sort of thing is why the JVM can’t be considered secure as it can be modified at runtime.

val privateEnabledField = SpecialFeature::class.java.getDeclaredField("enabled")
privateEnabledField.isAccessible=true
privateEnabledField.set(companionObjectInstance, true)

Conclusion

Reflection is powerful, but confusing. I could have probably done this cleaner JUST using Kotlin Reflect and not Java Reflection, but in my case I wanted to use Java Reflection, but needed to interact with a Kotlin companion object. There is a lot of documentation on how to mix Kotlin + Reflection, so feel free to read up more there. Cheers!

Organizing @Composables

I saved this post as a draft on February 23, 2021 and never published it. Almost 2 years later this topic came up again, so I want to publish it as a current post to create discussion on the topic. Feel free to ping me on Mastodon with your thoughts and feedback.

Jetpack Compose for Android is AMAZING, and I’m so excited for it to be stable and the recommended way to build Android applications. I’ve been working with the alpha versions of Compose 1.0.0 on Android for the last 6 months on side projects and have been doing a lot of thinking based on my experiences. One thing that came to mind when I first started, and still does, is how to structure my project and organize all my @Composable functions.

I’ve asked this question for #TheAndroidShow which is tomorrow, and hopefully will get some recommendations, but I’ve already had some good conversations on Twitter.

When I look around at the AndroidX Compose Library (Button.kt) and the compose-samples that the Google Developer Relations Team has published, I see that composables are organized by file.

Over the last 4 years of being a full-time Kotlin developer, I have tried to keep a single class or object per file. I also try to avoid writing code at the root level of a file.

The only exceptions I make when writing Kotlin code are for extension functions and typealiases, since those are required to be written directly in a file. I’m used to finding items by what class/object they are in, and not the function name. I’ve also historically found that large refactoring has been more successful when a file has a single Kotlin class or object.

For this post, I made up the GreetingHeader and GreetingContent @Composables for the purpose of having an example of related @Composables.

Let’s take a look at some options on how to group related @Composable functions.

Root Level in a File

@Composable
fun GreetingHeader() {
    Text(
        text = "Hello",
        style = MaterialTheme.typography.h1
    )
}

@Composable
fun GreetingContent() {
    Box(contentAlignment = Alignment.Center) {
        Text(
            text = "How are you?",
            modifier = Modifier.padding(16.dp)
        )
    }
}

Top level functions for nice clean syntax, but how do you find these composables in a project you are unfamiliar with? Composables don’t extend other classes or implement interfaces, so it’s hard to use built in tools to Android Studio and Intellij to find related ones.

In an object

object Greetings {
    @Composable
    fun GreetingHeader() {
        Text(
            text = "Hello",
            style = MaterialTheme.typography.h1
        )
    }

    @Composable
    fun GreetingContent() {
        Box(contentAlignment = Alignment.Center) {
            Text(
                text = "How are you?",
                modifier = Modifier.padding(16.dp)
            )
        }
    }
}

I originally leaned on this so I could search for a @Composable, and use auto complete. I do like it, but I don’t like the longer composable names, even though I can do static imports.

In a class

class Greetings {
    @Composable
    fun GreetingHeader() {
        Text(
            text = "Hello",
            style = MaterialTheme.typography.h1
        )
    }

    @Composable
    fun GreetingContent() {
        Box(contentAlignment = Alignment.Center) {
            Text(
                text = "How are you?",
                modifier = Modifier.padding(16.dp)
            )
        }
    }
}

I haven’t tried this yet. It could work though (it compiled), especially if you want to be able to access injected dependencies, etc.

In a class or object, via an interface

interface HeaderAndContent {
    @Composable
    fun Header()

    @Composable
    fun Content()
}

object Greetings : HeaderAndContent {
    @Composable
    override fun Header() {
        Text(
            text = "Hello",
            style = MaterialTheme.typography.h1
        )
    }

    @Composable
    override fun Content() {
        Box(contentAlignment = Alignment.Center) {
            Text(
                text = "How are you?",
                modifier = Modifier.padding(16.dp)
            )
        }
    }
}

I haven’t used an interface yet, but it’s an interesting thought. I checked it out and it’s possible and compiles. It could help with discoverability for similar @Composables.

This also gets me thinking about capitalization of @Composables. It isn’t required from a compiler standpoint, so what if we did this.

interface HeaderAndContent {
    @Composable
    fun header()

    @Composable
    fun content()
}

object Greetings : HeaderAndContent {
    @Composable
    override fun header() {
        Text(
            text = "Hello",
            style = MaterialTheme.typography.h1
        )
    }

    @Composable
    override fun content() {
        Box(contentAlignment = Alignment.Center) {
            Text(
                text = "How are you?",
                modifier = Modifier.padding(16.dp)
            )
        }
    }
}

Conclusion

It is very early on, and I’m not sure what the best way will be to organize @Composable functions. I typically say to do what the community is doing, but at this point we just have what the Google team is doing really. Let’s all use Compose some more, and figure out what works the best, but keep an open mind and try new things. Feel free to reach out with what you’re trying on Mastodon.

Debugging Android Intents

With new behaviors for apps using targetSdk=33 (Android 13) regarding Intents, it may be necessary to dive in and figure out how to make things compatible.

In doing this myself, I needed to figure out what was in the Intent, so I could handle it appropriately.

I started with this StackOverflow post, but ended up adding more info and doing it cleanly in Kotlin.

fun Intent?.toDebugString(): String {
    val intent = this ?: return ""
    return StringBuilder().apply {
        appendLine("--- Intent ---")
        appendLine("type: ${intent.type}")
        appendLine("package: ${intent.`package`}")
        appendLine("scheme: ${intent.scheme}")
        appendLine("component: ${intent.component}")
        appendLine("flags: ${intent.flags}")
        appendLine("categories: ${intent.categories}")
        appendLine("selector: ${intent.selector}")
        appendLine("action: ${intent.action}")
        appendLine("dataString: ${intent.dataString}")
        intent.extras?.keySet()?.forEach { key ->
            appendLine("* extra: $key=${intent.extras!![key]}")
        }
    }.toString()
}

Use the extension function above with println(myIntent.toDebugString()).

You can then filter Logcat with “System.out” and see the results! I hope this helps someone figure out what’s inside your Intents!

Report of your Android App’s Permissions

Permission Awareness

Knowing what you ship to your users is key, and permissions are one part of it. If you just look at your src/main/AndroidManifest.xml file, and think that’s all the permissions you will be shipping to the Play Store, you may find your self surprised that it may not be true. Applications can declare permissions, but 3rd party libraries and modules can declare them as well. Only the final, AndroidManifest.xml that has been generated via the manifest merging process is the source of truth.

In this article I share how the merged manifest is created, where you can find it, and a small Python script I created to parse the file and print out a list of permissions.

What is the “manifest merge” process?

There is a “manifest merge” process which takes all libraries and modules that your application relies on which ends up generating the final AndroidManifest.xml file. Merging the manifest is important because dependencies you rely on can bring in extra permissions you don’t define in your application yourself.

Where do I get my merged AndroidManifest.xml file?

Option 1: Grab the merged manifest from the build directory.

  • Build your APK via Android Studio or the command line.
    • Example ./gradlew app:assembleRelease
  • Locate your merged AndroidManifest.xml in the build directory: app/build/intermediates/merged_manifests/release/AndroidManifest.xml

Option 2: (You only have the APK, but didn’t build it yourself)

  • Copy/paste the APK you have into Android Studio. Then open it, and view the AndroidManifest.xml. At that point, you can view it there, or copy out the contents to use with the script.
  • Alternatively you can use something like apktool if you don’t have Android Studio.

How do I view all the permissions?

If you are looking to just see if a single permission has been declared, just search through the large AndroidManifest.xml file.

How do I create a permission report?

Sometimes it is nice to know what all your permissions are in a nice clean way. There are thousands of ways you could do this, but I created a python script that creates a clean alphabetized list of all your permissions.

Example Output

android.permission.ACCESS_NETWORK_STATE
android.permission.ACCESS_WIFI_STATE
android.permission.CAMERA
android.permission.FOREGROUND_SERVICE
android.permission.INTERNET
android.permission.VIBRATE

Instructions

  • Download print_permissions_from_androidmanifest.py and place it in a directory.
  • Open your APK in Andorid Studio (by double clicking on it in your build folder)
  • Copy the contents of AndroidManifest.xml to the clipboard, and save it to a file named AndroidManifest.xml in the same directory as print_permissions_from_androidmanifest.py.
  • Run python print_permissions_from_androidmanifest.py

Conclusion

It’s nice to cleanly see what permissions you are requesting when you send your app. There are probably better ways to do something like this, and if you know of some, I’ll be happy to link them in this post!

Install Referrer Kotlin Extension

There isn’t a Kotlin Extension (KTX) library for Google Play’s InstallReferrer Library, so I wanted to share how I wrapped the API in a very Kotlin friendly way.

The Install Referrer API allows you to securely retrieve referral content from Google Play.  This can help you understand how you are acquiring new users in your app, and help you provide customized experiences tailored to where a user came from. For instance, if someone downloaded the app on a “New York” section of your website, you could open the “New York” section of the app on first app launch.

I hope this wrapper helps you!

https://gist.github.com/handstandsam/686a1bb551d0426b51dd612890f64986

Introducing “Saydle 🔊” – A Real-time Gradle Audio Notification Script for Mac OS

Saydle 🔊 is a Wrapper for the Gradle Wrapper (gradlew) that notifies you via the Mac OS say command whether a task failed or succeeded.

Why?

Knowing when a Gradle build is done is super helpful when there are long running tasks. This allows you to be notified instead of checking the terminal.

https://twitter.com/HandstandSam/status/1463207029007339520

How does it work?

  • Instead of using ./gradlew, use ./saydlew instead. That’s it!
  • Example: ./saydlew app:assembleDebug

Try It Out

Check out the install instructions on GitHub.

Saydle 🔊 on GitHub

Feedback?

Let me know what you think on Twitter at @Handstandsam, or report issues on GitHub.

Jetpack Compose – Text Shadows

This post is a journey of the steps I took while figuring out how to do a Text Shadow with Jetpack Compose. If you want to skip the journey and just get the solution, jump to the end of the post!


As of version 1.0 of Jetpack Compose, Text Shadows don’t exist in the same way they used to on TextView. 😿

Adding a Shadow on a TextView looked like this:

<TextView
    android:id="@+id/text"
    style="@style/CategoryRowTitle"
    tools:text="Category" />
<style name="CategoryRowTitle" parent="TextAppearance.AppCompat">
    <item name="android:textSize">24sp</item>
    <item name="android:textColor">@color/white</item>
    <item name="android:shadowColor">@color/black</item>
    <item name="android:shadowDx">4</item>
    <item name="android:shadowDy">4</item>
    <item name="android:shadowRadius">8</item>
</style>

Adding a Shadow to Text in Jetpack Compose

You try can put a “shadow” on your Text Composable, but it’ll create a shadow behind the text container, not the actual characters. 🤔

Text(
    text = "Fruits",
    modifier = Modifier
        .shadow(elevation = 2.dp)
)

Creating a Custom Shadow in Jetpack Compose

I did my best to create a shadow myself by making a copy of the text, setting it to a dark color, and offsetting it by 2.dp.

@Composable
fun TextWithShadow(
    text: String,
    modifier: Modifier
) {
    Text(
        text = text,
        color = Color.DarkGray,
        modifier = modifier
            .offset(
                x = 2.dp,
                y = 2.dp
            )
            .alpha(0.75f)
    )
    Text(
        text = text,
        color = Color.White,
        modifier = modifier
    )
}

Looks great! But small differences.

Let’s Cheat and Use an AndroidView in Compose 😃

Compose has amazing interoperability with the Android View system. If something isn’t perfect in Compose, we can always just use the Android View version. Pixel perfect match! However, this wouldn’t work in Compose for Desktop because it keeps us tied to the Android View system.

@Composable
fun ComposeAndroidTextView(
    text: String,
    modifier: Modifier
) {
    AndroidView(
        modifier = modifier,
        factory = { context ->
            AppCompatTextView(context).apply {
                setTextAppearance(R.style.ItemRowTitle)
                this.text = text
            }
        }
    )
}

Let’s Try Again with Compose… StackOverflow? 🤔

I did find this Stack Overflow post that was similar, but not exactly what I needed. Here is what it had:

val textPaintStroke = Paint().asFrameworkPaint().apply {
    isAntiAlias = true
    style = android.graphics.Paint.Style.STROKE
    textSize = 64f
    color = android.graphics.Color.BLACK
    strokeWidth = 12f
    strokeMiter = 10f
    strokeJoin = android.graphics.Paint.Join.ROUND
}

val textPaint = Paint().asFrameworkPaint().apply {
    isAntiAlias = true
    style = android.graphics.Paint.Style.FILL
    textSize = 64f
    color = android.graphics.Color.WHITE
}

Canvas(
    modifier = Modifier.fillMaxSize(),
    onDraw = {
        drawIntoCanvas {
            it.nativeCanvas.drawText(
                "Sample",
                0f,
                120.dp.toPx(),
                textPaintStroke
            )
            it.nativeCanvas.drawText(
                "Sample",
                0f,
                120.dp.toPx(),
                textPaint
            )
        }
    }
)

What’s the Perfect Way to Match a TextView Shadow with Compose?

I’m not really sure. Update: I figured it out thanks to Antonio Leiva!

style = MaterialTheme.typography.h4.copy(
    shadow = Shadow(
        color = shadowColor,
        offset = Offset(4f, 4f),
        blurRadius = 8f
    )
)

I wanted to share my journey in figuring this out, but also thank everyone in the community for helping find the “right” way to do it in compose!

DIY Projector Movie Theater for $545.34

This post goes into the setup I ended up with for my DIY Movie Theater. I’m not an A/V purist, so take that into consideration.

The original reason I wanted to get a projector was so I could watch a movie outside with my kids, but then it snowballed a bit. The budget projectors in the $100-$150 range didn’t have great reviews, and I wanted something a little better. This post shows what I ended up with that is now hobbled together. It works pretty great, after some trouble shooting.

Problem 1: Dolby Digital Audio

These cheaper projectors can’t process audio when it is encoded for 5.1 surround sound. When I played a kids show like “Mickey Mouse Clubhouse”, the projector played sound fine, but when I tried a movie, there was no audio at all. I went down a few rabbit holes, but finally figured out that the projector couldn’t handle Dolby Digital Audio.

I thought that bluetooth could help here, but that doesn’t work with dolby audio either, and the bluetooth audio just didn’t hold up at high volumes. It would sometimes make cracking noises.

In order to listen to something with Dolby Digital Audio, you’ll have to strip out the audio before it gets to the projector. Some people would use a stereo receiver, but I got an HDMI audio extractor and that does the trick. It’s another adapter to bring along, but allows the audio to be pulled from the HDMI signal, but then allows the HDMI signal to carry on to the projector.

Problem 2: Video Source

The projector I got doesn’t have any software on it like Chromecast or Roku, so you’ll have to bring that yourself. That works well if you’re in range of your WiFi signal, but if you go away from there, be ready to have something that hooks offline via HDMI, or USB. Another thing to note is that you may think your Phone can just be mirrored to the screen, but many video apps will show a blank screen for it.

It Finally Works! 🧟

We just finished watching The Mandalorian on Disney+ on the “Movie Theater”, and it was a MUCH better experience than watching it on our 55 inch 4k TV (That we had got on sale for $330 2.5 years ago). Having it on a big screen just really makes it something you “feel” instead of just “watch”.

The Hardware

TOTAL Price: $545.34

Final Thoughts

The projector quality at 1080p is good, but it’s not REALLY good. It’s enough for me though, and we control the amount of light in the basement, so the picture is nice. I got the soundbar later on after trying some bluetooth speakers, and that made a huge difference. Having a large, high quality projector screen is critical, but if you have weak sound, it’s just not the same.