Running Specific Android UI Tests using TestParameterInjector via a Regex

There is documentation on the Android Developer website sharing tips to run Android UI tests via the command-line which I’ve found super useful. It provides examples on how to run specific tests (instead of running them all) including running by package, class or method. This documentation is fantastic, but it doesn’t include the tests_regex argument that is also available in the AndroidJUnitRunner.

I’ve recently I’ve been writing a lot of Android UI Tests using TestParameterInjector to support running the same test, but with run with different parameters. I’ve used the support for enum and Boolean values the most, but it also supports String, Int and others. This has been great, but it has also come with challenges in regards to how to run specific tests.

Example Test

Here is an example login test you might find in the src/androidTest directory which would run as an on-device Android instrumentation test. It uses a enum TestParameter of our custom enum TestAccount {SAM, HANDSTANDSAM }. It will run our single tests testLogin() and testSomethingElse() 2 times each (once for each enum value of SAM, HANDSTANDSAM) without us having to write out each one of those method explicitly. 🎉

package com.handstandsam

import com.google.testing.junit.testparameterinjector.TestParameter
import com.google.testing.junit.testparameterinjector.TestParameterInjector
import org.junit.Test
import org.junit.runner.RunWith

@RunWith(TestParameterInjector::class)
class Test(
    @TestParameter private val testAccount: TestAccount
) {
  enum class TestAccount { SAM, HANDSTANDSAM }  

  @Test
  fun testLogin() {
    println("Login with Test Account $testAccount")
  }

  @Test
  fun testSomethingElse() {
    println("Something Else with Test Account $testAccount")
  }
}

This exact code results in the following 4 executions:

  • com.handstandsam.Test#testLogin[SAM]
  • com.handstandsam.Test#testLogin[HANDSTANDSAM]
  • com.handstandsam.Test#testSomethingElse[SAM]
  • com.handstandsam.Test#testSomethingElse[HANDSTANDSAM]

Challenge: Computing a fully qualified method name for tests using TestParameterInjector

Normally the fully qualified method name would be com.handstandsam.Test#testLogin which you could send as an instrumentation argument to run that specific test. However in this case of a test leveraging TestParameterInjector‘s custom runner, it computes the unique test names at runtime via reflection.

If we try to explicitly run com.handstandsam.Test#testLogin, it’ll say “no tests found”.

We can use the computed name of com.handstandsam.Test#testLogin[SAM] and the test will be found.

In this simple example it’s hard to see the challenge, but when you mix multiple @TestParameters in a file and change their ordering, the computed fully qualified test names will change and could be long like test[SAM,true,BLUE] or something.

This means that the only reliable way to run the tests in this class without knowing the full name is by the class itself com.handstandsam.Test but that means 4 tests will run (2*2) which is not what we are looking to do.

./gradlew :app:connectedDebugAndroidTest -Pandroid.testInstrumentationRunnerArguments.class=com.handstandsam.Test

TestParameterInjector GitHub issue

Static computation of fully qualified test names is a challenge using TestParameterInjector, but to be fair the library wasn’t made specifically for Android Tests and this issue is more annoying in Android Instrumentation Tests that take longer to execute. TestParameterInjector is widely used for writing tests with Paparazzi to run the same test against multiple device and screen size permutations, but these tests run so fast that it isn’t a real problem to run them all at once.

Leveraging tests_regex 🎉

I’d like to be able to run all permutations of com.handstandsam.Test#testLogin which are:

  • com.handstandsam.Test#testLogin[SAM]
  • com.handstandsam.Test#testLogin[HANDSTANDSAM]

I could list out every method specified by the class instrumentation argument:

./gradlew :app:connectedDebugAndroidTest -Pandroid.testInstrumentationRunnerArguments.class=com.handstandsam.Test#testLogin[SAM],com.handstandsam.Test#testLogin[HANDSTANDSAM]

SOLUTION – Use tests_regex

Using the tests_regex argument allows us to use syntax like …testLogin\[.+]$ which will match all test permutations for the testLogin method 😀.

Full example command using test_regex

./gradlew :app:connectedDebugAndroidTest -Pandroid.testInstrumentationRunnerArguments.tests_regex="com.handstandsam.Test#testLogin\[.+]$"

The above command is pretty gross to write, but we’ve been able to generate it out via a Custom IDE Plugin (not generally applicable, so not open sourced) it doesn’t matter how verbose it is, as long as it works!

Conclusion

This tests_regex instrumentation argument has been there for years, but I never knew about it, it hasn’t been blogged about and it’s not in the current Android Developers command-line documentation. Regexes are not my favorite thing to write, but are made easier to figure out using regex101.com. I can foresee other uses of the regex command outside of Parameterized Tests, especially when combined with custom IDE tooling.

I hope you now know about this tests_regex argument and let me know how you’re using it on Bluesky!

LLM Based Android UI Testing – “Journeys with Gemini”

What Do We Know About “Journeys With Gemini”?

“Journeys with Gemini” was first (to my knowledge) discussed publicly at Droidcon London during a segment of #TheAndroidShow by Tor Norbye of the Android Studio team. We saw a sneak peek of a new way to write UI tests for Android using Google’s Gemini (AI Model) that takes a text based set of human readable steps and programmatically executes a UI test on your application.

We also heard a few more details about it at the VERY end (~31 mins in) of another Droidcon London talk “Scalable Testing Strategies”.

How and Where are Tests Defined?

  • Tests are defined in .journey.xml files in the tests appear in a view similar to the typical Android Test Runner and end up resolving in the androidTest source set.

File Format – What’s in a .journey.xml File?

It’s XML based file that contains the following elements to represent a test prompt.

  • Name
  • Description
  • Prompt Steps
    • Action
    • Assertion

How are Tests Run?

From what we see, it is all just IDE based tooling that looks similar to what we have today.

What’s the Editor Experience Like?

We see basic list behavior to add actions and assertions to the list. Additionally I spied a “drag” to reorder icon as well as a delete icon.

Journeys in Android Open Source (AOSP)

There is currently the shell of a Gradle Plugin and JUnit 5 runner. These have no implementation detail in them, so are API placeholders at this point. Link: https://cs.android.com/android-studio/platform/tools/base/+/mirror-goog-studio-main:journeys/

Here are the placeholder implementations at this point.

JourneysTestEngine.kt
JourneysGradlePlugin.kt

My Questions 🧠 (and Predictions) 🔮

When will the Journeys Feature be Available?

  • My Prediction: Early 2025.
    • Since they have already teased it publicly, and they’ll want feedback before any sort of release for Google I/O 2025 which will most likely be very AI/Gemini heavy like it was in 2024.
    • Historical release dates for recent Canaries of Android Studio:
      • “Meercat” (Nov 12th, 2024)
      • “Ladybug” (July 15, 2024)
      • “Koala” (May 14, 2024)
      • “Jellyfish” (December 28, 2023)

Do Running Journeys Require Connectivity to Gemini Cloud-based Services?

  • My Prediction: Yes.
    • This is still something evolving and because Gemini Nano only works on a limited set of hardware, I don’t know of any on-device Gemini solution for this. I would LOVE if there was one, but my current guess is that it’ll require connectivity

Why is there a Gradle Plugin?

  • My Prediction: Custom Execution using JUnit 5.
    • Currently Android UI tests only support JUnit 4 officially, and this is clearly using JUnit 5. Google would either have introduce official JUnit 5 support for Android (that would be pretty sweet), or have a different way of running these tests.

Will “Journeys” use Espresso or UI Automator?

  • My Prediction: Espresso.
    • Google’s been pushing Espresso a long time, and it’s great for “developer” tests. They could be using UI Automator instead, but I haven’t seen them pushing materials about UI Automator a lot. It would be cool to support both. I guess we’ll see.

What Will the Journeys New “Test Recorder” Look Like?

  • My Prediction: A lot like the old one.
    • Currently there is only “Action” “Assertion” prompts, and you’d probably click through the app to record it.
    • Bonus: I had a small “course” on Espresso Test Recorder on caster.io before it shut down. Luckily I was able to move the videos to YouTube at that time, so they are still available.
NOTE: This playlist has OLD Content (Most likely outdated)

Will this support iOS?

  • My Prediction: No.
    • While the Android Developers team is working hard to have Jetpack Libraries support Kotlin Multiplatform, but this feature looks like it’ll have a strong tie to Android Studio.

Will Journeys in Android Studio support non-Gemini LLMs?

  • My Prediction: No.
    • Android Studio is made by Google and so is Gemini. The tight integration gives them the ability to make a powerful toolkit that works well together. Based on previous observation (like Firebase Test Lab and Firebase Crashlytics integrations), they only support their own products natively.

Will it be possible to use Journeys with non-Gemini LLMs?

  • My Prediction: Yes. (but with non-Google Open Source)
    • This won’t be something Google officially supports, but it’s an XML based format with open sourced tooling. That means it is easy for others to add that support onto it.

Related work in this space

The idea of Prompt/LLM driven test execution isn’t totally brand new, but it’s still a very evolving space. Related content I’ve seen:

Conclusion (and Final Prediction)

It’s really exciting to see Google doing this. I think it’s where the industry is heading with LLMs and agents. I wish this product could support multiple LLM providers and iOS, but I’m pretty skeptical that it’ll be there based on the amount of investment that would be needed to build and support that. It just wouldn’t be Google’s best use of budget, but I do hope they build it in a way that others can extend it easily if they desire.

Find me on Bluesky Social and start a conversation on this.

Disclaimer: All the information about Journeys is publicly available through videos and open source. I have no insider knowledge on this product. I wrote this post because I saw it in a recording of Droidcon London and wanted to figure out as much as I could.

Demystifying Maestro’s UI Testing Implementation

I first heard about Maestro when it was released in 2022, but I haven’t played with it until now. I’m doing some work with Espresso and UiAutomator for Android testing and was curious how Maestro worked under the hood, so I cloned their git repo and dove into the code.

This quick post shares what I learned about the inner workings of the library with TONS of links to their open source implementation. Feel free to jump to the “How it Works” section below if you already know what Maestro is.

Background – What is Maestro?

It’s a testing framework where you use an easy to read YAML file to create commands that will execute on an Android, iOS or Web app. Here is a quick visual (taken from their website at maestro.mobile.dev) that gives you an idea of what it does.

Maestro Studio

This is an “app” you can run on your on machine to author the YAML for Maestro. It runs a local server and the app is served in a web browser. It continually updates with screenshots from the device and allows you to create commands and run them. My favorite part of it is how they have a nice way to represent the rendered UI tree. Here is a good demo of what that looks like here from Daniel Knott’s YouTube Channel.

How it Works

Maestro installs their own APKs

Their APKs are installed by their CLI tool. (source code) Here is the ADB command showing that the apps are installed after running. 👇

adb shell pm list packages | grep dev.mobile.maestro
package:dev.mobile.maestro.test
package:dev.mobile.maestro

Maestro Starts an On-Device GRPC Server within a Test

They start a @Test in their Instrumentation APK which then starts an on-device Netty GRPC server that runs in process and just runs the test as long as the server is running. (source code)

This test is started via an adb instrument command. (source code) By running the server inside the app, it gives them access to use UiAutomator just like any Android @Test and additionally allows the in-process code to respond back to the Maestro CLI with any requested information.

Serving UiAutomator View Hierarchy

This on-device Netty GRPC server accepts requests from their CLI tool for view hierarchy dumps. (source code) The view hierarchy is pulled from UiAutomator and the results are serialized it in an XML format. (source code)

Performing UI Interactions

UiAutomator is used on device to perform Ui Actions. (source code) However the CLI also uses adb commands to interact with the screen as well. (source code)

Waiting for Async Events

The Maestro CLI seems to do checks at a short interval when waiting for something to appear on the screen. Because the CLI is continually pulling screenshots from the device, they also do image comparisons to see when the screen has updated. (source code)

Visualizing the Implementation

Here is a wonderful Mermaid diagram that ChatGPT made me based on my post contents. Flow diagrams help me visualize this stuff, so this might be a nice way to see it as well.

flowchart TD
    A[Maestro CLI] -->|Installs Maestro APKs| B[Device with Maestro APKs]
    B -->|adb instrument command| C[Instrumentation APK]
    C -->|Starts Test| D[On-Device GRPC Server]
    D -->|Uses UiAutomator to dump View Hierarchy| E[View Hierarchy in XML]
    E -->|Sends view hierarchy data| A

    A -->|Sends interaction commands| F[ADB Commands or UiAutomator]
    F -->|Interacts with UI| G[Android App UI]

    A -->|Monitors Screen| H[Pulls Screenshots from Device]
    H -->|Performs Image Comparisons| I[Waits for Async Events]

Conclusion

Technically this is a pretty cool “hack” that is working for their product. That was fun to dive into. It is a cool strategy, so definitely try it out!

NOTE: This is just the interesting finds of my technical investigation into how it works and not a recommendation one way or another.

Want to discuss more with me? Find me on BlueSky or Threads!

Parameterized Android Tests with Burst 2.0

Parameterized tests allow you to write a test once, but allow it to be called with multiple parameters. This means it is creating more methods than you’ve written, but without you having to write and maintain each one individually.

Here is a trivial example of writing a single test with TestParameterInjector, but having it run twice with true and false.

@RunWith(TestParameterInjector::class)
class MyTest {

    @Test
    fun test(@TestParameter isOwner: Boolean) {
        // Your test logic here
    }
}

This example results in the following tests being run:

  • MyTest#test[isOwner=true]
  • MyTest#test[isOwner=false]

TestParameterInjector has been the defacto way to do this on the JVM and is still a good solution for those projects. The original Burst 1.x project was archived and pointed users to use TestParameterInjector.

Burst 2.0 bursts onto the Scene!

Fast forward to October 2024 and Kotlin Multiplatform in full swing. There is no solution for parameterized tests for Kotlin Multiplatform, so in order to solve the problem, Burst 2.0 was created as a Kotlin Compiler Plugin.

It Works on Android! 🎉

While Kotlin Multiplatform support is fantastic, my biggest need at work is to use it for Parameterized Android Instrumentation tests, so I tried it out on my open source project ShoppingApp and here are my experiences.

It ran successfully via the ./gradlew :app:connectedDebugAndroidTest --info command.

Screenshot 2024-10-31 at 9 42 33 AM

Despite IDE support issues (red highlighting), the underlying library compiles and executes on the command line 😄 .

Screenshot 2024-10-31 at 9 36 37 AM

Executing the Android Tests with the IDE also causes failures for some reason even though it works.

Screenshot 2024-10-31 at 9 37 07 AM

The Problem of Massively Sharding Android Tests

TestParameterInjector has been a solution for Android Parameterized Tests but falls short when wanting to statically compute all tests methods for sharding purposes.

Cloud based device farms like Firebase Test Lab can run your tests on _ number of devices at once and combine the results. This is facilitated in many projects through Flank (Fladle – Flank Support in Gradle). The problem is that TestParameterInjector computes the test method names at runtime, and therefore these device farms can only get an entire class to run (which might end up having 100 permutations with parameterized tests).

Parameterized tests are powerful, reduce boilerplate and ensure exhaustive coverage. To unlock this capability and support massively sharding tests, I personally spent 2 weeks developing a solution that DOES work with TestParameterInjector to compute all test names via static analysis of the APK via this multi-step process described here:

https://github.com/google/TestParameterInjector/issues/27#issuecomment-2419775787

This has been super helpful in allowing my team to run parameterized tests in a massively sharded device farm, but it is a complex solution (but runs in 3 seconds), and while there are tons of integration tests for the library to ensure it works, because it’s an involved set of steps, it still feels like it could fall over at some point.

I could open source this solution, but it has it’s limitations, and if we do have Burst 2.0 at our disposal now. I’m going to endorse their project and avoid having to maintain a project with a pretty equal feature set.

The big hurdle with TestParameterInjector and computing a deterministic list of tests statically (using limited features like enums, strings, etc) is hard because it’s determining the tests to run via the JUnit Runner itself at runtime, instead of when code is being compiled. This means the full list of methods are not in the final Test APK, but need to be loaded into JUnit and computed in a JVM runtime.

Burst 2.0 uses the same limitations as my solution (enums, booleans and list of strings), but does it at the Kotlin Compiler phase Because of this different method, computing all android tests to be run can be done via static analysis of the APK by tools like https://github.com/linkedin/dex-test-parser which computes a full list of methods from an APK. This also means that it will work in Firebase Test Lab and other sharding by method runners. Related Issue of TestParameterInjector -> https://github.com/google/TestParameterInjector/issues/27 to allow that functionality.

Kotlin Compiler Plugin

This what the resulting classes look like for a compiled class after getting processed by Burst.

Screenshot 2024-10-31 at 9 39 48 AM
Screenshot 2024-10-31 at 9 39 26 AM

Required Dependencies

Transitively brings in Kotlin 2.0.21 to your build classpath.

Conclusion

Burst 2.0 seems like the right solution for Android Developers to run parameterized tests and have it possible for sharded test runners to deterministically compute all test method names using static analysis.

If you are someone out there that really wants the implementation I have for TestParameterInjector, then reach out to me a threads.net/@handstandsam and I’ll see if I can share it in open source (but won’t maintain the library).

For now, to use Burst 2.0, you need Kotlin 2.0, but that’s already the case in the majority of projects since it was released as stable 6 months ago. You might have some IDE support issues for a bit, but I’m excited about Burst 2.0, and I’d encourage you to try it out on your Android projects!

Kotlin K2 FIR Quickstart Guide

I wrote this Kotlin K2 FIR guide because I was not able to find any guides or examples to get started with FIR for static analysis. K2 is now finally stable in Kotlin 2.0.0 and future versions, so FIR will be the recommended way of doing static analysis.

Background

Starting Kotlin 1.x you could only use PSI (Program Structure Interface) to create an AST (Abstract Syntax Tree) to run static analysis.

Kotlin’s K2 Compiler is powered by a new Frontend Intermediate Representation (FIR). It still uses PSI to create the initial model, but transforms that into FIR which is a semantic model that is independent from any compiler backend (JVM, JS, Native, etc).

Step 1

Add the Kotlin Embedded Compiler Dependency

implementation("org.jetbrains.kotlin:kotlin-compiler-embeddable:2.0.0")

Step 2

Use the code in the Gist: https://gist.github.com/handstandsam/9a561fc78b593039d1dd500fae14b355

Yes, this is a really short post, but it’s more so here so that you’ll discover the Gist from a search and be able to get started using K2’s FIR model!

Conclusion

FIR is much more useful in understanding what the code is instead of the original syntax. That being said, you can still reach back into the code that the FIR model is derived from to gain more context as needed. If you are building any Static Analysis tooling, it’s HIGHLY suggested to start building it on FIR going forward.

Credits

This implementation is based on:

Fetch and Render GitHub Markdown without CORS

I wanted to embed the contents of my GitHub project on another website, but the path to get there wasn’t straightforward. Here are the roadblocks I hit, and how I got around them.

Skip to the end if you just want the final solution.

Idea 1: Render in an iframe

I’d love to just create an iframe to show everything in my GitHub project on another website. An iframe seemed like a beautiful solution, but….

<iframe src="https://github.com/handstandsam/ShoppingApp"></iframe>

Roadblock: GitHub blocks iframes for its content.

Idea 2: Fetch the HTML, and Render it Manually

I thought I could just scrape the content from the website for my GitHub project and then render it on my site. However, I couldn’t pull arbitrary content from another web host due to CORS.

Note: If I had a server I could do this because I wouldn’t have CORS issues, but I was trying to do this completely in a frontend web page without a server.

Roadblock: CORS Browser Security Policies

Idea 3: Use the GitHub API to fetch the README File

GitHub has an awesome API that we can use to access the contents of a repository! I can’t use it to get the rendering of the entire project page, but I can access individual files like my README.md.

https://api.github.com/repos/handstandsam/ShoppingApp/contents/README.md

This allows me to pull down the contents of the file. The problem is that I can’t do that just in the frontend browser itself due to CORS.

Are you sensing a theme? Doing things in a browser is hard, but it helps make us safer on the web, so I can’t argue with that.

Roadblock: CORS Browser Security Policies

Idea 4: Use JSONP with the GitHub API

JSONP (JSON with Padding) is a workaround for CORS. You basically load an arbitrary bit of JavaScript from a 3rd party site, and have it call an arbitrary function that you know the name of.

Well, GitHub has support for JSONP! We will load JavaScript into our page from https://api.github.com/repos/handstandsam/ShoppingApp/contents/README.md?callback=myCallback and when the loading is done, it will invoke myCallback(results) assuming that the remote server has support for JSONP.

This exposes us to so many security vulnerabilities so PLEASE only do this with trusted sites. They could arbitrarily execute code within the context of your website and you wouldn’t know.

Note: JSONP uses the same functionality of loading in 3rd party javascript to do things like Analytics tracking, or fancy animations with JS libraries like BootStrap JS. It’s just programatically creating a <script> tag.

Roadblock: The response to the API contains Base64 encoded content.

Idea 5: Decode Base64 File Contents and Show README

I was able to define my callback for the GitHub API and then render the text into a pre (preformatted text) element. I did this by Base64 Decoding the GitHub API response’s “content” field, and then programmatically creating a pre element and setting its textContent.

function myCallback(response) {
    // Decode the Base64 Encoded Content
    let decodedContent = atob(response.data.content);

    // Create a "pre" HTML tag and render the content
    let pre = document.createElement("pre");
    pre.textContent = decodedContent;
    document.getElementsByTagName('body')[0].append(pre);
}

Roadblock: The contents weren’t formatted, just plain markdown.

Idea 6: Use a JS Library to Render the Markdown

There is a JavaScript library for everything. In this case I found markedjs/marked. I just give it a string of Markdown, and it’ll give me back the rendered HTML.

<script src="https://cdn.jsdelivr.net/npm/marked/marked.min.js"></script>
function githubMarkdownCallback(response) {
    // Decode the Base64 Encoded Content
    let rawMarkdown = atob(response.data.content);

    // Use the markedjs library to transform markdown -> html
    let markdownHtml = marked.parse(rawMarkdown)

    // Add the new div to the body of the html page
    let div = document.createElement("div");
    div.innerHTML = markdownHtml;
    document.getElementsByTagName('body')[0].append(div);
}

FINAL SOLUTION!

Fetch my project’s README.md contents from GitHub’s public API using JSONP and use markedjs to render the Markdown into HTML.

<script src="https://cdn.jsdelivr.net/npm/marked/marked.min.js"></script>
<script type="text/javascript">
function myCallback(response) {
    // Decode the Base64 Encoded Content
    let rawMarkdown = atob(response.data.content);

    // Use the markedjs library to transform markdown -> html
    let markdownHtml = marked.parse(rawMarkdown)

    // Add the new div to the body of the html page
    let div = document.createElement("div");
    div.innerHTML = markdownHtml;
    document.getElementsByTagName('body')[0].append(div);
}

let script = document.createElement('script');
script.src = 'https://api.github.com/repos/handstandsam/ShoppingApp/contents/README.md?callback=myCallback';
document.getElementsByTagName('head')[0].appendChild(script);
</script>

Compose for Web (WASM) – What and Why?

As a former web-developer myself, I still gravitate back to browser-based UIs. They are so easy to access from anywhere, and are globally available. It’s hard to argue the utility of the amazing web platform. Compose for Web (WASM) is the latest technology in Kotlin Multiplatform and I’m pretty bullish about it.

In this post I’ll take you through what it is and why I think it’s going to be pretty big.

My Past Explorations into Kotlin + Web

I have previously dabbled in Kotlin Multiplatform for JavaScript and Compose HTML in my ShoppingApp project. I find them both very exciting, but I’ve only seen them useful in limited use cases.

I’ve started digging to Compose for Web (WASM), but wanted to give some context to start as there are similarly named things and disambiguation is needed.

Kotlin/JS

This JavaScript (Kotlin/JS) compilation target is here to stay, and is useful not only in the browser, but for backends using Node.js. This technology allows code to be compiled to JavaScript, but doesn’t have any concept of UI itself.

Kotlin/JS is great for complex business logic so it doesn’t have to be re-written and tested in multiple languages.

Kotlin/JS is not so great at size (KBs), and therefore a hard sell to use in Web UIs. I pitched some password validation rule logic to a set of Angular web devs and was told that the JavaScript that was generated was over 10x the size it would be if they wrote it in typescript. That was fair, but I can see the argument tipping the other way if there is really complex business logic. At that point, the consistency and maintainence costs can be more important than page load time (which should get better as time goes on). Note: The reason why the generated JavaScript is so large is because it needs to bring along the Kotlin Standard Library (stdlib), implemented in JS. That is an upfront cost though, so adding additional logic should be fairly linear.

Compose HTML (Previously “Compose for Web”)

Compose HTML allows the compose runtime to render HTML elements. While very cool from a technical standpoint, the marketing behind this has fizzled out (rightfully so) to try and make room for “Compose for Web” (WASM), and create less ambiguity. You can see in this JetBrains blog post first announcing it where it was branded “Compose for Web”, but is now specifically named Compose HTML to disambiguate.

This reminds me of Mosaic, which allows you to leverage the Compose runtime to create terminal apps.

Both are very cool from a technical standpoint, and allow you to leverage the Compose runtime, but you have to bind to platform specific UI elements. Because of this additional work, the developer friction will most likely prevent broader adoption.

Convergence on Compose Multiplatform UI

Jetpack Compose for Android had incredible investment for multiple years and created really solid foundational UI components. The goal is to reuse code that is already written for Jetpack Compose, and bring it to other platforms. That’s why JetBrains uses the same package and classnames in compose-multiplatform. These implementations of compose-multiplatform enable Kotlin Multiplatform UI for Desktop, iOS and now Web (WASM).

These additional (non-Android) multiplatform implementations render to a 2 Dimensional (2D) canvas using SKIA (similar technique used by Flutter). Note: As of very recently, Flutter now leverages the Impeller as the 2D rendering for better performance.

Because a developer can now code against a single set of Compose APIs that can render UIs across multiple platforms, the value is there to start seeing more use cases for Compose Multiplatform UI.

What is Compose for Web (WASM)?

Compose for Web (WASM) leverages Web-Assembly (WASM) to run native binaries in the browser. For browser based UIs, this is a very real future as it’s already supported in Chrome, Safari, Firefox and more. For myself (someone who does Compose UI development for Android), Compose for Web allows me to re-use my existing skills, and create UIs that can be shared via a URL. Not only that, but it is code that will be familiar to other developers on my team, and therefore make it more approachable and have better chance for success.

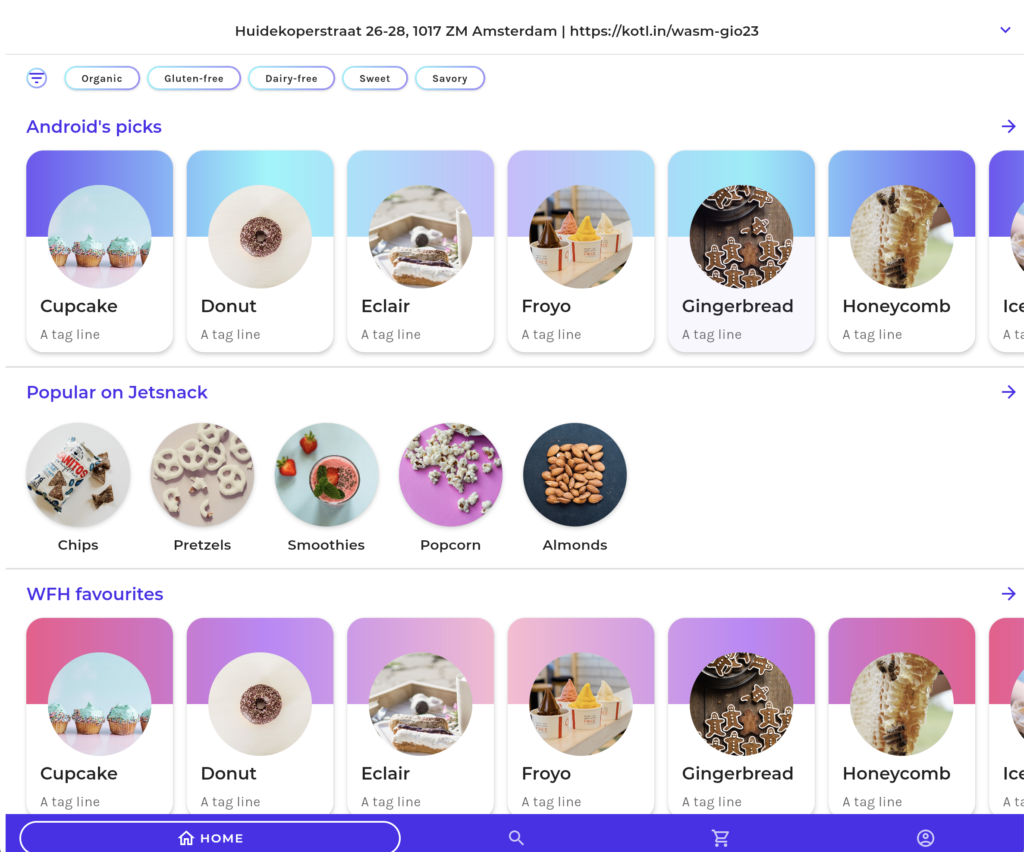
This Compose for Web technology is current incubating, but is really powerful. Run the samples and check it out, but there are animations and images, and gradients. It’s beautiful.

Getting a mobile developer to learn React requires a full paradigm shift and isn’t scalable. The same could be said about shifting to coding in Swift and iOS. Being able to create a consistent set of solutions on a single technology will drive adoption.

Why Compose for Web (WASM)?

I think this will be big for Kotlin developers to get their code running in a browser. I am currently building developer tools for small projects, and making them accessible to everyone in an organization is so much easier to do via a web url instead of having to download an APK and run it.

I have always wanted to share a design system library with others in an organization via a URL. That friction for installing an application is just so cumbersome.

Additionally, we can start to do many test/run cycles in the browser if that test/debug cycle story gets better. I already do that today with Compose for Desktop as it removes the need for a device at all. Android Studio’s Compose previews work great in some use cases, but other times it is nicer to run a bit more code via Compose for Desktop.

With WASM, we will get native performance with this technology, and soon be able to access system level APIs to make very powerful applications.

Next: Under The Surface of Compose for Web (WASM)

I want to dive deeper into Compose for Web (WASM). I’ve been running the samples locally and dived into the generated html, js and wasm files generated by the Compose for Web implementation. As I learn more I’ll share what I learn.

Other related articles I found after writing this:

To be continued…

Adding Compose to Existing Espresso Tests with createEmptyComposeRule()

As the documentation says, you can combine both Espresso and Compose in an Android instrumentation test. In order to interact with Compose in an instrumentation test you need a ComposeTestRule.

Problem

Typically you would create a ComposeTestRule with createComposeRule() in a part of your app that is compose only, but that will create a blank ComponentActivity and launch it showing a blank screen.

@get:Rule
val composeTestRule = createComposeRule()

This is great if you are looking to just use composeTestRule.setContent { Text("Hi")} in your test, but if you are integrating with an existing Espresso test, this will not be the case.

You could use the createAndroidComposeRule<MyActivity>(), however that will also use an ActivityTestRule underneath the hood and launch the Activity, which will change the behavior of your existing test. 🤔

@get:Rule
val composeTestRule = createAndroidComposeRule<MyActivity>()

Solution

If all you want to do is keep the Espresso test the same way it is, but also interact with some compose elements, use createEmptyComposeRule() and it will all work! 🎉

@get:Rule
val composeTestRule = createEmptyComposeRule()

Conclusion

Now you can interact with compose elements along with view elements, exactly like the documentation says. 😃

composeTestRule.onNodeWithText("Something").assertIsDisplayed()

Using Java Reflection with Kotlin Companion Objects

Kotlin companion objects allow you to add static data and methods associated with a class. This is similar to how Java has static fields and methods. The problem is that Java doesn’t really know what a companion object it, so trying to access one using standard Java reflection might make you go crazy. 🤪

package com.handstandsam

/** This is contrived example of a companion object */
class SpecialFeature {
  companion object {
    var enabled: Boolean = false
  }
}

The decompiled Java class (created by the Kotlin Compiler) results in this:

package com.handstandsam;

import kotlin.Metadata;
import kotlin.jvm.internal.DefaultConstructorMarker;
import org.jetbrains.annotations.NotNull;

public final class SpecialFeature {
   private static boolean enabled;

   @NotNull
   public static final Companion Companion = new Companion((DefaultConstructorMarker)null);

   public static final class Companion {
      public final boolean getEnabled() {
         return SpecialFeature.enabled;
      }

      public final void setEnabled(boolean var1) {
         SpecialFeature.enabled = var1;
      }

      private Companion() {
      }

      public Companion(DefaultConstructorMarker $constructor_marker) {
         this();
      }
   }
}

The Kotlin Standard Lib for Java has a really cool method called companionObjectInstance that allows you to grab an instance of the declared companion object from the KClass object.

Why is companionObjectInstance helpful?

When Kotlin is compiled to Java Class files, the companion object has a fully qualified class name of com.handstandsam.SpecialFeature$Companion.

Mapping Kotlin -> Java Byte Code can make your head hurt, so by using this companionObjectInstance helper method, we don’t have to figure out how to get an instance of the companion object, or figure out the fully qualified class name.

val companionObjectJavaClass = com.handstandsam.SpecialFeature::class.java
val companionObjectInstance = companionObjectJavaClass.kotlin
        .companionObjectInstance!!

Now that we have an instance of the companion object class, and know the Java class, we can use reflection to set the value of the enabled property on the companion object.

companionObjectInstance::class.java
    .methods
    .first { it.name == "setEnabled" }
    .invoke(companionObjectInstance, true)

Note: setEnabled is the name, and it is a method here. You might expect this to just be a property which is what I assumed, but when compiled to java byte code, it is marked private and has a getter and a setter.

Bonus: Accessing private properties using Java Reflection

You could alternatively use Java reflection to change the backing private static boolean enabled field directly if you choose.

If you wanted to set the private static field value itself, rather than calling the setter, you can grab the declared field, and set it to accessible which allows us to bypass the private visibility. This sort of thing is why the JVM can’t be considered secure as it can be modified at runtime.

val privateEnabledField = SpecialFeature::class.java.getDeclaredField("enabled")
privateEnabledField.isAccessible=true
privateEnabledField.set(companionObjectInstance, true)

Conclusion

Reflection is powerful, but confusing. I could have probably done this cleaner JUST using Kotlin Reflect and not Java Reflection, but in my case I wanted to use Java Reflection, but needed to interact with a Kotlin companion object. There is a lot of documentation on how to mix Kotlin + Reflection, so feel free to read up more there. Cheers!

Kotlin Sealed Interfaces with KotlinX Serialization JSON

I heavily use sealed interfaces to model result objects in Kotlin as they allow me to create a type of classes that can be handled using exhaustive when statements, similar to an enum, but also each type can contain its own properties.

I wanted to serialize these sealed interface Kotlin models to/from JSON over HTTP. There are a bunch of options for serializing JSON in Java like Moshi, Gson and Jackson. While all of those libraries are great, I had a requirement of creating a multi-platform library, and went with KotlinX Serialization.

In this post I’ll walk you through an example of how I configured KotlinX Serialization to work for my use case.

Example: Marketing Campaigns API Result

This endpoint returns a strongly typed campaign, and I wanted to represent this in JSON.

public sealed interface CampaignContent {
    public data class PopupModal(
        public val imageUrl: String,
        public val text: String,
        public val subtext: String,
    ) : CampaignContent

    public data class Link(
        public val linkText: String,
        public val url: String,
        public val linkIcon: String? = null,
    ) : CampaignContent
}
{
  "type": "popup_modal",
  "image_url": "https://...",
  "text": "Text",
  "subtext": "Subtext"
}
{
  "type": "link",
  "link_icon": "https://...",
  "url": "https://..."
}

We need to deserialize a JSON response into a strongly typed object that implements the CampaignContent sealed interface.

fun getCampaignContentFromServer() : CampaignContent

KotlinX Serialization has Polymorphism support allows us to do this. You need to register polymorphic definitions in a SerializersModule that you provide to your Json object that is used to encode and decode objects to/from JSON.

val jsonSerializer = Json {
  serializersModule = SerializersModule {
    polymorphic(
      CampaignContent::class,
      CampaignContent.PopupModal::class,
      CampaignContent.PopupModal.serializer(),
    )
    polymorphic(
      CampaignContent::class,
      CampaignContent.Link::class,
      CampaignContent.Link.serializer(),
    )
  }
}
val campaignContent : CampaignContent = jsonSerializer.decodeFromString(
  CampaignContent.serializer(), 
  jsonString,
)

In order to support polymorphism, a type property is used in the JSON string representation {"type": "..."}. By default this "type" field is a fully qualified classname. This allows KotlinX Serialization know what type to deserialize. You have control over what the name of this classDiscriminator field is, as well as other configuration options when configuring your Json {} serializer.

If you don’t want to use the fully qualified class name as the class type, then you can put a @SerializedName("...") annotation to the class and it will use that name instead of the fully qualified class name. This is helpful for me as the backend did not use fully qualified names, and I had set them explicitly. In the example below I added the @SerializedName("popup_modal") data class.

Final Models after adding @Serializable and @SerializedName

public sealed interface CampaignContent {

  @Serializable
  @SerializedName("popup_model")
  public data class PopupModal(
    @SerializedName("image_url")
    public val imageUrl: String,
    @SerializedName("text")
    public val text: String,
    @SerializedName("subtext")
    public val subtext: String,
  ) : CampaignContent

  @Serializable
  @SerializedName("link")
  public data class Link(
      @SerializedName("link_text")
      public val linkText: String,
      @SerializedName("url")
      public val url: String,
      @SerializedName("link_icon")
      public val linkIcon: String? = null,
  ) : CampaignContent
}

Considerations

At first I made my models match the JSON values as I didn’t have to specify @SerializedName since KotlinX Serialization will just match the field name. After a bit of usage, link.link_text just didn’t feel as correct as link.linkText, so I chose to specify a @SerializedName annotation instead. The resulting Java bytecode is the same as the KotlinX Serialization plugin does code generation that writes out the serializer anyways. This does make your data class look not as pretty, but from the general building and usage perspective of these models, the user will not know.

Conclusion

That was a whirlwind intro, but I had to really dig through deep into the documentation to figure it out and am hoping this helps someone do this faster than I did it originally.