Continuous Integration for Android Using Jenkins

Dan Jarvis and I co-presented a talk entitled “Continuous Integration for Android Using Jenkins” at the Android Summit 2016 on August 26, 2016 in McLean, Virginia.  Here are our slides.  Video should be available in the coming weeks and will be posted here and on Twitter.

Some Highlights:

  • Automate everything (If you can script it, do it)
  • “There’s an app for that” on a smartphone, “There’s a plugin for that” on Jenkins
  • The Android Emulator is great for scalability in CI, it’s fast and you can configure it in many ways
  • Shard for speed

Lots of Upcoming Speaking Engagements!

I’m excited to announce I’ve been accepted to talk at a bunch of upcoming events.


Espresso: A Screenshot is Worth 1,000 Words

Do your product owners, designers and the people that pay you understand what in the world your Espresso tests are doing and why they are valuable? You’ve spent so much time and effort writing these tests and your whole team deserves to get the most benefit out of them. In this talk you’ll learn how to setup your Espresso tests to take programatic screenshots, and leverage the Robot pattern of testing for clean, readable, and maintainable tests. You’ll also learn guidelines on when it’s appropriate to write Espresso tests instead of Robolectric or Unit tests, and how to leverage mock data to make your Espresso tests run with Tesla-like speed.

I have architected the Espresso test setup for our Capital One Wallet Android team and helped execute our ongoing continuous integration efforts. We’ve seen a 4x+ speed improvement over Appium, have more maintainable tests, and now have visibility for anyone to look into our test coverage.


“Continuous Integration Tips & Tricks for Android”
This is a co-talk with Dan Jarvis, the tech lead for Capital One Wallet for Android.

DNS on the Android Emulator

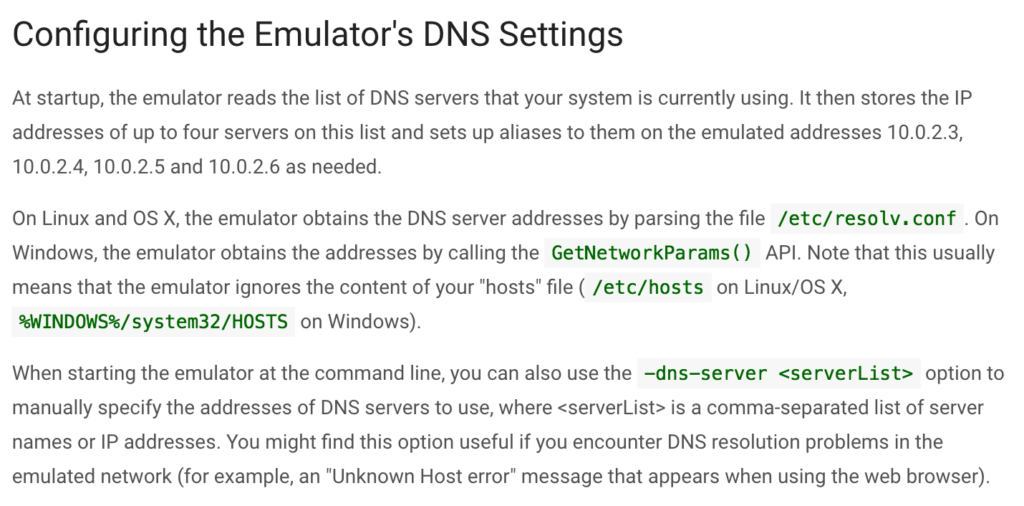
The last few days I have been struggling to get the Android Emulator to connect to certain domains through a proxy we have at my job.  Because of this, I started messing with my OS X DNS configuration and got myself in a DNS mess.  I finally figured my way out, so I wanted to share with you how DNS works with the Android Emulator, and hopefully avoid the troubles I ran into.

Android Documentation:

Screen Shot 2016-05-03 at 7.44.53 PM
http://developer.android.com/tools/help/emulator.html#dns

The Android Emulator uses the DNS settings of your OS X machine from/etc/resolv.conf as mentioned above.  The file looks something like:

#
# Mac OS X Notice
#
# This file is not used by the host name and address resolution
# or the DNS query routing mechanisms used by most processes on
# this Mac OS X system.
#
# This file is automatically generated.
#
search fios-router.home
nameserver 192.168.1.1

This file is re-generated by OS X as you connect to different networks (different WiFi hotspots or ethernet connections) to properly resolve DNS entries while connected to that network.

The thing I didn’t know is that /etc/resolv.conf is by default a symbolic link to /var/run/resolv.conf.  So, if you ever mess with /etc/resolv.conf and want to put back the original, you’ll have to re-create the symbolic link on your system, so that your global overrides are no longer in place.  Create the symbolic link using the following command:

sudo ln -s /var/run/resolv.conf /etc/resolv.conf

Anyways, you can override your DNS entries for the Android Emulator via the command line using the “-dns-server” option, or you can edit /etc/resolv.conf and override it globally.  Just realize that you need to create a symbolic link to /var/run/resolv.conf in order to “revert” changes if you mess with /etc/resolv.conf.

Happy DNS’ing with the Android Emulator and I hope for your case you don’t ever have to deal with it!

Using the Android Emulator for Continuous Integration

Screen Shot 2016-04-23 at 9.06.54 PM

I spent the last few weeks figuring out how to get our Android Tests running on our Jenkins CI (Continuous Integration) server using the latest Android Emulator. I am sharing what I learned so that I can hopefully help someone else and so I can refer back to it in the future.

Result of this tutorial/example:

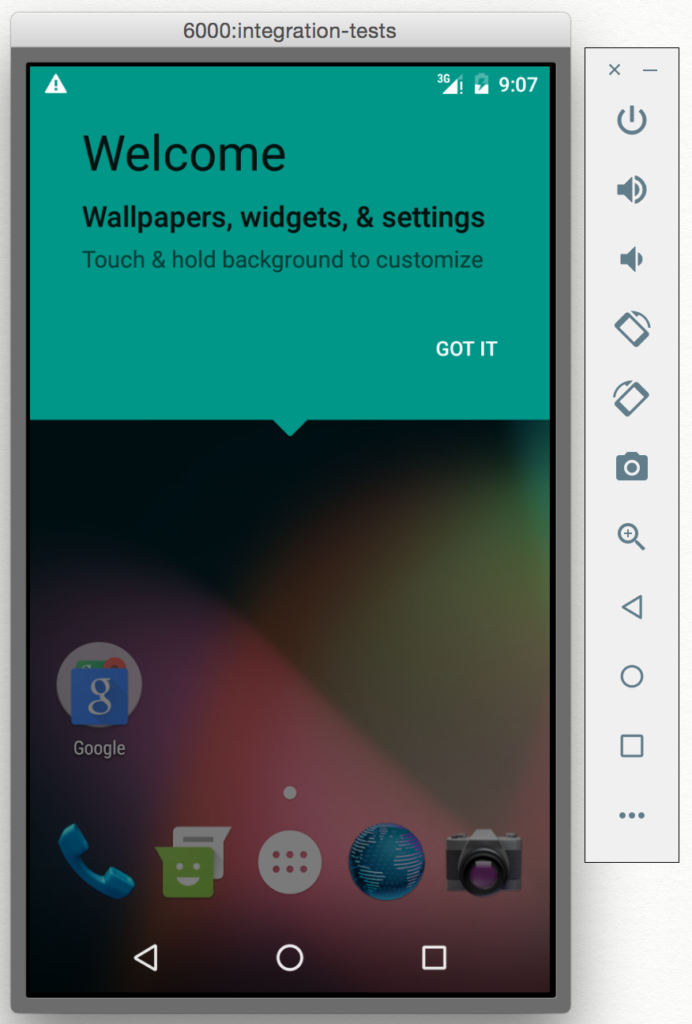
You will be able to programmatically create an Android Emulator AVD (Android Virtual Device), start it, wait for it to load, run your tests, then kill the emulator, generate a Spoon html test report.

Screen Shot 2016-04-23 at 8.55.17 PM

Assumptions for this example:

  • You have the Android SDK configured on this machine with:
    • SDK components for API 23
    • The latest build tools
    • Google apis support
    • API 23, x86_64 with Google APIs Image
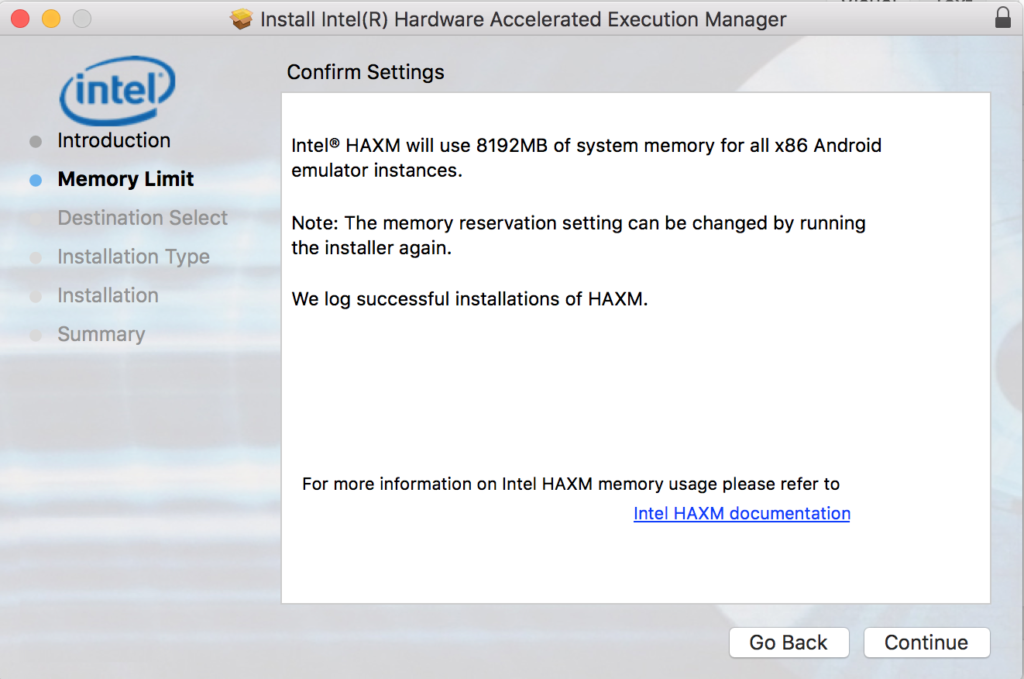
    • HAXM support installed
  • You have an Android build flavor named “qa”.
  • You are running your tests on a “debug” build.
  • You have built the APK and test APK with:
    • ./gradlew clean app:assembleQaDebug and app:assembleQaDebugAndroidTest
  • You have Android tests in a Java package called “integration_tests”
  • spoon-runner-1.2.0-jar-with-dependencies.jar exists in your working directory.
  • You want to use an API 23, x86_64, Google APIs enabled AVD (Note, you could easily change these, but this is what this example uses)

To download all the necessary SDK components referenced above, you can run the following command, or just download the components using the UI version of the Android SDK Manager.  NOTE: These commands aren’t scripted for a CI server.  You have to manually accept licensing terms:

android update sdk --no-ui --all --filter 'platform-tools,extra-android-support,build-tools-21.1.1,extra-android-m2repository,extra-google-m2repository,android-23,addon-google_apis-google-23,sys-img-x86_64-google_apis-23'

This Android test execution script will:

  • Forcefully create an AVD for this test (so that it is a fresh device every time)
  • Use port 6000 for the emulator (This is arbitrary, but by default, it is 5554 and assigned by Android).
  • Start the emulator for the AVD on a specific port (so we can target the device by serial with “emulator-{PORT}”
  • Ensure the emulator started by polling for the emulator to be booted
  • Use Spoon to run the tests in a specific package
  • Kill this emulator instance after our tests complete
#CONFIG
FLAVOR="qa"
PACKAGE_NAME="com.example.myapp"
AVD_NAME="integration-tests"
PORT=6000

##############################################################################

#Ensure the Test APK is built already.
TEST_APK_FILE="app/build/outputs/apk/app-${FLAVOR}-debug-androidTest-unaligned.apk"
if [ ! -f "${TEST_APK_FILE}" ]
then
	echo "androidTest APK doesn't exist, exiting.  Make sure you run ./gradlew app:assembleQaDebug app:assembleQaDebugAndroidTest"
exit
else
	echo "androidTest APK Exists, continuing"
fi

#Calculate the Serial Number of the emulator instance
SERIAL=emulator-${PORT}

echo "Creating (forceful) AVD with name ${AVD_NAME}"
# We have to echo "no" because it will ask us if we want to use a custom hardware profile, and we don't.
echo "no" | android create avd \
    --name "${AVD_NAME}" \
    --target "android-23" \
    --abi "google_apis/x86_64" \
    --skin "WXGA720" \
	--force
echo "AVD ${AVD_NAME} created."

#Start the Android Emulator
#"2>&1" combines stderr and stdout into the stdout stream
START_EMULATOR="emulator \
	-avd ${AVD_NAME} \
	-netspeed full \
	-gpu on \
	-netdelay none \
	-port ${PORT}"

echo $START_EMULATOR
$START_EMULATOR 2>&1 &

#Ensure Android Emulator has booted successfully before continuing
EMU_BOOTED='unknown'
while [[ ${EMU_BOOTED} != *"stopped"* ]]; do
    sleep 5
    EMU_BOOTED=`adb -s ${SERIAL} shell getprop init.svc.bootanim || echo unknown`
done

duration=$(( SECONDS - start ))
echo "Android Emulator started after $duration seconds."

# Get the file name of the QA APK (we need to cope with the version number changing)
APK_LIST_AS_TEXT="$(ls -t app/build/outputs/apk/*-android-debug-*-${FLAVOR}.apk)"
APK_FILES=( $APK_LIST_AS_TEXT )

# Use the Spoon utility as a test runner
SPOON_COMMAND="java -jar spoon-runner-1.2.0-jar-with-dependencies.jar \
	-serial ${SERIAL} \
	--apk ${APK_FILES[0]} \
	--test-apk ${TEST_APK_FILE} \
	--no-animations \
	--fail-on-failure \
	--debug
echo "Running: ${SPOON_COMMAND}"
${SPOON_COMMAND}

#Stop the Android Emulator
echo "Killing the Android Emulator with serial: ${SERIAL}"
adb -s ${SERIAL} emu kill

Final notes & tips:

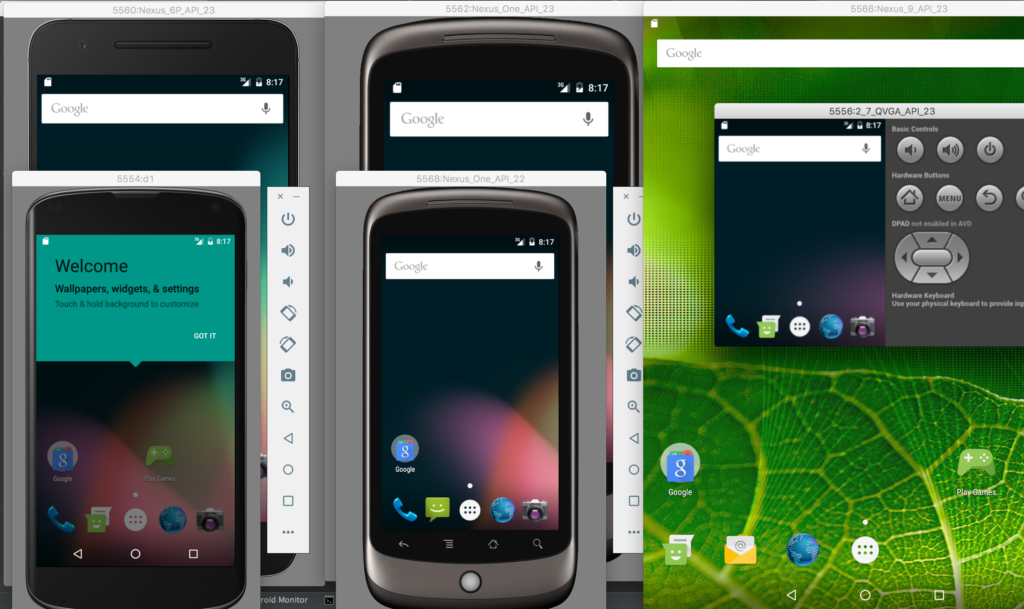
  • Because the Android Emulator’s serial number is in the format of “emulator-{SERIAL}”, it is very important to start the emulator on a specific port (using the “-port {PORT}” param) so that you can reference the image by serial number.  This allows you to launch more than one emulator on the same build machine.
  • Command to list available Android platforms
    android list targets
  • Command to list available AVDs
    android list avd
  • Command to list all available SDK components that you can –filter for in the “update sdk” command:
    android list sdk --all --extended

If you have any questions or comments, let me know on Twitter at @HandstandSam.

Exercise Your Mobile App’s API with AngularJS and a Simple HTTP Proxy

Capturing your mobile app’s API responses typically very arduous:

  • Run your app, and run through a scenario to generate the calls you want while you grab the logs.
  • or… run a bunch of API request with Postman or curl, but having to run the calls in order and copy/paste Authentication headers, etc to make it work.

You would think building a AngularJS web interface for your API to do the tedious parts for you would be easy… which it technically is… but not in a way that you can trick the browser into thinking it’s secure.  That’s because a web browser uses security policies that typical block CORS (Cross-Origin Resource Sharing).  That means that if you are on http://myui.com and want to make a request to your API (which is on http://myapi.com) and you API doesn’t have JSONP (JSON with Padding) support, you are in a hard spot and need something server-side to make those calls for you, and then return the results.

A trivial example of the pain CORS will cause is shown here with my GitHub profile.  If I want to pull this data, and add it to my website, I can’t do it because of CORS blocking.

curl https://api.github.com/users/handstandsam

{
  "login": "handstandsam",
  "id": 264948,
  "avatar_url": "https://avatars.githubusercontent.com/u/264948?v=3",
  "gravatar_id": "",
  "url": "https://api.github.com/users/handstandsam",
  "html_url": "https://github.com/handstandsam",
  "followers_url": "https://api.github.com/users/handstandsam/followers",
  "following_url": "https://api.github.com/users/handstandsam/following{/other_user}",
  "gists_url": "https://api.github.com/users/handstandsam/gists{/gist_id}",
  "starred_url": "https://api.github.com/users/handstandsam/starred{/owner}{/repo}",
  "subscriptions_url": "https://api.github.com/users/handstandsam/subscriptions",
  "organizations_url": "https://api.github.com/users/handstandsam/orgs",
  "repos_url": "https://api.github.com/users/handstandsam/repos",
  "events_url": "https://api.github.com/users/handstandsam/events{/privacy}",
  "received_events_url": "https://api.github.com/users/handstandsam/received_events",
  "type": "User",
  "site_admin": false,
  "name": "Sam Edwards",
  "company": "http://github.com/handstandtech",
  "blog": "http://handstandsam.com",
  "location": null,
  "email": null,
  "hireable": null,
  "bio": null,
  "public_repos": 7,
  "public_gists": 2,
  "followers": 10,
  "following": 58,
  "created_at": "2010-05-04T22:15:11Z",
  "updated_at": "2016-02-26T23:08:36Z"
}

GitHub is smart enough to provide the ability to use JSONP (invokes a local javascript method with the result of your API request), which allows us to actually do this.

curl https://api.github.com/users/handstandsam?callback=mycallback

/**/mycallback({
  "meta": {
    "Content-Type": "application/javascript; charset=utf-8",
    "X-RateLimit-Limit": "60",
    "X-RateLimit-Remaining": "55",
    "X-RateLimit-Reset": "1457061648",
    "Cache-Control": "public, max-age=60, s-maxage=60",
    "Vary": "Accept",
    "ETag": "\"5dd9556a9a8f8067c294a028b1f1a21d\"",
    "Last-Modified": "Fri, 26 Feb 2016 23:08:36 GMT",
    "X-GitHub-Media-Type": "github.v3",
    "status": 200
  },
  "data": {
    "login": "handstandsam",
    "id": 264948,
    "avatar_url": "https://avatars.githubusercontent.com/u/264948?v=3",
    "gravatar_id": "",
    "url": "https://api.github.com/users/handstandsam",
    "html_url": "https://github.com/handstandsam",
    "followers_url": "https://api.github.com/users/handstandsam/followers",
    "following_url": "https://api.github.com/users/handstandsam/following{/other_user}",
    "gists_url": "https://api.github.com/users/handstandsam/gists{/gist_id}",
    "starred_url": "https://api.github.com/users/handstandsam/starred{/owner}{/repo}",
    "subscriptions_url": "https://api.github.com/users/handstandsam/subscriptions",
    "organizations_url": "https://api.github.com/users/handstandsam/orgs",
    "repos_url": "https://api.github.com/users/handstandsam/repos",
    "events_url": "https://api.github.com/users/handstandsam/events{/privacy}",
    "received_events_url": "https://api.github.com/users/handstandsam/received_events",
    "type": "User",
    "site_admin": false,
    "name": "Sam Edwards",
    "company": "http://github.com/handstandtech",
    "blog": "http://handstandsam.com",
    "location": null,
    "email": null,
    "hireable": null,
    "bio": null,
    "public_repos": 7,
    "public_gists": 2,
    "followers": 10,
    "following": 58,
    "created_at": "2010-05-04T22:15:11Z",
    "updated_at": "2016-02-26T23:08:36Z"
  }
})

Most of us aren’t that lucky however, and JSONP is not supported by the API we are using.  And while this is great in many cases, it still doesn’t help us with anything other than GET requests.  POST, PUT and DELETE commands are all blocked from CORS so we are very limited.

If you are just interested in GET requests, and JSONP is not a possibility, you could instead modify the server code to return the header “Access-Control-Allow-Origin: *”. Most modern browsers would allow you to do a CORS GET request. Unfortunately in a lot of cases, GET requests are not enough or we don’t have access to the server code.

Well, how do I get around this to make REST calls to our server, like POST?

Well, write some server code that can do the requests for you since it won’t have security restrictions like the browser does.  But, most of us don’t have time or that.  The solution I came up with on the latest project I’m learning the API for is “php-guzzle-http-proxy“. This is as dirt simple as I could get and navigate around all these CORS problems I have been mentioning without having to write ANY server-side code.

Just plop this repo in a directory of your PHP server, and start making requests (/proxy in this case).  You’ll just add in a special header to your request I’ve named “X-Proxy-Url”.  This is the URL you REALLY want to call, but CORS won’t let you.  You can do any type of request you want: GET, POST, PUT or DELETE.

In curl it would look like:

curl -H "X-Proxy-Url: https://myapi.com/login" -H "Accept: application/json" -X POST -d '{"username": "sam", "password": "notsecure"}' http://myui.com/proxy

In AngularJS it would look like:

$http({
  method: 'POST',
  url: '/proxy,
  headers: {
    'Accept': 'application/json',
    'X-Proxy-Url': 'https://myapi.com/login'
  },
  data: {"username": "sam", "password": "notsecure"}
}).success(function(response){
  console.log(response.data);
});

That’s it. No server-side code required, just this one tiny PHP proxy script to allow you to make all types of REST calls including GET, POST, etc.

The tool I wrote (that unfortunately I can’t share) used Angular and Bootstrap.  When using the two in combo, when you get your JSON response back, display it with the following tag to make it formatted and easy to read.

<pre>{{data | json}}</pre>

Let me know if you found this helpful on Twitter at @HandstandSam

———————–

Related Links:

Continuous Integration at LesFurets.com – Richmond Java Users Group (RJUG)

“Our highest priority is to satisfy the customer through early and continuous delivery of valuable software.” – 1st principal of the Agile Manifesto

This presentation by Raphaël Brugier (@rbrugier) at the Richmond Java Users Group last night (Feb 17th) was really good and highlighted:

  • Continuous Integration.  A case study of LesFurets.com. 40,000 unit tests running in 3 minutes.  Selenium tests running in 15 minutes.  Passing tests == shippable code.
  • They went from shipping a feature in a month, to as soon as ready (possibly only a few days).
  • A different kind of Git Flow using git octopus. – https://github.com/lesfurets/git-octopus
  • They have new developers hit the deploy button their first day.  Share deployment responsibilities within the dev team.
  • “If it hurts, do it more often.” – In regards to doing a deployment/release.
  • Work on feature branches.  Ship features as ready, not based on sprints. (git octopus facilitates this)
  • Detect feature branch merge conflicts after every push and make sure it’s resolved ASAP.
  • QA is owned by developers and sign off is given by product when dev demos it.
  • and more…

I would highly recommend watching the recording of the event.  Heads up: The speaker had a French accent and the video is from my MacBook’s camera, however, you get to watch it and otherwise you wouldn’t be able to :-p.

YouTube Link: https://www.youtube.com/watch?v=uTOPvC3lV1Q

Slides: http://www.slideshare.net/raphaelbrugier/continuous-delivery-journey-at-lesfuretscom

Meetup Info: http://www.meetup.com/Richmond-Java-Users-Group/events/226909145/

Network Calls from Android Device to Laptop over USB via ADB

I’ve seen a few articles about using the “adb reverse” command which allows you to make specific network calls to your laptop over USB, but when explaining this concept to others, they had a hard time visualizing how it worked.  I’ve put together this post to help illustrate how this works and spotlight some use cases.

Android’s “adb reverse” command is available in Lollipop and higher versions of Android (Platform 21+) and it allows you to access a server running on your computer from your Android device over USB without any network (WiFi or Cellular).  This is done through a technique called a reverse proxy.

What’s a reverse proxy? (via Wikipedia)

A type of proxy server that retrieves resources on behalf of a client from one or more servers. These resources are then returned to the client as though they originated from the proxy server itself.

Use Case 1 : Android -> Server running on laptop

Android Device (localhost:8080) -> Server running on Computer (localhost:8081)

adb reverse tcp:8080 tcp:8081

Screen Shot 2016-02-01 at 2.42.15 PM

Use Case 2 : Android -> WireMock on laptop -> Server accessible only on laptop (i.e. VPN)

Download the WireMock JAR and run it using the following command in a Terminal

java -jar wiremock-standalone-2.0.8-beta.jar --port=8081 --proxy-all="https://internal.myapp.com"

Android Device (localhost:8080) -> WireMock running on Computer (localhost:8081)

adb reverse tcp:8080 tcp:8081

This allows you to have your physical Android device access resources that are only available through your laptop.

When you’re done, turn off all reverse proxy port mappings:

adb reverse --remove-all

Sources:

Running WireMock on Android

Update: (September 17th, 2017) – WireMock 2.8.0 is the latest working version on Android at this point in time.  Check out https://github.com/handstandsam/AndroidHttpMockingExamples and https://github.com/handstandsam/ShoppingApp for the latest examples as this blog post was written in January of 2016.


WireMock on Android is now possible!  Thanks to work by @tomakehurst with the 2.0-beta branch of WireMock to revamp the dependency structure from the 1.0 branch, and a tiny change I put in to match Android’s HttpClient method signatures, it can now run on Android without any modifications.

WireMock includes the following features out of the box which are very valuable in a wide variety of development and testing scenarios:

  • HTTP response stubbing, matchable on URL, header and body content patterns
  • Request verification
  • Runs in unit tests, as a standalone process or as a WAR app
  • Configurable via a fluent Java API, JSON files and JSON over HTTP
  • Record/playback of stubs
  • Fault injection
  • Per-request conditional proxying
  • Browser proxying for request inspection and replacement
  • Stateful behaviour simulation
  • Configurable response delays

It’s true you don’t have to put WireMock on your Android device to use it.  You can also just run WireMock on a computer and get a lot of benefit out of this by pointing your HTTP calls to your computer.  This can be very useful during development and testing, but will require you to manage these mock files separate from your Android application. When you run WireMock on your computer, you’re creating a configuration dependency which is challenging to maintain for scripted testing scenarios.  By including WireMock in your Android project and starting the server programmatically, you are able to remove the dependency of having to run an external server.

Here are your build.gradle dependencies to bundle WireMock 2.0.8-beta into your Android project:

compile("com.github.tomakehurst:wiremock:2.0.8-beta") {
    //Allows us to use the Android version of Apache httpclient instead
    exclude group: 'org.apache.httpcomponents', module: 'httpclient'

    //Resolves the Duplicate Class Exception
    //duplicate entry: org/objectweb/asm/AnnotationVisitor.class
    exclude group: 'asm', module: 'asm'

    //Fixes Warning conflict with Android's version of org.json
    //org.json:json:20090211 is ignored for debugAndroidTest as it may be conflicting with the internal version provided by Android.
    exclude group: 'org.json', module: 'json'
}
//Android compatible version of Apache httpclient.
compile 'org.apache.httpcomponents:httpclient-android:4.3.5.1'

If you want an example of what it looks like to use a bundled WireMock instance in an Android test, check out an examples repository on GitHub I put together to show this.

Here is an Espresso Test from the examples project:

@RunWith(AndroidJUnit4.class)
public class WireMockActivityInstrumentationTestCase2 extends ActivityInstrumentationTestCase2 {
    private MainActivity activity;

    public WireMockActivityInstrumentationTestCase2() {
        super(MainActivity.class);
    }

    @Rule
    public WireMockRule wireMockRule = new WireMockRule(BuildConfig.PORT);

    @Before
    @Override
    public void setUp() throws Exception {
        super.setUp();
        injectInstrumentation(InstrumentationRegistry.getInstrumentation());
        activity = getActivity();
    }
    @Test
    public void testWiremock() {
        String jsonBody = asset(activity, "atlanta-conditions.json");
        stubFor(get(urlMatching("/api/.*"))
                .willReturn(aResponse()
                        .withStatus(200)
                        .withBody(jsonBody)));

        String serviceEndpoint = "http://127.0.0.1:" + BuildConfig.PORT;
        activity.setWeatherServiceManager(new WeatherServiceManager(serviceEndpoint));

        onView(ViewMatchers.withId(R.id.editText)).perform(typeText("atlanta"));
        onView(withId(R.id.button)).perform(click());
        onView(withId(R.id.textView)).check(matches(withText(containsString("GA"))));
    }
}

Full Source File on GitHub

If you’re using WireMock for only testing or mock scenarios, you can justify the dependency overhead of including the library because of it’s vast array of features.  But, I wouldn’t suggest embedding it into your normal app as it has a very large method count and size footprint.  Here’s a breakdown of how big WireMock and it’s dependencies are:

Screen Shot 2016-01-30 at 8.23.55 PM
Source: http://www.methodscount.com/?lib=com.github.tomakehurst:wiremock:2.0.8-beta

That puts us at a total of 54,691 methods if you include WireMock 2.0.8-beta in your project by itself. Wowsa, that’s a lot, especially with Android’s 65,000 Method Limit (which can be circumvented using a technique called MultiDex).

Dependency exclusions & inclusions for WireMock to run on Android:

  • Exclude: org.apache.httpcomponents:httpclient (-4,098 Methods)
  • Exclude: org.json:json (-357 Methods)
  • Exclude: asm:asm (-391 Methods)
  • Include: org.apache.httpcomponents:httpclient-android (+3,389 Methods)

Grand Total Method Count for Android: 53,234

Grade dependencies tree for WireMock 2.0.8-beta:

+--- com.github.tomakehurst:wiremock:2.0.8-beta
|    +--- org.eclipse.jetty:jetty-server:9.2.13.v20150730
|    |    +--- javax.servlet:javax.servlet-api:3.1.0
|    |    +--- org.eclipse.jetty:jetty-http:9.2.13.v20150730
|    |    |    \--- org.eclipse.jetty:jetty-util:9.2.13.v20150730
|    |    \--- org.eclipse.jetty:jetty-io:9.2.13.v20150730
|    |         \--- org.eclipse.jetty:jetty-util:9.2.13.v20150730
|    +--- org.eclipse.jetty:jetty-servlet:9.2.13.v20150730
|    |    \--- org.eclipse.jetty:jetty-security:9.2.13.v20150730
|    |         \--- org.eclipse.jetty:jetty-server:9.2.13.v20150730 (*)
|    +--- org.eclipse.jetty:jetty-servlets:9.2.13.v20150730
|    |    +--- org.eclipse.jetty:jetty-continuation:9.2.13.v20150730
|    |    +--- org.eclipse.jetty:jetty-http:9.2.13.v20150730 (*)
|    |    +--- org.eclipse.jetty:jetty-util:9.2.13.v20150730
|    |    \--- org.eclipse.jetty:jetty-io:9.2.13.v20150730 (*)
|    +--- org.eclipse.jetty:jetty-webapp:9.2.13.v20150730
|    |    +--- org.eclipse.jetty:jetty-xml:9.2.13.v20150730
|    |    |    \--- org.eclipse.jetty:jetty-util:9.2.13.v20150730
|    |    \--- org.eclipse.jetty:jetty-servlet:9.2.13.v20150730 (*)
|    +--- com.google.guava:guava:18.0
|    +--- com.fasterxml.jackson.core:jackson-core:2.6.1
|    +--- com.fasterxml.jackson.core:jackson-annotations:2.6.1
|    +--- com.fasterxml.jackson.core:jackson-databind:2.6.1
|    |    +--- com.fasterxml.jackson.core:jackson-annotations:2.6.0 -> 2.6.1
|    |    \--- com.fasterxml.jackson.core:jackson-core:2.6.1
|    +--- org.skyscreamer:jsonassert:1.2.3
|    +--- xmlunit:xmlunit:1.6
|    +--- com.jayway.jsonpath:json-path:2.0.0
|    |    +--- org.slf4j:slf4j-api:1.7.10 -> 1.7.12
|    |    \--- net.minidev:json-smart:2.1.1
|    |         \--- net.minidev:asm:1.0.2
|    +--- org.slf4j:slf4j-api:1.7.12
|    +--- net.sf.jopt-simple:jopt-simple:4.9
|    \--- junit:junit:4.12 (*)
\--- org.apache.httpcomponents:httpclient-android:4.3.5.1

My recommendation: If you need the features WireMock provides, go with it.  It’s sexy and it works well.  WireMock has a lot of bang for the buck, and you’re only taking this overhead in test and mock build flavors.  If you’re looking for something WAY more basic on Android, try okhttp’s MockWebServer project.  It does allow you to run an HTTP server within your app but it’s very limited and that makes it lightweight.  You can queue up responses in a row, or create a custom “dispatcher” which allows you to choose which response to send back based on a request.  It really depends on your use cases as to which one you choose.  There is also an example of MockWebServer being used in the same AndroidHttpMockingExamples project on GitHub.  Note: the examples are there mostly for configuration but don’t exercise all of WireMock’s features.  In this examples project, you will see that MockWebServer is an equally viable solution because of the simplicity of this use case.

The latest version of okhttp’s MockWebServer has 20,453 methods, but that includes okhttp and junit which you are probably already using in your project.  The biggest culprit is BouncyCastle (a java implementation of many encryption algorithms) which has 15,163 on it’s own.

Screen Shot 2016-01-30 at 9.54.32 PM

Source: http://www.methodscount.com/?lib=com.squareup.okhttp3:mockwebserver:3.0.1

Gradle Dependencies for okhttp’s MockWebServer:

\--- com.squareup.okhttp3:mockwebserver:3.0.1
     +--- com.squareup.okhttp3:okhttp:3.0.1
     |    \--- com.squareup.okio:okio:1.6.0
     +--- com.squareup.okhttp3:okhttp-ws:3.0.1
     |    \--- com.squareup.okhttp3:okhttp:3.0.1 (*)
     +--- org.bouncycastle:bcprov-jdk15on:1.50
     \--- junit:junit:4.11 -> 4.12 (*)

Related Info: If you just want a little more info and more advanced use cases about how to use WireMock on Android using Espresso UI tests, Michael Bailey has a great talk up on YouTube from 2014.  He talks about how he used an embedded WireMock instance on Android that he hacked together for version 1 of WireMock (library is not publicly available).  He shows some really good examples and I highly recommend watching the talk.

Finally: One thing I haven’t figured out how to do on Android yet is to use the “__files” and “mappings” directories the same way you can on a computer.  If anyone knows how to get this to work, or a nice work-around, please let me know.

Are you using WireMock on Android?  If so, please let me know on Twitter by tweeting @HandstandSam, I’d love to know.

Determining Supported Processor Types (ABIs) for an Android Device

This article is a quick overview on the types of Android processor instruction set types, known as an ABI (Application Binary Interface) and how to determine which ones your device supports.

In order to include any compiled native C libraries, such as “mylib.so” into your Android application, it needs to be compiled it for a specific ABI.

ABIs found on Android are in 3 categories:

  • ARM
    • armeabi
    • armeabi-v7a (Typically also supports armeabi)
    • arm64-v8a (Typically also supports armeabi and armeabi-v7a)
  • X86
    • x86
    • x86_64 (Typically also supports x86)
  • MIPS
    • mips
    • mips64 (Typically also supports mips)

When including native libraries into your app, you’ll typically see them packaged within an AAR dependency, but sometimes you will have to add them manually.  When you have to add them manually you will have to structure your dependencies to tell which ABI the code is compiled for.

For example:

  • app/libs/armeabi/mylib.so or
  • app/libs/x86/mylib.so

“armeabi-v7a” is BY FAR the most widely seen ABI on Android. About 90+% of all phones made in the last few years supports this.  x86 is only on a few devices including the The Asus Zenphone 2, Genymotion Emulator and some Android Emulator images.   I’ve never even heard of any modern android device using a “mips” based processor.

To figure out what type of ABI your Android device has, you have two methods.  You can do it with an ADB (Android Debug Bridge) command, or programmatically through code.

Related Links: