I’ve seen a few articles about using the “adb reverse” command which allows you to make specific network calls to your laptop over USB, but when explaining this concept to others, they had a hard time visualizing how it worked. I’ve put together this post to help illustrate how this works and spotlight some use cases.
Android’s “adb reverse” command is available in Lollipop and higher versions of Android (Platform 21+) and it allows you to access a server running on your computer from your Android device over USB without any network (WiFi or Cellular). This is done through a technique called a reverse proxy.
A type of proxy server that retrieves resources on behalf of a client from one or more servers. These resources are then returned to the client as though they originated from the proxy server itself.
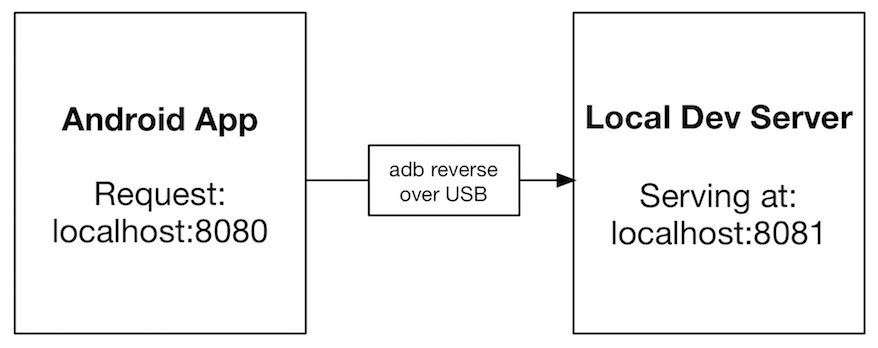
Use Case 1 : Android -> Server running on laptop
Android Device (localhost:8080) -> Server running on Computer (localhost:8081)
adb reverse tcp:8080 tcp:8081
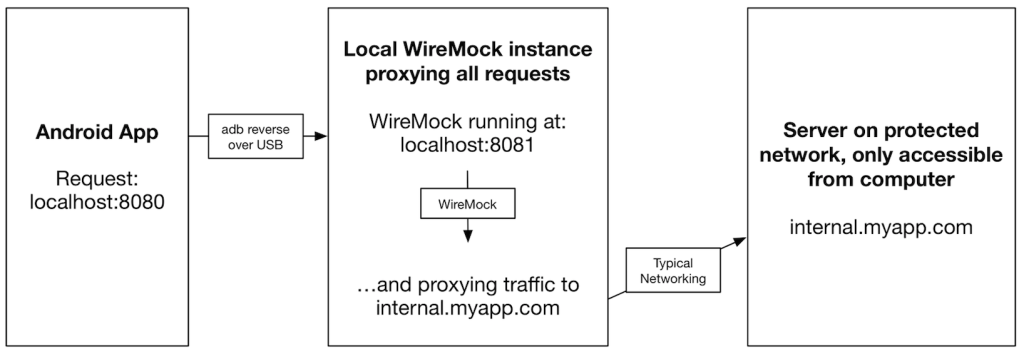
Use Case 2 : Android -> WireMock on laptop -> Server accessible only on laptop (i.e. VPN)
WireMock includes the following features out of the box which are very valuable in a wide variety of development and testing scenarios:
HTTP response stubbing, matchable on URL, header and body content patterns
Request verification
Runs in unit tests, as a standalone process or as a WAR app
Configurable via a fluent Java API, JSON files and JSON over HTTP
Record/playback of stubs
Fault injection
Per-request conditional proxying
Browser proxying for request inspection and replacement
Stateful behaviour simulation
Configurable response delays
It’s true you don’t have to put WireMock on your Android device to use it. You can also just run WireMock on a computer and get a lot of benefit out of this by pointing your HTTP calls to your computer. This can be very useful during development and testing, but will require you to manage these mock files separate from your Android application. When you run WireMock on your computer, you’re creating a configuration dependency which is challenging to maintain for scripted testing scenarios. By including WireMock in your Android project and starting the server programmatically, you are able to remove the dependency of having to run an external server.
Here are your build.gradle dependencies to bundle WireMock 2.0.8-beta into your Android project:
compile("com.github.tomakehurst:wiremock:2.0.8-beta") {
//Allows us to use the Android version of Apache httpclient instead
exclude group: 'org.apache.httpcomponents', module: 'httpclient'
//Resolves the Duplicate Class Exception
//duplicate entry: org/objectweb/asm/AnnotationVisitor.class
exclude group: 'asm', module: 'asm'
//Fixes Warning conflict with Android's version of org.json
//org.json:json:20090211 is ignored for debugAndroidTest as it may be conflicting with the internal version provided by Android.
exclude group: 'org.json', module: 'json'
}
//Android compatible version of Apache httpclient.
compile 'org.apache.httpcomponents:httpclient-android:4.3.5.1'
If you want an example of what it looks like to use a bundled WireMock instance in an Android test, check out an examples repository on GitHub I put together to show this.
Here is an Espresso Test from the examples project:
@RunWith(AndroidJUnit4.class)
public class WireMockActivityInstrumentationTestCase2 extends ActivityInstrumentationTestCase2 {
private MainActivity activity;
public WireMockActivityInstrumentationTestCase2() {
super(MainActivity.class);
}
@Rule
public WireMockRule wireMockRule = new WireMockRule(BuildConfig.PORT);
@Before
@Override
public void setUp() throws Exception {
super.setUp();
injectInstrumentation(InstrumentationRegistry.getInstrumentation());
activity = getActivity();
}
@Test
public void testWiremock() {
String jsonBody = asset(activity, "atlanta-conditions.json");
stubFor(get(urlMatching("/api/.*"))
.willReturn(aResponse()
.withStatus(200)
.withBody(jsonBody)));
String serviceEndpoint = "http://127.0.0.1:" + BuildConfig.PORT;
activity.setWeatherServiceManager(new WeatherServiceManager(serviceEndpoint));
onView(ViewMatchers.withId(R.id.editText)).perform(typeText("atlanta"));
onView(withId(R.id.button)).perform(click());
onView(withId(R.id.textView)).check(matches(withText(containsString("GA"))));
}
}
If you’re using WireMock for only testing or mock scenarios, you can justify the dependency overhead of including the library because of it’s vast array of features. But, I wouldn’t suggest embedding it into your normal app as it has a very large method count and size footprint. Here’s a breakdown of how big WireMock and it’s dependencies are:
That puts us at a total of 54,691 methods if you include WireMock 2.0.8-beta in your project by itself. Wowsa, that’s a lot, especially with Android’s 65,000 Method Limit (which can be circumvented using a technique called MultiDex).
Dependency exclusions & inclusions for WireMock to run on Android:
My recommendation: If you need the features WireMock provides, go with it. It’s sexy and it works well. WireMock has a lot of bang for the buck, and you’re only taking this overhead in test and mock build flavors. If you’re looking for something WAY more basic on Android, try okhttp’s MockWebServer project. It does allow you to run an HTTP server within your app but it’s very limited and that makes it lightweight. You can queue up responses in a row, or create a custom “dispatcher” which allows you to choose which response to send back based on a request. It really depends on your use cases as to which one you choose. There is also an example of MockWebServer being used in the same AndroidHttpMockingExamples project on GitHub. Note: the examples are there mostly for configuration but don’t exercise all of WireMock’s features. In this examples project, you will see that MockWebServer is an equally viable solution because of the simplicity of this use case.
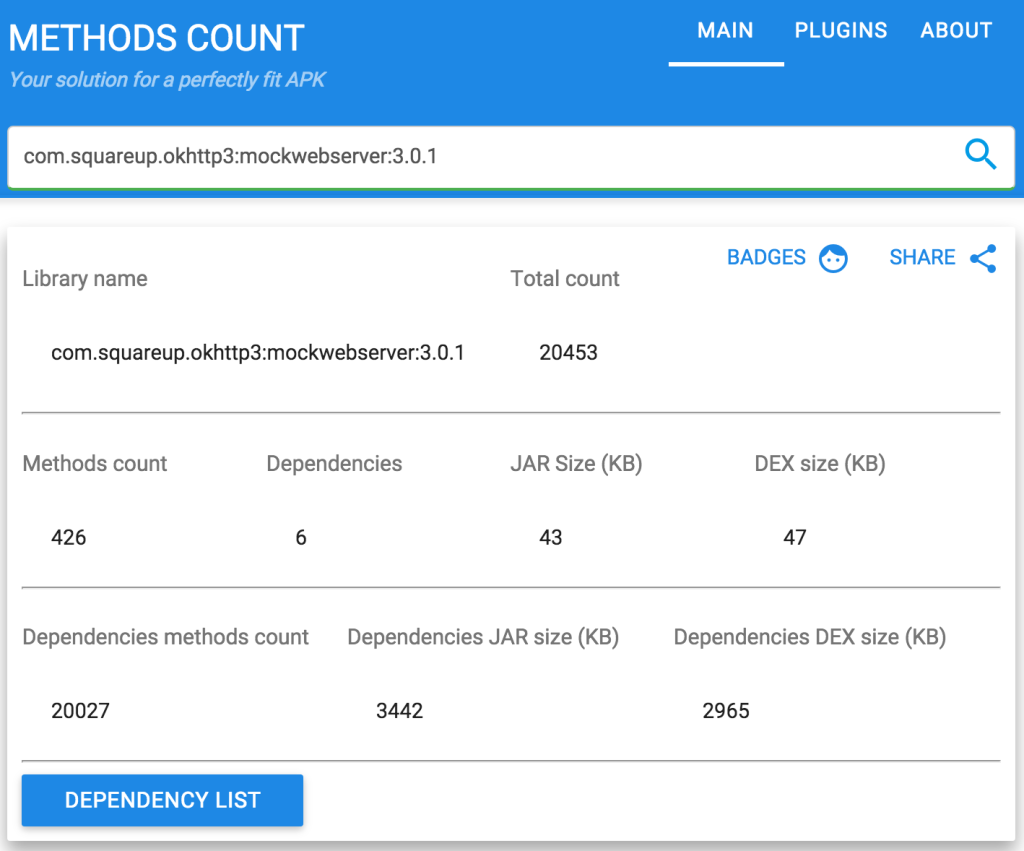
The latest version of okhttp’s MockWebServer has 20,453 methods, but that includes okhttp and junit which you are probably already using in your project. The biggest culprit is BouncyCastle (a java implementation of many encryption algorithms) which has 15,163 on it’s own.
Related Info: If you just want a little more info and more advanced use cases about how to use WireMock on Android using Espresso UI tests, Michael Bailey has a great talk up on YouTube from 2014. He talks about how he used an embedded WireMock instance on Android that he hacked together for version 1 of WireMock (library is not publicly available). He shows some really good examples and I highly recommend watching the talk.
Finally: One thing I haven’t figured out how to do on Android yet is to use the “__files” and “mappings” directories the same way you can on a computer. If anyone knows how to get this to work, or a nice work-around, please let me know.
Are you using WireMock on Android? If so, please let me know on Twitter by tweeting @HandstandSam, I’d love to know.
This article is a quick overview on the types of Android processor instruction set types, known as an ABI (Application Binary Interface) and how to determine which ones your device supports.
In order to include any compiled native C libraries, such as “mylib.so” into your Android application, it needs to be compiled it for a specific ABI.
ABIs found on Android are in 3 categories:
ARM
armeabi
armeabi-v7a (Typically also supports armeabi)
arm64-v8a (Typically also supports armeabi and armeabi-v7a)
X86
x86
x86_64 (Typically also supports x86)
MIPS
mips
mips64 (Typically also supports mips)
When including native libraries into your app, you’ll typically see them packaged within an AAR dependency, but sometimes you will have to add them manually. When you have to add them manually you will have to structure your dependencies to tell which ABI the code is compiled for.
For example:
app/libs/armeabi/mylib.so or
app/libs/x86/mylib.so
“armeabi-v7a” is BY FAR the most widely seen ABI on Android. About 90+% of all phones made in the last few years supports this. x86 is only on a few devices including the The Asus Zenphone 2, Genymotion Emulator and some Android Emulator images. I’ve never even heard of any modern android device using a “mips” based processor.
To figure out what type of ABI your Android device has, you have two methods. You can do it with an ADB (Android Debug Bridge) command, or programmatically through code.
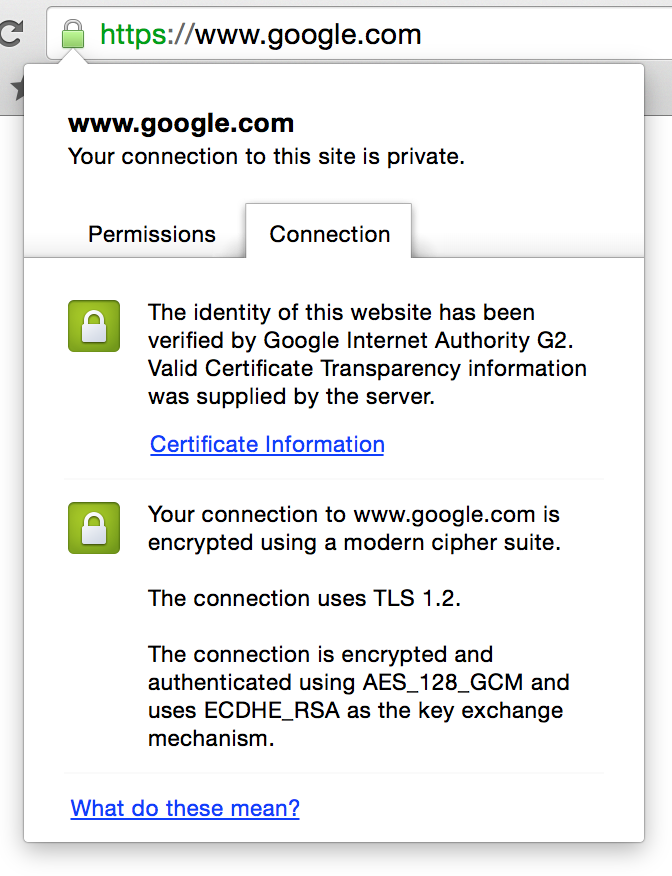
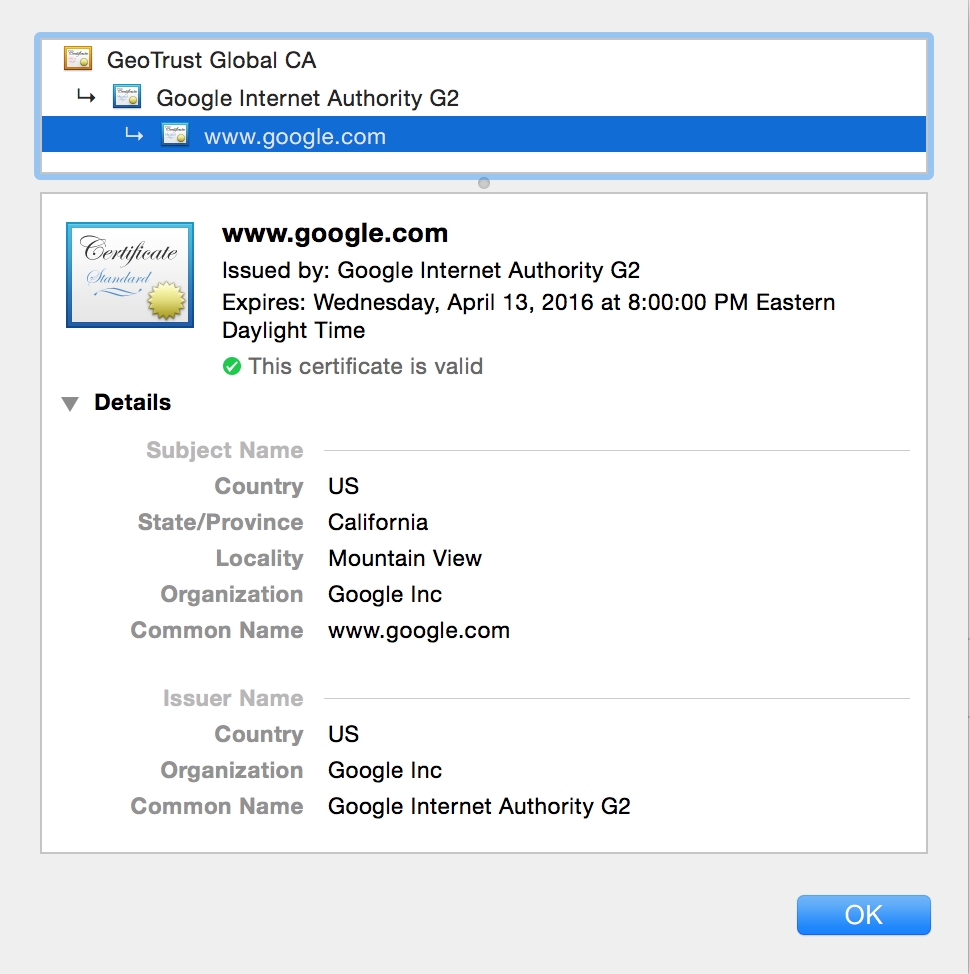
Ensures a client is connecting over HTTPS to the intended server ONLY and no other. This is achieved by including public server certificate information on the client and not relying on the device’s trust store (such as the one on Android or the JVM).
This trust store can be augmented by adding in additional Certificate Authority (CA) Certs and then HTTPs traffic can still be monitored. A common development use of monitoring HTTPS traffic is using Charles Proxy.
depth=2 /C=US/O=GeoTrust Inc./CN=GeoTrust Global CA
verify error:num=20:unable to get local issuer certificate
verify return:0
-----BEGIN PUBLIC KEY-----
MIIBIjANBgkqhkiG9w0BAQEFAAOCAQ8AMIIBCgKCAQEAhtxFolwNJBGuhYRGDiNF
2Av9jTt0c2vk5mLBrO9td2hFyvw0B0fPpxbkOm72Cd4OnGVXxIB0hp1XRWXuyP+p
FMHmXSshVWDIrcAwjR5r+WnAqrLacZJNHkDOWO+COY8CUHGTn9YfwKwuHQROp6aH
Yu7YhppMXu3dL1kZ55AzYdwgYVc6BdxmDsGWRZbgZ0qt/QQC0zmbR+hLpZAKhHmN
VnBRXYz5q+XLEBmjQnwVmwMzPCvZFzNEWan0wQsCRqcJ19lO5hLxn4O2T718qF2h
cd1sH1RL6HlhUxJe09L3yoGCMoENIq6ywIrVgFsZtyhg8TMyCZuRtyCS+ux9ma0A
7wIDAQAB
-----END PUBLIC KEY-----
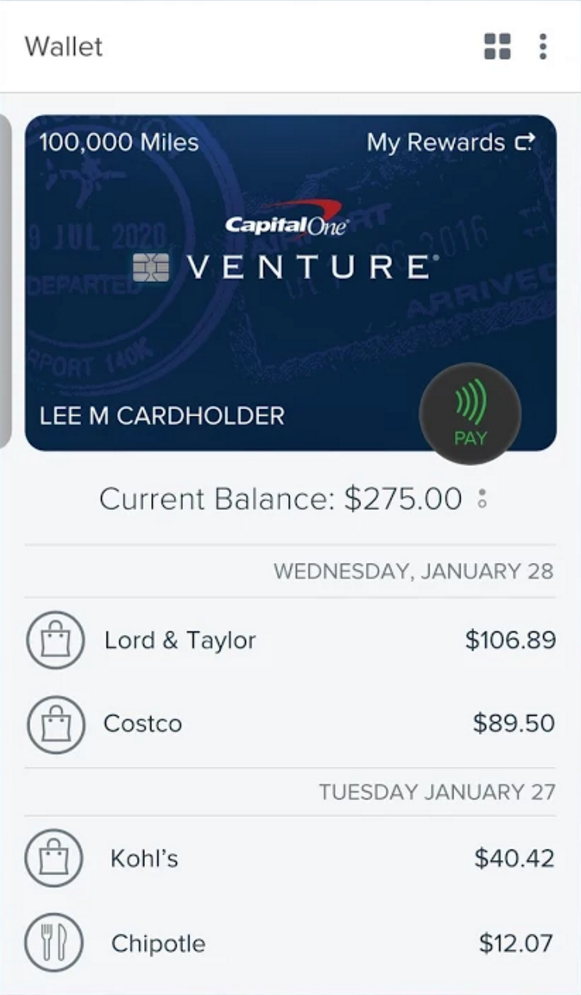
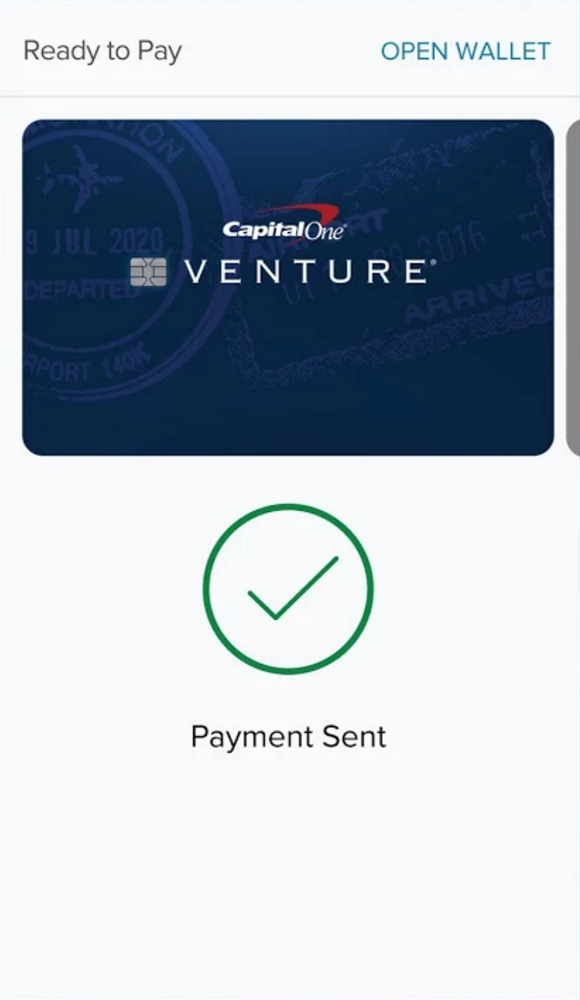
It’s been super hard to not share this info as I’ve done presentations on Host Card Emulation (HCE) presentations, but on October 14th the feature I’ve been leading Android development efforts on launched! Capital One Wallet – Google Play Store. This is a project I’ve been a part of for almost a year and it’s so cool to see it in the wild and right along side of Android Pay, Samsung Pay and the rest. It supports Visa and Mastercard and is pretty awesome. Capital One was the first bank in the US to support contactless payments in an Android app and it’s super exciting to have been a part of that.
I tried to do my with presentations but it always killed me that I wasn’t able to share what we were doing. I did feel like I was able to explain how HCE works on Android, but wasn’t able to give much more info at the time. Check out my presentation video and slides from Droidcon NYC.
Overview: Learn how Host Card Emulation (HCE) works on Android to enable contactless payments. This is shown by following along with an example application, Handstand Pay (https://github.com/handstandsam/HandstandPay). This example app uses Visa MSD data that was the first form of contactless payments. This presentation also overviews the latest cloud-based secure element HCE solutions using a tokenization provider.
Here are my slides and a video of the presentation.
Presented at:
* Droidcon NYC 2015 – August 27, 2015
* AnDevCon Boston 2015 – July 31, 2015
By learning iOS and coming over to the dark side, you can learn from the iOS app, and also help do a quick implementation of a feature you already implemented on Android.
App Store approval can take up to 2 weeks. On Android, it’s up within 12 hours.
——
Project Structure
* Swift uses modules
* Note: Objective-C has no namespacing so use class prefixes (recommended to be at least 3 characters, and not something like “FB”) info.plist is required and similar to AndroidManifest.xml n Android
* No build.gradlew. All build info in *.xcodeproj
Asset Bundles:
* There are 3 buckets. Just @1x, @2x, and 3x
* The iPhone 6 is the first device to have @3x and a non-1:1 or 2:1 pixel ratio.
UIViewControllers <-> Activities (UI Building Blocks)
Fundamental view-management model for all iOS apps.
iOS is strongly architected around the MVC framework.
Fragments don’t exist on iOS, and this sort of concept doesn’t really exist. You could do it if you use the Child View Controller Containment, but it’s not recommended unless you have significant iOS experience since this is not a common patter.
ListFragment would be done with a UITableViewController on iOS.
Closures are Apple’s Lambda implementation blocks. These are similar to anonymous functions or AsyncTasks
Main View Components
PagerAdapter or NavigationDrawer -> UITabBar
ListView -> UITableView
GridView -> UICollectionView
iOS Interface Builder is your friend. AutoLayout is almost a must.
Storyboards are powerful and worthwhile.
Core Data is a ORM with some pluses and minuses. Designed to be easy to use and reliable. It is the defacto way to do persistent data as it also has migrations, etc. Contains grouping, filtering and organizing data in memory and in the UI.
What is MasterCard?
“We are more than credit cards, we are payment experts. We process transactions 2x quicker than the blink of an eye.”
“We <3 Android”
MasterCard is part of Android Pay, but he can’t speak much about that.
MasterCard developer zone
You can play with all of their SDKs and each one has a Sandbox available. There is also documentation and support forums. Go to “Services” and there are about 20 on there.
MasterPass – Digital Wallet Network
A digital Wallet Service that allows consumers pay with any payment card anywhere on any connected-device.
Simplify Commerce – Accepting Payments
Makes it easy for small businesses to accept payments.
“Low, Fixed Pricing – SDKs – Plugins
Merchant Identifier – Rich Merchant Data
“Provides rich merchant descriptions based on a merchant’s acquiring name.” This makes the credit card statement entry human readable instead of “JOE COFFE 342”, it would be “Joe’s Coffee on 2nd Street”, etc.
*NEW* – “Places” aggregate anonymous spend data to give you relevant merchant-focused information.”
“Say you are traveling to the middle of no where Utah, and you want a good restaurant. They use anonymous transaction data to see what the most popular payments are.
“Masters of Code” is their global hackathon. Running a lot of these events. One is in NYC November 7-8 this year. Get one quick, because it will sell out.
“Locations API” – For determining where MasterCard is accepted.
Artifactory is a good option if you want an internally hosted repository. JCenter also can provide a private hosted repository.
If you publish to mavenCentral(), it will be available on jcenter() as well.
Sign up for a SonaType Acount (mavenCentral()) or a JCenter account. Jcenter seems to be easier and is the default these day for Android libraries, but this example is for SonaType:
You need to select a group name like “com.handstandsam”